Caterpillar Cat CB-534D, CB-534DXW Vibratory Compactor (Prefix GCA) Service Repair Manual Instant Download
Please open the website below to get the complete manualnn// n
Download Presentation

Please find below an Image/Link to download the presentation.
The content on the website is provided AS IS for your information and personal use only. It may not be sold, licensed, or shared on other websites without obtaining consent from the author. Download presentation by click this link. If you encounter any issues during the download, it is possible that the publisher has removed the file from their server.
E N D
Presentation Transcript
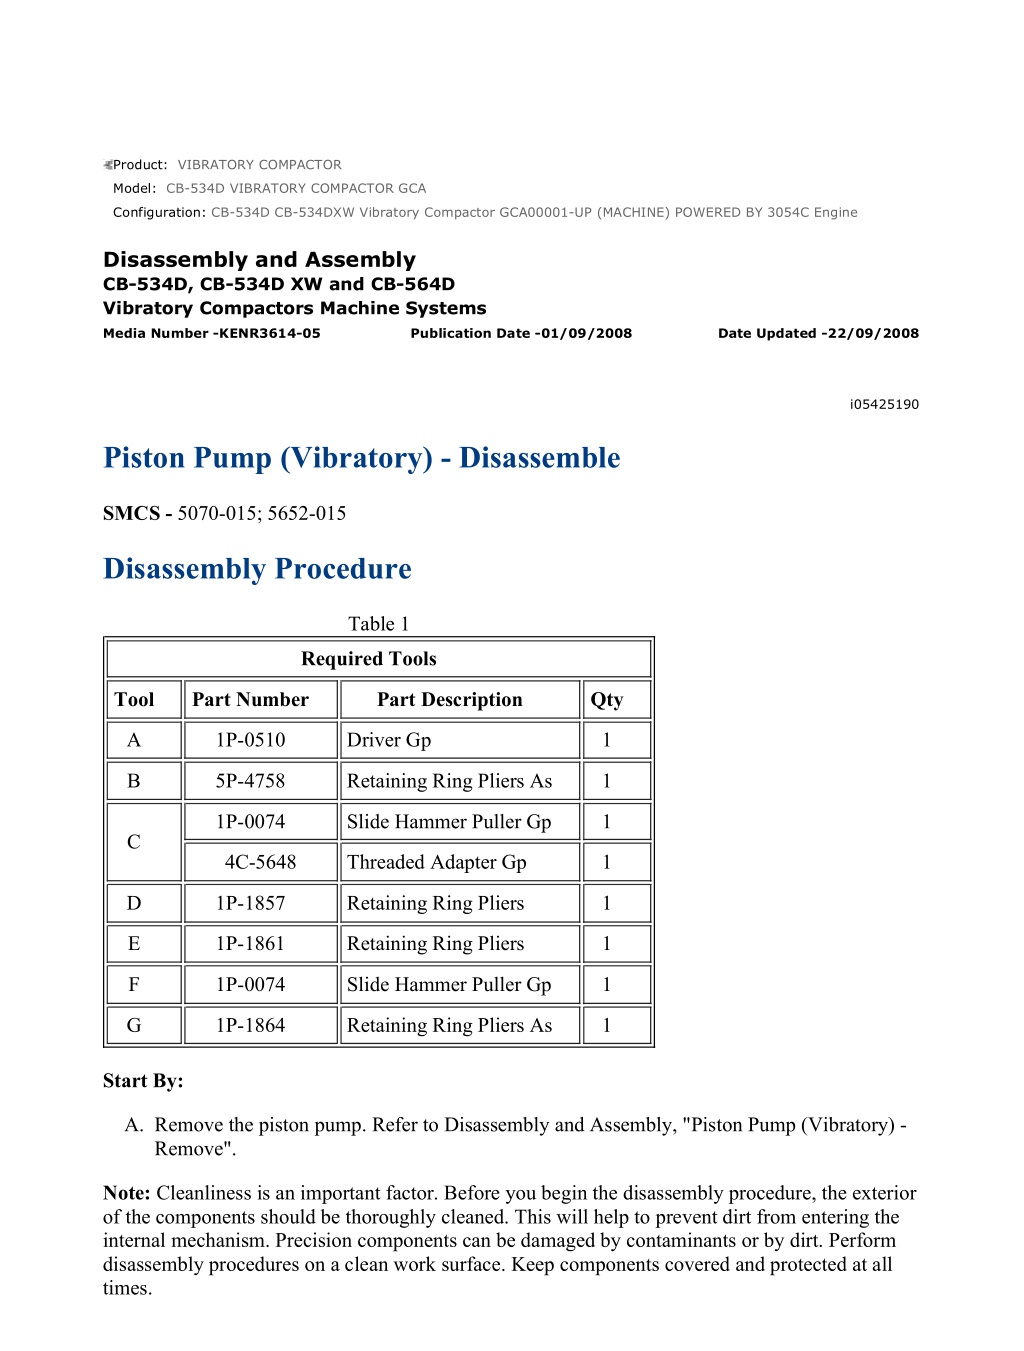
CB-534D CB-534DXW Vibratory Compactor GCA00001-UP (MACHINE) POWERE... 1/15 Product: VIBRATORY COMPACTOR Model: CB-534D VIBRATORY COMPACTOR GCA Configuration: CB-534D CB-534DXW Vibratory Compactor GCA00001-UP (MACHINE) POWERED BY 3054C Engine Disassembly and Assembly CB-534D, CB-534D XW and CB-564D Vibratory Compactors Machine Systems Media Number -KENR3614-05 Publication Date -01/09/2008 Date Updated -22/09/2008 i05425190 Piston Pump (Vibratory) - Disassemble SMCS - 5070-015; 5652-015 Disassembly Procedure Table 1 Required Tools Tool Part Number Part Description Qty A 1P-0510 Driver Gp 1 B 5P-4758 Retaining Ring Pliers As 1 1P-0074 Slide Hammer Puller Gp 1 C 4C-5648 Threaded Adapter Gp 1 D 1P-1857 Retaining Ring Pliers 1 E 1P-1861 Retaining Ring Pliers 1 F 1P-0074 Slide Hammer Puller Gp 1 G 1P-1864 Retaining Ring Pliers As 1 Start By: A. Remove the piston pump. Refer to Disassembly and Assembly, "Piston Pump (Vibratory) - Remove". Note: Cleanliness is an important factor. Before you begin the disassembly procedure, the exterior of the components should be thoroughly cleaned. This will help to prevent dirt from entering the internal mechanism. Precision components can be damaged by contaminants or by dirt. Perform disassembly procedures on a clean work surface. Keep components covered and protected at all times. https://127.0.0.1/sisweb/sisweb/techdoc/techdoc_print_page.jsp?returnurl=/sis... 2021/4/28
CB-534D CB-534DXW Vibratory Compactor GCA00001-UP (MACHINE) POWERE... 2/15 Note: Regular maintenance and frequent inspections are routine precautions. Practice preventive maintenance before damage occurs. Preventive maintenance can help to avoid a failure. If a failure occurs, an accurate diagnosis of the cause can prevent a recurrence. Information is available to analyze the failures of the piston pump and the motor. Refer to Special Publication, SEBD0641, "Analyzing Axial Piston Pump and Motor Failures". Note: After disassembly has been completed, check the condition of all the components. Refer to Guideline For Reusable Parts, SEBF8032, "Piston Pumps and Motors". During reconditioning, correct any conditions that might have caused the original failure. Information is available to analyze failures on the piston pumps and the motor. Refer to Special Publication, SEBD0641, "Analyzing Axial Piston Pump and Motor Failures". Illustration 1 g01219676 1. Remove bolts (1) and remove bolt (2) . Remove solenoid (3) . Illustration 2 g01219677 2. Remove gasket (4) and remove O-ring seal (5) . https://127.0.0.1/sisweb/sisweb/techdoc/techdoc_print_page.jsp?returnurl=/sis... 2021/4/28
CB-534D CB-534DXW Vibratory Compactor GCA00001-UP (MACHINE) POWERE... 3/15 Illustration 3 g01219678 3. Remove nuts (6) and remove the O-ring seals. Remove coils (7) . Illustration 4 g01219680 4. Remove cartridges (8) . Illustration 5 g01219681 5. Use Tooling (B) in order to remove retaining ring (9) . https://127.0.0.1/sisweb/sisweb/techdoc/techdoc_print_page.jsp?returnurl=/sis... 2021/4/28
https://www.ebooklibonline.com Hello dear friend! Thank you very much for reading. Enter the link into your browser. The full manual is available for immediate download. https://www.ebooklibonline.com
CB-534D CB-534DXW Vibratory Compactor GCA00001-UP (MACHINE) POWERE... 4/15 Illustration 6 g01219685 6. Use Tooling (C) in order to remove cover (10) . Illustration 7 g01219687 7. Remove O-ring seal (11) and remove O-ring seal (12) from cover (10) . https://127.0.0.1/sisweb/sisweb/techdoc/techdoc_print_page.jsp?returnurl=/sis... 2021/4/28
CB-534D CB-534DXW Vibratory Compactor GCA00001-UP (MACHINE) POWERE... 5/15 Illustration 8 g01219688 8. Remove bolts (13) and remove head (14) . Illustration 9 g01219690 9. Remove port plate (15) and remove O-ring seals (16) . Remove bearing (17) . Illustration 10 g01219694 10. Remove pin (18) . https://127.0.0.1/sisweb/sisweb/techdoc/techdoc_print_page.jsp?returnurl=/sis... 2021/4/28
CB-534D CB-534DXW Vibratory Compactor GCA00001-UP (MACHINE) POWERE... 6/15 Illustration 11 g01219696 Personal injury can result from being struck by parts propelled by a released spring force. Make sure to wear all necessary protective equipment. Follow the recommended procedure and use all recommended tooling to release the spring force. 11. Remove plug (22) and remove relief valve (19) . 12. Remove O-ring seal (20) and remove backup ring (21) from plug (22) . 13. Repeat Steps 11 and 12 for the opposite side. Illustration 12 g01219700 https://127.0.0.1/sisweb/sisweb/techdoc/techdoc_print_page.jsp?returnurl=/sis... 2021/4/28
CB-534D CB-534DXW Vibratory Compactor GCA00001-UP (MACHINE) POWERE... 7/15 Personal injury can result from being struck by parts propelled by a released spring force. Make sure to wear all necessary protective equipment. Follow the recommended procedure and use all recommended tooling to release the spring force. 14. Remove the following items from the head assembly: screw (27) , poppet valve (25) , spring retainer (24) and spring (23) . 15. Remove O-ring seal (26) from screw (27) . Illustration 13 g01219705 16. Remove plug (28) and the O-ring seal. 17. Remove plug (29) and the O-ring seal. 18. Remove plug (30) and the O-ring seal. 19. Remove plug (31) and the O-ring seal. https://127.0.0.1/sisweb/sisweb/techdoc/techdoc_print_page.jsp?returnurl=/sis... 2021/4/28
CB-534D CB-534DXW Vibratory Compactor GCA00001-UP (MACHINE) POWERE... 8/15 Illustration 14 g01219707 20. Remove cap (32) and remove one valve (33) (not shown). Illustration 15 g01219709 21. Remove O-ring seal (34) and remove rotating group (35) . Illustration 16 g01219711 https://127.0.0.1/sisweb/sisweb/techdoc/techdoc_print_page.jsp?returnurl=/sis... 2021/4/28
CB-534D CB-534DXW Vibratory Compactor GCA00001-UP (MACHINE) POWERE... 9/15 22. Remove pistons (36) and remove retainer plate (37) from the rotating group. Remove retainer (38) from the rotating group. Illustration 17 g01219718 Personal injury can result from being struck by parts propelled by a released spring force. Make sure to wear all necessary protective equipment. Follow the recommended procedure and use all recommended tooling to release the spring force. 23. Use Tooling (A) and a suitable press in order to apply slight compression to the spring. Use Tooling (D) in order to remove retaining ring (39) . Illustration 18 g01219727 https://127.0.0.1/sisweb/sisweb/techdoc/techdoc_print_page.jsp?returnurl=/sis... 2021/4/28
CB-534D CB-534DXW Vibratory Compactor GCA00001-UP (MACHINE) POWE... 10/15 24. Remove the following items from barrel assembly (42) : retaining ring (39) , spring (40) , washer (41) and pins (43) . Illustration 19 g01219768 25. Remove swashplate assembly (44) . Illustration 20 g01219772 26. Remove block (45) and remove pin (46) from swashplate assembly (44) . Remove bearing (47) . Remove pin (49) and remove bearing (48) from swashplate assembly (44) . https://127.0.0.1/sisweb/sisweb/techdoc/techdoc_print_page.jsp?returnurl=/sis... 2021/4/28
CB-534D CB-534DXW Vibratory Compactor GCA00001-UP (MACHINE) POWE... 11/15 Illustration 21 g01219779 27. Remove bearing races (50) . Illustration 22 g01219785 28. Use Tooling (E) in order to remove retaining ring (51) . 29. Use Tooling (F) in order to remove lip seal (52) . Illustration 23 g01219818 https://127.0.0.1/sisweb/sisweb/techdoc/techdoc_print_page.jsp?returnurl=/sis... 2021/4/28
CB-534D CB-534DXW Vibratory Compactor GCA00001-UP (MACHINE) POWE... 12/15 30. Use Tooling (E) in order to remove retaining ring (53) . Illustration 24 g01219871 31. Remove shaft (54) . Illustration 25 g01219888 32. Use Tooling (G) in order to remove retaining ring (55) from shaft (54) . Remove bearing (56) from shaft (54) . https://127.0.0.1/sisweb/sisweb/techdoc/techdoc_print_page.jsp?returnurl=/sis... 2021/4/28
CB-534D CB-534DXW Vibratory Compactor GCA00001-UP (MACHINE) POWE... 13/15 Illustration 26 g01219942 33. Remove cap (59) and remove one adjuster (60) (not shown). Remove bolts (57) . Remove cover (58) and one piston assembly (61) (not shown). Illustration 27 g01220403 Note: Measure the distance and record the distance from the end of piston assembly (61) to nut (62) for assembly purposes. 34. Remove nut (62) and remove piston assembly (61) from cover (58) . 35. Remove one O-ring seal (63) (not shown) from cover (58) . https://127.0.0.1/sisweb/sisweb/techdoc/techdoc_print_page.jsp?returnurl=/sis... 2021/4/28
CB-534D CB-534DXW Vibratory Compactor GCA00001-UP (MACHINE) POWE... 14/15 Illustration 28 g01219956 36. Remove cap (64) and remove adjuster (65) (not shown). Illustration 29 g01220415 37. Remove two guide rings (66) and remove two seal rings (67) from the housing. Illustration 30 g01219988 38. Remove plug (69) and remove pin retainer (68) from the housing. https://127.0.0.1/sisweb/sisweb/techdoc/techdoc_print_page.jsp?returnurl=/sis... 2021/4/28
CB-534D CB-534DXW Vibratory Compactor GCA00001-UP (MACHINE) POWERE... 1/17 Product: VIBRATORY COMPACTOR Model: CB-534D VIBRATORY COMPACTOR GCA Configuration: CB-534D CB-534DXW Vibratory Compactor GCA00001-UP (MACHINE) POWERED BY 3054C Engine Disassembly and Assembly CB-534D, CB-534D XW and CB-564D Vibratory Compactors Machine Systems Media Number -KENR3614-05 Publication Date -01/09/2008 Date Updated -22/09/2008 i02438391 Piston Pump (Vibratory) - Disassemble SMCS - 5070-015; 5652-015 Disassembly Procedure Table 1 Required Tools Tool Part Number Part Description Qty A 1P-0510 Driver Gp 1 B 1P-1857 Retaining Ring Pliers 1 C 1P-1861 Retaining Ring Pliers 1 D 1P-0074 Slide Hammer Puller Gp 1 E 1P-1864 Retaining Ring Pliers As 1 Start By: A. Remove the vibratory pump. Refer to Disassembly and Assembly, "Piston Pump (Vibratory) - Remove". NOTICE Care must be taken to ensure that fluids are contained during performance of inspection, maintenance, testing, adjusting and repair of the product. Be prepared to collect the fluid with suitable containers before opening any compartment or disassembling any component containing fluids. https://127.0.0.1/sisweb/sisweb/techdoc/techdoc_print_page.jsp?returnurl=/sis... 2021/4/28
CB-534D CB-534DXW Vibratory Compactor GCA00001-UP (MACHINE) POWERE... 2/17 Refer to Special Publication, NENG2500, "Caterpillar Tools and Shop Products Guide" for tools and supplies suitable to collect and contain fluids on Caterpillar products. Dispose of all fluids according to local regulations and mandates. Note: Cleanliness is an important factor. Before you begin the disassembly procedure, the exterior of the components should be thoroughly cleaned. This will help to prevent dirt from entering the internal mechanism. Precision components can be damaged by contaminants or by dirt. Perform disassembly procedures on a clean work surface. Keep components covered and protected at all times. Note: Regular maintenance and frequent inspections are routine precautions. Practice preventive maintenance before damage occurs. Preventive maintenance can help to avoid a failure. If a failure occurs, an accurate diagnosis of the cause can prevent a recurrence. Information is available to analyze the failures of the piston pump and the motor. Refer to Special Publication, SEBD0641, "Analyzing Axial Piston Pump and Motor Failures". Note: After disassembly has been completed, check the condition of all the components. Refer to Guideline For Reusable Parts, SEBF8032, "Piston Pumps and Motors". During reconditioning, correct any conditions that might have caused the original failure. Information is available to analyze failures on the piston pumps and the motor. Refer to Special Publication, SEBD0641, "Analyzing Axial Piston Pump and Motor Failures". Illustration 1 g01218536 1. Remove bolts (1) and head assembly (2) . https://127.0.0.1/sisweb/sisweb/techdoc/techdoc_print_page.jsp?returnurl=/sis... 2021/4/28
CB-534D CB-534DXW Vibratory Compactor GCA00001-UP (MACHINE) POWERE... 3/17 Illustration 2 g01218538 2. Remove O-ring seals (3) and (5) from head assembly (2) . 3. Remove dowels (4) from head assembly (2) . Note: Mark the orientation of port plate (6) for assembly purposes. 4. Remove port plate (6) from head assembly (2) . Illustration 3 g01218540 Note: Mark the orientation of pin (7) for assembly purposes. 5. Remove pin (7) from port plate (6) . https://127.0.0.1/sisweb/sisweb/techdoc/techdoc_print_page.jsp?returnurl=/sis... 2021/4/28
CB-534D CB-534DXW Vibratory Compactor GCA00001-UP (MACHINE) POWERE... 4/17 Illustration 4 g01218541 Personal injury can result from being struck by parts propelled by a released spring force. Make sure to wear all necessary protective equipment. Follow the recommended procedure and use all recommended tooling to release the spring force. 6. Remove plug (12) and remove spring (9). Remove relief valve (8) . 7. Remove O-ring seal (10) and remove backup ring (11) from plug (12) . 8. Repeat Steps 6 and 7 for the opposite side. Illustration 5 g01218579 https://127.0.0.1/sisweb/sisweb/techdoc/techdoc_print_page.jsp?returnurl=/sis... 2021/4/28
CB-534D CB-534DXW Vibratory Compactor GCA00001-UP (MACHINE) POWERE... 5/17 Personal injury can result from being struck by parts propelled by a released spring force. Make sure to wear all necessary protective equipment. Follow the recommended procedure and use all recommended tooling to release the spring force. 9. Remove the following items from the head assembly: screw (17), poppet valve (15), spring retainer (14) and spring (13) . 10. Remove O-ring seal (16) from screw (17) . Illustration 6 g01218587 Illustration 7 g01218588 https://127.0.0.1/sisweb/sisweb/techdoc/techdoc_print_page.jsp?returnurl=/sis... 2021/4/28
CB-534D CB-534DXW Vibratory Compactor GCA00001-UP (MACHINE) POWERE... 6/17 Personal injury can result from being struck by parts propelled by a released spring force. Make sure to wear all necessary protective equipment. Follow the recommended procedure and use all recommended tooling to release the spring force. 11. Remove the following items from head assembly (2) : screw (22), spring retainer (20), spring (19), spring retainer (18), spool (25) and valve (23) . 12. Remove pistons (24) and (26) from spool (25) . 13. Remove O-ring seal (21) from screw (22) . Illustration 8 g01218599 14. Remove O-ring seal (27) from valve (23) . https://127.0.0.1/sisweb/sisweb/techdoc/techdoc_print_page.jsp?returnurl=/sis... 2021/4/28
CB-534D CB-534DXW Vibratory Compactor GCA00001-UP (MACHINE) POWERE... 7/17 Illustration 9 g01218603 15. Remove bushing (28) from the head assembly. Illustration 10 g01218616 16. Remove bushing (29) from the head assembly. Illustration 11 g01218619 17. Remove bolts (32). Remove control valve (31) from housing (30) . https://127.0.0.1/sisweb/sisweb/techdoc/techdoc_print_page.jsp?returnurl=/sis... 2021/4/28
CB-534D CB-534DXW Vibratory Compactor GCA00001-UP (MACHINE) POWERE... 8/17 Illustration 12 g01218642 18. Remove gasket (33) and remove O-ring seal (34) from the control valve. Illustration 13 g01218644 19. Remove nuts (35) and the O-ring seals. Remove coils (36) . Illustration 14 g01218647 20. Remove cartridges (37) . https://127.0.0.1/sisweb/sisweb/techdoc/techdoc_print_page.jsp?returnurl=/sis... 2021/4/28
CB-534D CB-534DXW Vibratory Compactor GCA00001-UP (MACHINE) POWERE... 9/17 Illustration 15 g01218831 21. Remove rotating group (39) from shaft (38) and housing (30) . Illustration 16 g01218652 22. Use the following procedure and disassemble the rotating group. Note: Mark the orientation of pistons (40) and barrel assembly (42) for assembly purposes. a. Remove nine pistons (40) and remove retainer plate (41) from barrel assembly (42) . https://127.0.0.1/sisweb/sisweb/techdoc/techdoc_print_page.jsp?returnurl=/sis... 2021/4/28
CB-534D CB-534DXW Vibratory Compactor GCA00001-UP (MACHINE) POWE... 10/17 Illustration 17 g01218660 b. Remove retainer (43) from barrel assembly (42) . Illustration 18 g01218662 Personal injury can result from being struck by parts propelled by a released spring force. Make sure to wear all necessary protective equipment. Follow the recommended procedure and use all recommended tooling to release the spring force. c. Remove shims (44) and remove springs (45). Note the position of the springs. The springs must be installed in the same position for proper clearance. https://127.0.0.1/sisweb/sisweb/techdoc/techdoc_print_page.jsp?returnurl=/sis... 2021/4/28
CB-534D CB-534DXW Vibratory Compactor GCA00001-UP (MACHINE) POWE... 11/17 Illustration 19 g01218663 Illustration 20 g01218664 Sudden release of spring force can cause injury. To prevent the possibility of injury, follow the procedure to relieve the spring pressure. d. Position barrel assembly (42) in a suitable press. Position Tooling (A) against shim (47). Use the suitable press and apply slight compression on spring (49). Use Tooling (B) in order to remove retaining ring (48) and slowly release the spring compression. e. Remove the following items from barrel assembly (42) : shim (47), spring (49) and shim (46) . https://127.0.0.1/sisweb/sisweb/techdoc/techdoc_print_page.jsp?returnurl=/sis... 2021/4/28
CB-534D CB-534DXW Vibratory Compactor GCA00001-UP (MACHINE) POWE... 12/17 Illustration 21 g01218676 23. Remove swashplate assembly (50) from housing (30) . Illustration 22 g01218678 24. Use the following procedure and disassemble the swashplate assembly. a. Remove wire (55) and remove bearing (56) from swashplate (51) . b. Remove the following items from swashplate (51) : pin (52), roller (53), bearing (54) and wire (57) . c. Remove the roller from both of the bearings. https://127.0.0.1/sisweb/sisweb/techdoc/techdoc_print_page.jsp?returnurl=/sis... 2021/4/28
CB-534D CB-534DXW Vibratory Compactor GCA00001-UP (MACHINE) POWE... 13/17 Illustration 23 g01218680 25. Remove bearing races (58) from housing (30) . Illustration 24 g01218682 26. Remove pins (59) from housing (30), if necessary. Illustration 25 g01218684 27. Remove plug (61) and remove pin (60) from housing (30) . https://127.0.0.1/sisweb/sisweb/techdoc/techdoc_print_page.jsp?returnurl=/sis... 2021/4/28
Suggest: If the above button click is invalid. Please download this document first, and then click the above link to download the complete manual. Thank you so much for reading
CB-534D CB-534DXW Vibratory Compactor GCA00001-UP (MACHINE) POWE... 14/17 Illustration 26 g01218686 28. Use Tooling (C) in order to remove retaining ring (62) from housing (30) . Illustration 27 g01218687 29. Use Tooling (D) in order to remove seal (63) from housing (30) . https://127.0.0.1/sisweb/sisweb/techdoc/techdoc_print_page.jsp?returnurl=/sis... 2021/4/28
https://www.ebooklibonline.com Hello dear friend! Thank you very much for reading. Enter the link into your browser. The full manual is available for immediate download. https://www.ebooklibonline.com


