Advanced Circuits Group Week 1 Exercises Overview

This introduces the Advanced Circuits group's Week 1 exercises aiming to wire up a smart home with interconnected sensors, Google Home/Alexa, and multipurpose buttons. The plan includes using Arduino, battery, breadboard, lights, LDR, motion sensor, gas sensor, and door lock servo with a keypad over the course of six weeks. Tips for tidiness and efficiency, a Bronze Challenge to add components like LEDs and bulbs, connected in a specific way, a Silver Challenge to program the lights, and a Gold Challenge to create a two-function program are outlined.

Download Presentation

Please find below an Image/Link to download the presentation.
The content on the website is provided AS IS for your information and personal use only. It may not be sold, licensed, or shared on other websites without obtaining consent from the author. Download presentation by click this link. If you encounter any issues during the download, it is possible that the publisher has removed the file from their server.
E N D
Presentation Transcript
Intro to Circuits Advanced group: Week 1 exercises
Aims: Let s wire up a house! Smart home Interconnected sensors Google home/Alexa Multipurpose buttons
The plan: Week 1 Arduino, battery, breadboard and lights Week 2 LDR, motion sensor, gas sensor Week 3 LDR, motion sensor, gas sensor Week 4 LDR, motion sensor, gas sensor / Door lock servo, keypad Week 5 Door lock servo, keypad Week 6 Door lock servo, keypad
Tips: Use functions as much as possible, much easier and tidier to work with Try to keep the virtual wires as tidy as possible, and colour code them Test as much of the code and circuit as possible use the serial monitor and Serial.print() Ask questions if you re stuck
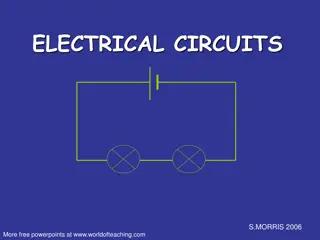
BRONZE Challenge: Add the following components to your circuit 9 volt battery Arduino Bread board 3 LEDs 2 bulbs
BRONZE Challenge: Connect the power terminals of the battery into the VIN and GND pins of the Arduino Connect the 5V and GND pin from the Arduino to the power rails of the breadboard Add the 3 LEDs to the breadboard, change the colours to red, orange and green Connect the Cathode to the ground pin and the Anode to the Digital Pin for the Arduino: Red LED pin 13, orange LED pin 12, green LED pin 11
BRONZE Challenge: Finally, connect up the two bulbs, connect terminal 1 to the ground power bar on the breadboard. Connect terminal 2 on bulb 1 to pin A3, connect terminal 2 on bulb 2 to pin A4. Are there any issues with the way we have wired anything up?
SILVER Challenge: Let s begin programming Make sure you are using the text editor (not blocks) Arduino C is a lot more flexible than blocks. Define all the OUTPUTs for the 3 LEDs and 2 bulbs, using the pins on the bronze challenge Make all the lights turn on and off at the same time, with a 5 second delay.
GOLD Challenge: Create a two functions for each LED and Bulbs: One to turn the light on One to turn the light off. Create a program which flashes each light in sequence by calling these new functions e.g. onRedLED(); delay(500); offRedLED(); onOrangeLED(); delay(500); offOrangeLED(); onGreenLED(); delay(500);
Extension Challenge: Introduce a variable for each LED to save the state of whether it is on or off. Add the ability to check whether LEDs are currently on or off (you could use the serial monitor). If you turn on a certain light in the house, it means that you have moved rooms. So, create a program which turns off other lights.