Step-by-Step Guide to Replacing Fan and Crimping Wires
Detailed instructions on how to replace a fan and properly crimp wires for your electronic device, including cutting the cable, removing the old fan, threading the wires, and crimping them together. Tips provided for practice and avoiding errors. Ensure to follow each step carefully.

Download Presentation

Please find below an Image/Link to download the presentation.
The content on the website is provided AS IS for your information and personal use only. It may not be sold, licensed, or shared on other websites without obtaining consent from the author. Download presentation by click this link. If you encounter any issues during the download, it is possible that the publisher has removed the file from their server.
E N D
Presentation Transcript
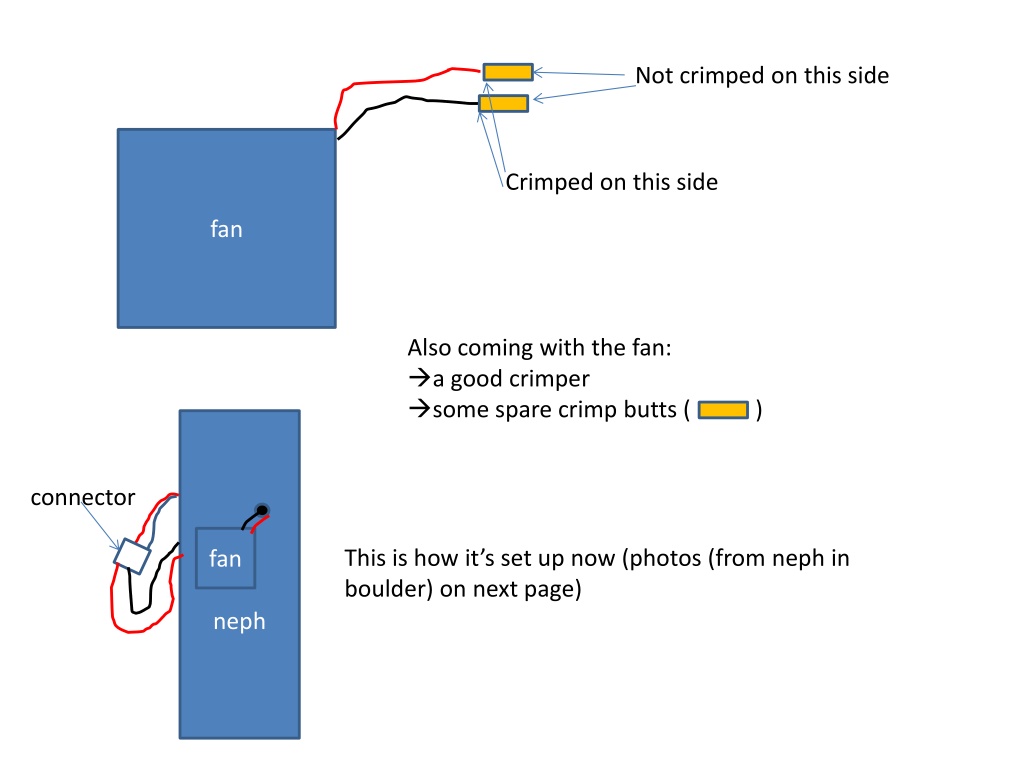
Not crimped on this side Crimped on this side fan Also coming with the fan: a good crimper some spare crimp butts ( ) connector This is how it s set up now (photos (from neph in boulder) on next page) fan neph
To circuit board connector hole Thru hole to fan
Replacing fan Put a message in the message log you are doing the repair and turn the neph off. 1) Cut cable between fan and connector. You want to leave yourself plenty of wire to work with (like 8 or so). The pink circle sortof indicates where you can make the cut 2) Remove old fan. To circuit board hole connector Thru hole to fan fan neph
3) Thread the crimped wires from the new fan through the hole 4) Crimp the cut wires to the fan wires We ve included some spare crimp butts both so you can PRACTICE crimping on other wire. They could also come in handy if you mess up when doing the real crimp. The potential for messing up is why you want give yourself as much wire as you can when you do the cut in step 1 just in case you need to cut the crimp off and try again. (3) (4) hole connector hole connector fan fan neph neph


 Thread the crimped wires from the new fan through the")