Understanding Electrical Conductors and Insulators in Grade 6 Natural Sciences and Technology
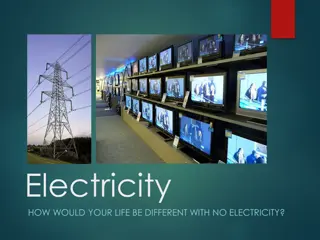
Explore the topic of electrical conductors and insulators in Grade 6 Natural Sciences and Technology, learning about wiring a three-pin plug, the colors of the live, neutral, and earth wires, and the steps involved in wiring a South African three-pin plug. Gain insight into the roles of each wire and the importance of proper electrical connections.

Download Presentation

Please find below an Image/Link to download the presentation.
The content on the website is provided AS IS for your information and personal use only. It may not be sold, licensed, or shared on other websites without obtaining consent from the author. Download presentation by click this link. If you encounter any issues during the download, it is possible that the publisher has removed the file from their server.
E N D
Presentation Transcript
Natural Sciences and Technology Grade 6 Term 3: Energy and Change Electrical Conductors and Insulators
Topic 2 Electrical Conductors and Insulators Wiring a three-pin plug Natural Sciences and Technology - Grade 6
The 3 colours of a three-pin plug earth neutral live Natural Sciences and Technology - Grade 6
The 3 colours of a three-pin plug The LIVE wire is BROWN It is connected to a fuse on the live pin. The electric current uses the live wire as its route. Natural Sciences and Technology - Grade 6
The 3 colours of a three-pin plug The NEUTRAL wire is BLUE It is the route that the electric current takes when it exits an appliance, therefore the neutral wire has a voltage close to zero. Natural Sciences and Technology - Grade 6
The 3 colours of a three-pin plug The EARTH wire is GREEN & YELLOW It is connected to the earth pin. It is used when the appliance has a metal casing to take any current away as soon as the live wire comes in contact with the casing. Natural Sciences and Technology - Grade 6
Wiring a South African three-pin plug STEP 1: The electric cord Cut the plastic insulation approximately 0.5cm away at the ends of the three wires inside the electrical cord. Natural Sciences and Technology - Grade 6
Wiring a South African three-pin STEP 2: The copper strands Twist the strands of copper wire gently with your fingers until each strand is tight. Fold the twisted strands over. Natural Sciences and Technology - Grade 6
Wiring a South African three-pin STEP 3: The plug cover Unscrew or snap the plug cover. Natural Sciences and Technology - Grade 6
Wiring a South African three-pin plug STEP 4: Undo small/tiny screws The small/tiny screws on each of the plug's pins must be unscrewed. Natural Sciences and Technology - Grade 6
Wiring a South African three-pin plug STEP 5: The copper and brown wires The twisted copper wires must be inserted into the pins holes. Insert the brown wire into the pin on the right [this pin is marked with the letter L or a brown spot]. Natural Sciences and Technology - Grade 6
Wiring a South African three-pin plug [ STEP 6. Tighten screws Use a flat screwdriver to tighten the small / tiny screws on each pin of the plug. Natural Sciences and Technology - Grade 6
Wiring a three-pin plug STEP 7: The green, yellow and blue wires Make certain that the arrestor clips grip the electrical cord firmly. Always insert the green and yellow wire into the top pin. Insert the blue wire into the left pin [this pin is marked with the letter N or a blue spot]. Natural Sciences and Technology - Grade 6
Wiring a South African three-pin plug STEP 8: Replace cover Replace the cover of the plug properly. Natural Sciences and Technology - Grade 6