Building an International Expense Report Guide
At the conclusion of your international trip, learn how to create an expense report using your approved trip request. Follow a step-by-step process to add trip details, create itineraries, include expenses, and adjust allowances for lodging and meals. Utilize the provided visuals for a seamless experience.
Uploaded on Nov 23, 2024 | 0 Views
Download Presentation

Please find below an Image/Link to download the presentation.
The content on the website is provided AS IS for your information and personal use only. It may not be sold, licensed, or shared on other websites without obtaining consent from the author. Download presentation by click this link. If you encounter any issues during the download, it is possible that the publisher has removed the file from their server.
E N D
Presentation Transcript
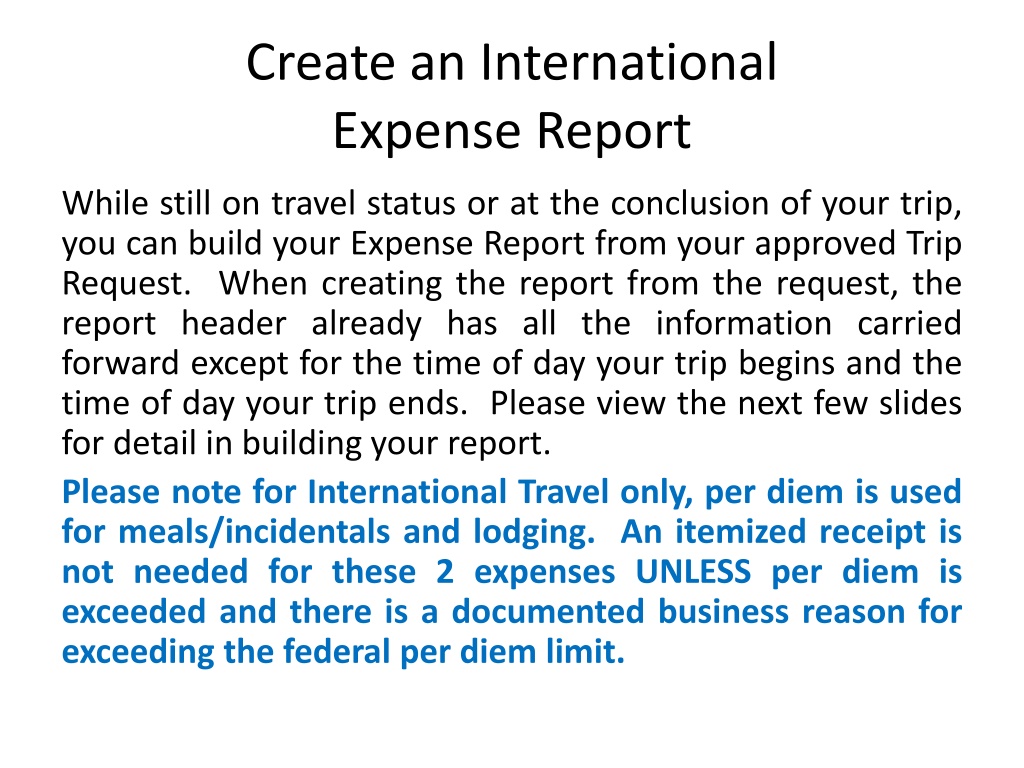
Create an International Expense Report While still on travel status or at the conclusion of your trip, you can build your Expense Report from your approved Trip Request. When creating the report from the request, the report header already has all the information carried forward except for the time of day your trip begins and the time of day your trip ends. Please view the next few slides for detail in building your report. Please note for International Travel only, per diem is used for meals/incidentals and lodging. An itemized receipt is not needed for these 2 expenses UNLESS per diem is exceeded and there is a documented business reason for exceeding the federal per diem limit.
As shown below, click on Request and navigate to Active Requests. Choose the correct approved request and click on the blue expense on the far right side of the request. You can then begin to build your Expense Report.
You will now begin to create a new Expense Report. All the information entered at the Request header will carry over to the Expense Report Header except for the time of day your trip started and ended. Enter the times and scroll to the bottom of the screen and click on to move to the next screen where you can begin entering your trip expenses.
Before adding Expenses, an Itinerary must be added to the Expense Report In report, click on Details, then click on New Itinerary.
The itinerary is where you will add your departure city, date and time and your arrival city, date and time. Click save and then enter your return departure city, date and time and your return arrival city, date and time. Then click next and your itinerary will be assigned to your expense report. Click next again to move to Expenses & Adjustments . Make sure to include both your departure AND return dates for a complete itinerary.
This is the Expenses & Adjustments grid. The amount listed on the right is the allowance that includes lodging and meals/incidentals. If a meal is provided, click the box and that amount will be deducted from the daily allowance. If you want to exclude an entire day s allowance, click the box to the left under exclude the entire allowance amount for that particular day. When finished click on Create Expenses.
The expense report is populated with the daily meal allowance (includes incidentals) and the lodging allowance for the days included in your itinerary. If you need to delete EITHER a lodging allowance OR meal allowance for a specific day you can delete the row by clicking in the box to the left of the date and click the blue delete button that will illuminate. No receipts are needed for lodging or meals per diem. Now, you can enter your other expenses as needed.
Entering Trip Expenses Click on the red New Expense to add a new expense, you will then begin typing the expense type in the white box OR you can find the expense type in the list and click on it. The next slide will show the information needed to input for an expense.
After clicking on the expense type, the box on the right will open and you will insert the expense information. Only the fields with the red lines are required. After you have saved the expense, it will appear on the left side. When you have entered all your expenses you are ready to submit your report. When entering amount of expense, please use the currency that is on the receipt. Concur will automatically access the conversion rate using the transaction date of the expense. Click the down arrow next to amount for the correct currency.
Below is an example of the Expense Report Approval Flow. Once you have submitted the report you will receive an onscreen notification that the report has been successfully submitted. Travel Approval will self populate with your travel approver and CANNOT be changed. If this is not correct contact your division or college AAS. Budget approval is an optional step in the workflow. If your request needs a budget approver, enter an * and the name of a budget approver will appear, you can then choose your approver. (It can be the same as the travel approver.) You can also click the red X to remove this step from the workflow. Accounts Payable use only!
Thank you! If further information or assistance is needed, please do not hesitate to contact Accounts Payable/Travel at 909-537-5155.
