Complete Guide to GPS Training and Handling Sessions
Learn how to effectively use GPS devices for GIS training, including satellite search, marking waypoints, map interfaces, importing/exporting files, and transforming waypoints into polygons. Get familiar with GPS functions and computer interfaces for improved navigation and data management in this comprehensive session program.

Uploaded on Oct 04, 2024 | 0 Views
Download Presentation

Please find below an Image/Link to download the presentation.
The content on the website is provided AS IS for your information and personal use only. It may not be sold, licensed, or shared on other websites without obtaining consent from the author. Download presentation by click this link. If you encounter any issues during the download, it is possible that the publisher has removed the file from their server.
E N D
Presentation Transcript
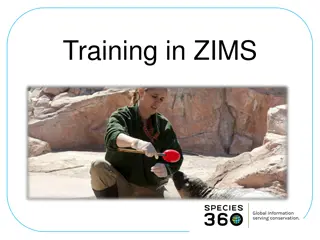
GIS TRAINING GPS session
Session program GPS handling: - Satellite search - Mark waypoint - Search waypoint - Use the Go to interface - Use the map interface - Change the position format Interface PC/GPS - Import/export GPX files - Import existing waypoint on a QGIS map - Create waypoint on a map and export to GPS - Create polygons from Waypoints
Get familiar with the GPS Power button Page button Menu Button Setup Change format to: dddd mm s,ss Mark Button Find button Zoom Etc. Please ask any questions
Satellite search Before you can manipulate your GPS outside you need to make sure it s connected to enough satellite to locate itself. There are few ways to check: power button Setup mode map interface
Marking a Waypoint Turn on the GPS and Press the mark button A window open You can rename the automatically created name at your convenience Press enter to save the waypoint Now we will head outside and create waypoint to delimitate Tennis court (1st aquaculture pond) give numbered name, ex: T1, T2, T3, T4 The pool outside the conference building (2nd aquaculture pond) numbered name
COMPUTER INTERFACE Open a new QGIS Project Make sure you are connected to internet Load google satellite image In Browser, click right on XYZ Tiles Click New connection Type the name: Google satellite Enter the following URL: http://www.google.cn/maps/vt?lyrs=s@189&gl=cn&x={x}&y={y}&z={z} Press Ok and double click on Google satellite to make in appear on your map Add your created waypoints on the map Connected your GPS to the computer Within the GPS look for GPX folder Copy the file which correspond to today date in your training folder Add the copied file on your current project
Point to polygon We will transform the waypoint into polygons From point to line
Point to polygon We will transform the waypoint into polygons From line to polygons
Point to polygon We will transform the waypoint into polygons 1st step: save as/export the gpx file to a shapefile (name=ponds); Only keep the name column In the shapefile, click on the edit button; Create a new column in the attribute table: to differentiate the two ponds ; In View , in Panel select processing toolbox, a window will appear on the left;
Point to polygon In the processing toolbox panel Double click on the point to path tool in the vector creation section : We will have to select the appropriate input layer and to set the order field and the group field according to names that have been given to your points and the newly created file; A new temporary layer called Path will be created Still In the processing toolbox panel Double click on the line to polygon tool in the vector geometry Select appropriate input file A new temporary layer called Path will be created You need to save the newly created files if you want to keep them in the project (they will disappear if not saved when you reopen the project)
Next exercice Upload Noumea exercice GPX file (Pauline to give) Connect GPS to computer Transfer GPX file to GPS (Into GPX folder) Enter a new point: Name: SPC 6 Coordinates (set to hddd.ddddd ) 166.44254,-22.30129 Go look for all the points name (SPC 1 to SPC 6) outside using the find button Mark a new point at each of the point as close as possible name them PC1 to PC6 Come back in the Training room Copy the GPX file on your training folder and add it to your map