Setting Up an ODK Aggregate Account: Step-by-Step Guide
This guide provides detailed steps on setting up an ODK Aggregate account, including options for deployment, installation instructions, user roles, and permissions. Learn how to manage collected data, deploy to Google's App Engine or a local server, and utilize different user capabilities within ODK Aggregate. Site administration tips and user management guidance are also covered.

Download Presentation

Please find below an Image/Link to download the presentation.
The content on the website is provided AS IS for your information and personal use only. It may not be sold, licensed, or shared on other websites without obtaining consent from the author. Download presentation by click this link. If you encounter any issues during the download, it is possible that the publisher has removed the file from their server.
E N D
Presentation Transcript
1 ODK Aggregate: Setting up an ODK Aggregate account Dr. Caroline Krafft St. Catherine University cgkrafft@stkate.edu Version: January 14, 2018
2 Settingup ODK Aggregate
3 ODK Aggregate: Options ODK Aggregate is the ready-to-deploy server and data repository Provides blank forms to tablets Accepts finalized forms (submissions) Manage collected data Can deploy to Google s App Engine (we walk through this) Alternatively can deploy locally on a Tomcat server (or any serverlet 2.5- compatible (or higher) web container) backed with a SQL database server See http://opendatakit-dev.cs.washington.edu/1_0_tools/aggregate/tomcat_install Note: ODK Sync Endpoints is a more technically advanced alternative
4 ODK Aggregate: Installation Download ODK Aggregate here. If you run into any issues installing, refer to the ODK Aggregate instructions page. There is also ODK Forum for any questions you may have: https://forum.opendatakit.org
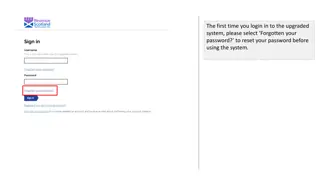
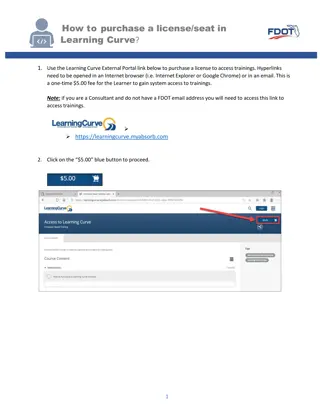
5 ODK Aggregate: An Example from Google API 1.Following this URL will bring us to the test ODK Aggregate server. 2.Next steps would be to click Log In and enter the username and password.
6 ODK Aggregate The top of the screen will look like this. Go to Site Admin.
7 Roles ODK Aggregate allows users different capabilities: Data Collector - able to download forms to ODK Survey and submit data to ODK Aggregate. Data Viewer - able to log onto the ODK Aggregate website, filter and view submissions, and generate csv files for download. Form Manager - all the capabilities of a Data Viewer plus the abilities to upload a form definition, delete a form and its data, and upload submissions manually through the ODK Aggregate website. Synchronize Tables - able to download, upload and alter data records within ODK Tables as restricted by table-access privileges granted to the user. Tables Super-user - able to administer row-level and table-access privileges. Administer Tables - able to administer tables and row-level and table-access privileges. Site Administrator - all the capabilities of a Form Manager plus the ability to add users, set passwords, and grant these capabilities to other users.
8 ODK Aggregate: Permissions and Users You are the site administrator. If you are using a dummy tester, you can either create a new gmail account or create an ODK account to be the tester. Once you ve created an account, enter the username into Add Users . Under Edit Users , you can set unique passwords for the data collectors. Make sure to save changes.
9 Adding ODK Tables
10 ODK Tables Tables is a program that allows you to visualize and edit data, revisiting existing data and syncing it with an ODK Aggregate instance in the cloud. Using Tables as your entry-point to data collection, you will be able to gather data using ODK Survey, sync it to a server, and have other users download and edit the data on their own devices. You will need to add ODK Tables on ODK Aggregate
11 ODK Tables in ODK Aggregate 4 1 2 To add ODK Table into Aggregate you must have Administrator status. 1. First click on Site Admin tab 2. Then click on Preferences 3. Next, under ODK 2.0 Feature click the box underneath (Sync functionality) 4.Finally, a tab should appear named ODK Tables 5. Now, anything you do on your ODK tables app on your tablet should show up under this tab once you have synced your devices 3