Getting Started with Canvas for Teachers: A Comprehensive Guide
This guide covers essential steps for teachers to navigate Canvas effectively, from logging in to customizing course navigation and adding individuals. Discover how to set up notifications, utilize the dashboard efficiently, integrate Google Drive, and create informative pages for your class. Improve your Canvas proficiency and enhance your teaching experience with these detailed instructions.
Uploaded on Sep 17, 2024 | 0 Views
Download Presentation

Please find below an Image/Link to download the presentation.
The content on the website is provided AS IS for your information and personal use only. It may not be sold, licensed, or shared on other websites without obtaining consent from the author. Download presentation by click this link. If you encounter any issues during the download, it is possible that the publisher has removed the file from their server.
E N D
Presentation Transcript
Getting Started with Getting Started with Canvas for Teachers Canvas for Teachers
Logging In Bookmark toolbar>Canvas Bookmark toolbar>Canvas https://knoxschools.instructure.com/ Use your district email and password to login. 2
Welcome Tour Click on the help menu icon in the global navigation to find the tour. 3
Notifications Notification settings: Found under Account Set up how you wish to be notified of Canvas events. Add your cell phone and/or personal email as preferred for Canvas notifications.
Your Dashboard Find the correct Course Card on your dashboard to get into your course. Note that under the three ellipsis, you can choose the view you want on your dashboard. TIP: Control the Cards you see on your dashboard. Select Course icon >View all courses. Click the star next to any course cards you want to appear on your dashboard. Deselect the star to remove from your dashboard. 5
Course Navigation Course Navigation Click Settings > Navigation Found on the left of your page as you enter a Canvas course. This area can easily be personalized for each course to help students find their way. Drag any of the items found in the navigation to the bottom to hide them from students. 6
People People To Add people: You can add people in various roles like student, teacher, or TA. Canvas syncs nightly with Aspen so student enrollment will remain current. Choose People > +People Use email address & choose role Select Next Click to Add User 7
Google Drive Authorize Google Drive to allow it to connect to Canvas. Select Google Drive from Course Navigation Enter your credentials. Authorize. 8
Pages Pages Content pages allow you to create materials for your class. Create a homepage for your course. Pages are essentially one-way communication. 10
Rich Content Editor Rich Content Editor The editor is available any time you are adding text or content to a page, assignment, quiz, or discussion. Check under the plug (far right) to see more options such as Google Drive, Microsoft Teams, etc. Find the plugin icon to see YouTube, Google Drive and other Plugins. Tip: Use tables to allow text to sit beside images! Use tables to allow text to sit beside images! 11
Rich Content Editor 2 3 4 5 6 1. Anytime you type in Canvas, you will get this toolbar. 2. You can make change the font size or make the text bold (B), italicized (I), or Underlined (U). 3. You can change the color, highlight words, or super/subscript. 4. Align (center, left or right) your text or create bullets 5. Add hyperlinks, images, media, or documents. For media, you can upload or record here. 6. Insert table, math equations, and other connected items (under the plug like Google Drive). 12
Building Your Course Building Your Course Pages Assignment Quizzes Discussions Feedback Grades Modules 13
Modules Modules Modules organize content into units, weeks, or other chosen organizational methods. Provides linear direction for how course content should be completed. Houses assignments, discussions, quizzes, and pages. 14
Building Your Course Building Your Course Assignments Allow for students to submit work using various file types. Feedback and grades can be given. Quizzes Quizzes allow for student assessment of course content. Quizzes can be graded or set up as surveys or practice. Discussions Allow for student feedback and collaboration. Teacher settings can allow for customization of student replies. Can be set to graded or ungraded. 15
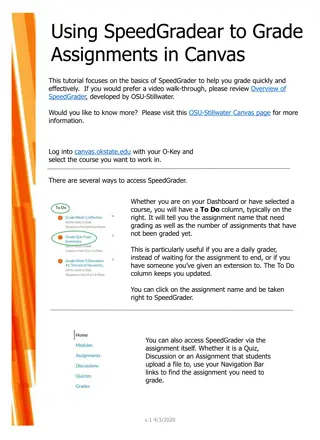
Grades and Feedback Grades and Feedback SpeedGrader Allows for teacher annotations and feedback directly on a student submission. Grades>Select Student & Assignment>SpeedGrader Grades>Select Student & Assignment>SpeedGrader Exporting Grades This will generate a .csv file that you can use to input your grades into Aspen. Grades>Actions>Export Grades>Actions>Export 16
Feedback in SpeedGrader Feedback in SpeedGrader Feedback 1. You can type comments. 2. Attach files with feedback. 3. Create an audio or video recording. 4. Use speech to text. Then Submit Rubrics are another great feature to be used within Speedgrader so students have high quality feedback. 1 2 3 4 17
THE CANVAS TEACHER APP Can be downloaded from the Apple or Android Store. The app will allow access to your courses. You can grade, communicate, and update through Announcements, Assignments, Discussions, and Quizzes. 18
Commons Share your work with yourself or others in the Commons. You can also find work from others that you can import to your course. 19
Crosslisting Crosslisting Do you teach multiple blocks of the same course? Try crosslisting! This will allow you to upload ONCE and then all classes will have access to the information. How to Crosslist courses 20
Have Questions or Need Support?? Email: edtechliaisons@knoxschools.org Visit the Canvas Help Guides https://community.canvaslms.com/community/answers /guides 21


