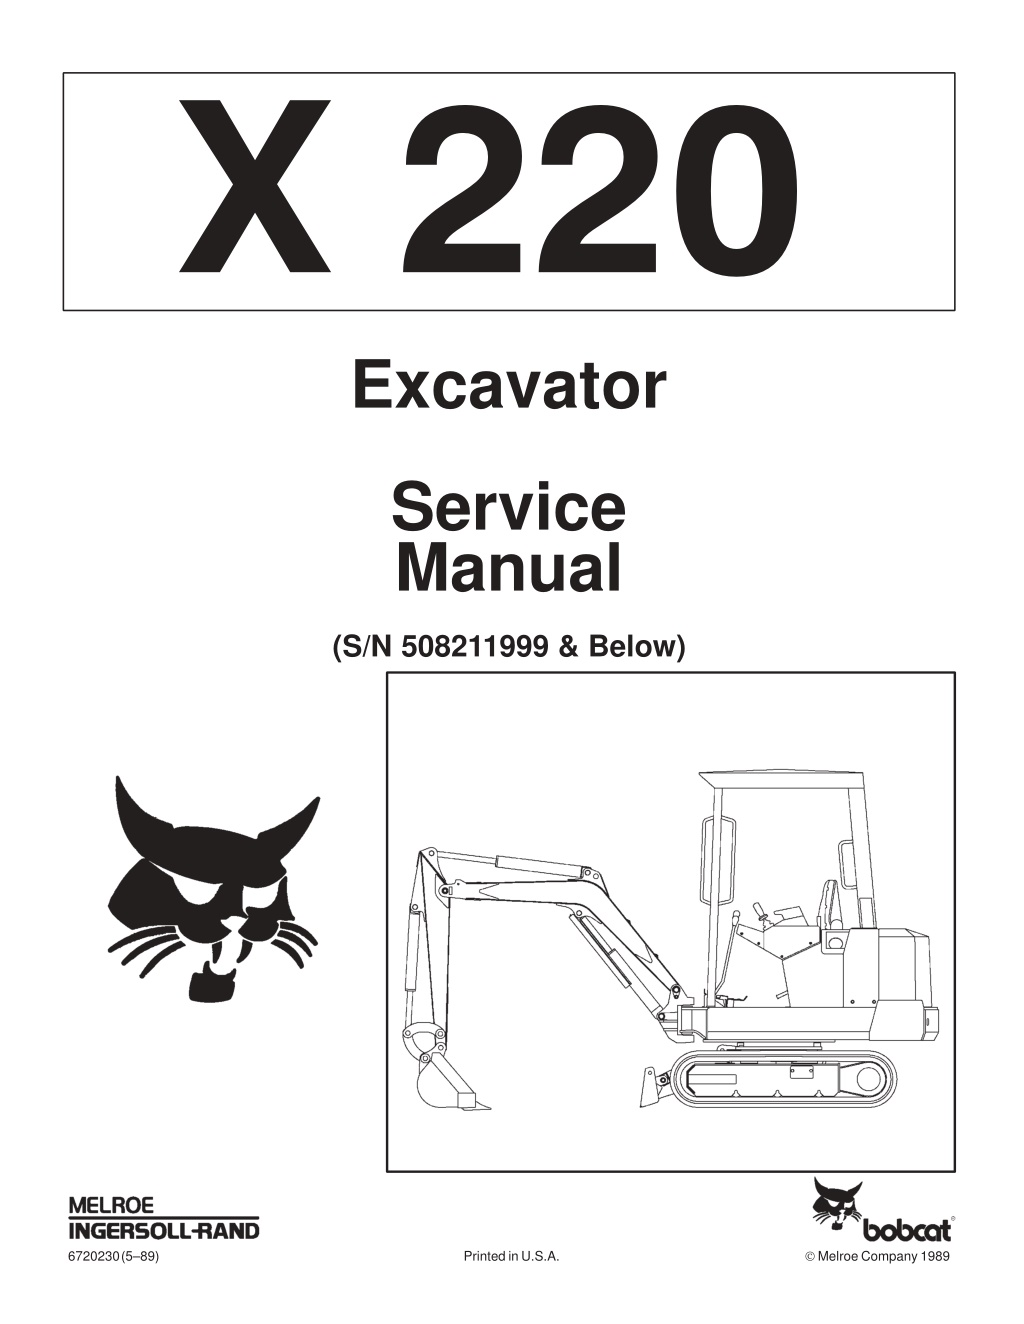
BOBCAT 220 MINI EXCAVATOR Service Repair Manual Instant Download (SN 508211999 & Below)
Please open the website below to get the complete manualnn// n

Download Presentation
Please find below an Image/Link to download the presentation.
The content on the website is provided AS IS for your information and personal use only. It may not be sold, licensed, or shared on other websites without obtaining consent from the author. Download presentation by click this link. If you encounter any issues during the download, it is possible that the publisher has removed the file from their server.
Presentation Transcript
????? Excavator Service Manual (S/N 508211999 & Below) Melroe Company 1989 6720230 (5 89) Printed in U.S.A.
CONTENTS PREVENTIVE MAINTENANCE SAFETY INSTRUCTIONS SERIAL NUMBER LOCATIONS DELIVERY REPORT HYDRAULIC EXCAVATOR IDENTIFICATION PREVENTIVE MAINTENANCE HYDRAULIC SYSTEM DRIVE SYSTEM . . . . . . . . . . . . . . . . . . . . . . . . . . . . . . . . . . . . . . . . . . . . . . . . . UPPER WORKS & SWING SECTION MAIN FRAME & TRACKS . . . . . . . . . . . . . . . . . . . . . . . . . . . . . . . . . . . . . . . . . ELECTRICAL SYSTEM . . . . . . . . . . . . . . . . . . . . . . . . . . . . . . . . . . . . . . . . . . . ENGINE SERVICE . . . . . . . . . . . . . . . . . . . . . . . . . . . . . . . . . . . . . . . . . . . . . . . TECHNICAL DATA . . . . . . . . . . . . . . . . . . . . . . . . . . . . . . . . . . . . . . . . . . . . . . . . . . . . . . . . . . . . . . . . . . . . . . . . . . . . . . . . . . . . . . . . . . . . . . . . . . . . . . . . . . . . . . . . . . . . . . . . . . . . . . . . . . . . . . . . . . . . . . . . . . . . . . . . . . . . . . . . . . . . . . . . . . . . . . . . . . . . . . . . . . . . . . . . . . . . . . . . . . . . . . . . . . . . . . . . . . . . . . . . . . . . . . . . . . . . . . . . . . . . . . . . . . . . . . . . . . . . . . . . . . . . . . . . . . . . . . . . . i ii ii iii HYDRAULIC SYSTEM 1 1 2 1 3 1 4 1 5 1 6 1 7 1 8 1 . . . . . . . . . . . . . . . . . . . . . . . . . . . . . . DRIVE SYSTEM UPPER WORKS & SWING SECTION MAIN FRAME & TRACKS ELECTRICAL SYSTEM ENGINE SERVICE TECHNICAL DATA 220 (S/N 508211999 & Below) Excavator 3 Service Manual
FOREWORD This manual is for the Bobcat hydraulic excavator mechanic. It provides necessary servicing and adjustment procedures for the hydraulic excavator and its component parts and systems. Refer to the Operation & Maintenance Manual for operating instructions, starting procedure, daily checks, etc. A general inspection of the following items must be made after the hydraulic excavator has had service or repair: 1. Check that the operator canopy is in good condition and is not modified. 9. Safety treads must be in good condition. 2. Check canopy mounting hardware is tightened and approved. that the operating 10. Check for the correct function of the the indicator lamps. is Melroe 3. The seat belt must be correctly installed, functional and in good condition. 11. Check hydraulic fluid level, engine oil and fuel supply. 4. Inspect for loose or broken parts or connections. 12. Inspect for fuel, oil or hydraulic leaks.. 5. Machine signs must be legible and in the correct location. 13. Lubricate excavator. the hydraulic 6. Steering levers, control levers and foot pedals must return to neutral. Control lock must lock controls securely. 14. Check the condition of the battery and cables. 7. Inspect the air cleaner for damage or leaks. Check the condition of the element. 15. Check modifications not completed. for any field FIELD MODIFICATION Recommend to the owner that all necessary corrections be made before the machine is returned to service. 8. Check the electrical charging system. 220 (S/N 508211999 & Below) Excavator 1 Service Manual
https://www.ebooklibonline.com Hello dear friend! Thank you very much for reading. Enter the link into your browser. The full manual is available for immediate download. https://www.ebooklibonline.com
SAFETY INSTRUCTIONS Instructions are necessary before operating or servicing machine. Read Operation & Maintenance Manual, Handbook and signs (decals) on machine. Follow warnings and instructions in the manuals when making repairs, adjustments or servicing. Check for correct function after adjustments, repairs or service. Failure to follow instructions can cause injury or death. W 2003 0797 The following publications provide information on the safe use and maintenance of the excavator and attachments: The Delivery Report is used to assure that complete instructions have been given to the new owner and that the machine is in safe operating condition. The Operation & Maintenance Manual delivered with the excavator gives operating information as well as routine maintenance and service procedures. It is a part of the excavator and must stay with the machine when it is sold. The excavator has machine signs (decals) which instruct on the safe operation and care. The signs and their locations are shown in the Operation & Maintenance Manual. Replacement signs are available from your Bobcat Excavator dealer. The CIMA Safety Manual delivered with the excavator gives information for safe operating and standard signals. The Service Manual and Parts Manual are available from your dealer for use by mechanics to do shop type service and repair work. Warnings on the machine and in the manuals are for your safety. Failure to obey warnings can cause injury or death. This notice identifies procedures which must be followed to avoid damage to the machine. I 2019 0284 W 2044 1285 Safety Alert Symbol: This Safety Symbol is used for important safety messages. When you see this symbol follow the safety message to avoid personal injury or death. Wear tight fitting clothing and any other required safety apparel when operating or servicing the excavator. Wear safety glasses when maintaining or servicing the excavator. Exhaust gases can kill, vent engine exhaust outdoors. Know where fire extinguishers and first aid kits are located and how to use them. Do not run the excavator where exhaust, arcs, sparks or hot components can contact flammable material, explosive dust or gases. Check fuel and hydraulic tubes, hoses and fittings for damage and leakage. Never use open flame or bare skin to check for leaks. Tighten or replace any parts that show leakage. Always clean fluid spills. Do not use gasoline or diesel fuel for cleaning parts. Use commercial nonflammable solvents. Do not use ether or starting fluids on an engine that has glow plugs. These starting aids can explode and injure you. Clean the excavator before doing any welding. Cover rubber hoses, battery and all other flammable parts. Keep a fire extinguisher near the excavator when welding. Have good ventilation when welding or grinding painted parts. Wear a dust mask when grinding painted parts. Toxic dust or gas can be produced. Stop the engine and let it cool before adding fuel. No smoking! Use the procedure in this manual for installing, connecting and jump starting batteries. 220 (S/N 508211999 & Below) Excavator i Service Manual
SERIAL NUMBER LOCATIONS A Always use the serial number of the machine when requesting service information or when ordering parts. Early or later models (identification made by serial number) may use different parts, or it may be necessary to use a different procedure in doing a specific service operation. HYDRAULIC EXCAVATOR SERIAL NUMBER The excavator serial number plate is on the machine frame, at the left side near the front corner [A]. N 07348 ENGINE SERIAL NUMBER B The engine serial number is located on the engine block, near the fuel injection pump [B]. N 07349 DELIVERY REPORT C The Delivery Report must be filled out by the dealer and signed by the owner or operator when the excavator is delivered. An explanation of the form must be given to the owner. Make sure it is filled out completely [C]. 220 (S/N 508211999 & Below) Excavator ii Service Manual
HYDRAULIC EXCAVATOR IDENTIFICATION CONTROL LEVERS OPERATOR CANOPY ENGINE COVER BOOM SWING LOCK UPPER WORKS BLADE TRACK TRACK FRAME GRAB HANDLES DIPPERSTICK CYLINDER OPERATOR SEAT BUCKET CYLINDER BOOM CYLINDER BUCKET LINK CONTROL LOCK BLADE CYLINDER DIPPERSTICK BUCKET B 14810 B 14811 220 (S/N 508211999 & Below) Excavator iii Service Manual
PREVENTIVE MAINTENANCE PREVENTIVE MAINTENANCE Page Number AIR CLEANER SERVICE Replacing the Filter Element . . . . . . . . . . . . . . . . . . . . . . . . . . . . . . . . . . . . 1 2 COOLING SYSTEM Coolant Level Coolant Replacement . . . . . . . . . . . . . . . . . . . . . . . . . . . . . . . . . . . . . . . . . . . . . . . . . . . . . . . . . . . . . . . . . . . . . . . . . . . . . . . . . . . . . . . . . . . 1 6 1 6 ENGINE COVER Procedure . . . . . . . . . . . . . . . . . . . . . . . . . . . . . . . . . . . . . . . . . . . . . . . . . . . . 1 3 ENGINE LUBRICATION SYSTEM Checking the Engine Oil Engine Oil and Filter Replacement . . . . . . . . . . . . . . . . . . . . . . . . . . . . . . . . . . . . . . . . . . . . . . . . . . . . . . . . . . . . . . . . . . . . . 1 5 1 5 FINAL DRIVE CASE Checking Oil Level Draining Final Drive Case . . . . . . . . . . . . . . . . . . . . . . . . . . . . . . . . . . . . . . . . . . . . . . . . . . . . . . . . . . . . . . . . . . . . . . . . . . . . . . . . . . 1 12 1 12 FUEL SYSTEM Fuel Specifications Fuel System Service . . . . . . . . . . . . . . . . . . . . . . . . . . . . . . . . . . . . . . . . . . . . . . . . . . . . . . . . . . . . . . . . . . . . . . . . . . . . . . . . . . . . . . . 1 3 1 3 HYDRAULIC SYSTEM Checking and Adding Fluid Replacement of the Hydraulic Filter Hydraulic Reservoir . . . . . . . . . . . . . . . . . . . . . . . . . . . . . . . . . . . . . . . . . . . . . . . . . . . . . . . . . . . . . . . . . . . . . . . . . . . . . . . . . . . . . . . . . . . . . . . . . . . . . . . . . . . . . . 1 7 1 8 1 8 LUBRICATION OF THE EXCAVATOR Procedure . . . . . . . . . . . . . . . . . . . . . . . . . . . . . . . . . . . . . . . . . . . . . . . . . . . . 1 10 SERVICE SCHEDULE Chart . . . . . . . . . . . . . . . . . . . . . . . . . . . . . . . . . . . . . . . . . . . . . . . . . . . . . . . . 1 1 USING A BOOSTER BATTERY (JUMP STARTING) Procedure . . . . . . . . . . . . . . . . . . . . . . . . . . . . . . . . . . . . . . . . . . . . . . . . . . . . 1 9 220 (S/N 508211999 & Below) Excavator 1 1 Service Manual
SERVICE SCHEDULE Maintenance work must be done at regular intervals. Failure to do so will result in excessive wear and early failures. The service schedule is a guide for correct maintenance of the Hydraulic Excavator. Instructions are necessary before operating or servicing machine. Read Operation & Maintenance Manuals, Handbook and signs (decals) on machine. Follow warnings and instructions in the manuals when making repairs, adjustments or servicing. Check for correct function after adjustments, repairs or service. Failure to follow instructions can cause injury or death. W 2003 1289 ITEM SERVICE REQUIRED 8 10 50 100 250 500 1000 Engine Air Cleaner Engine Oil Engine Coolant System Indicator Lights Operator Canopy Seat Belt & Control Lock Safety Signs (Decals) & Safety Treads Check & empty dust cup as required. Check the oil level & add oil as needed. Check radiator coolant level. Check for correct operation. Check the fastening bolts, nuts, & condition of canopy. Check the condition, operation & that fasteners are tight. Check for damaged signs (decals) and safety treads. Replace any safety signs and safety treads that are damaged or worn. Check & adjust tension. Check fluid level. Drain water and sediment from fuel tank. Lubricate two grease fittings. Lubricate one grease fitting. Replace oil & filter element. Tracks Hydraulic Reservoir Fuel Tank Swing Circle Swing Pinion Engine Oil & Filter All Machinery Pivot Points Alternator Belt Final Drive Case Hydraulic Filter Fuel Filter Battery Air Cleaner Cooling System Alternator & Starter Engine Valve Clearance Cooling System Hydraulic Tank Final Drive Case Lubricate 20 grease fittings. Check & adjust tension. Check fluid level & add oil as needed. Replace filter element. Replace filter element. Check & clean cable ends & check electrolyte level. Replace the filter element. Clean the radiator fins. Check the condition. Check & adjust valve clearance. Drain, flush & add new coolant to the cooling system. Change the fluid, clean fill neck strainer & suction strainer. Change the fluid. After the first 250 hours of machine operation do the following procedures: Change oil in final drive case. Check and adjust engine valve clearance. 220 (S/N 508211999 & Below) Excavator 1 1 Service Manual
ENGINE COVER A Procedure AVOID INJURY Never service or adjust the machine when the engine is running unless instructed to do so in the manual. W 2012 0290 N 07367 Keep the engine cover closed when operating the machine. W 2141 0189 B Open the engine cover to service the engine. Pull on the latches and lift the engine cover until it is fully raised [A]. 1 AIR CLEANER SERVICE Replacing the Filter Element See the Service Schedule Page 1 1 for the correct service interval. Service the air cleaner as follows: 1. Remove the dust cup (Item 1) [B]. N 07368 C 2. Remove the wing nut (Item 1) [C]. 1 N 07369 D 3. Remove the filter element [D]. 4. Check the air cleaner housing for damage. 5. Install a new air filter element. Install and tighten the wing nut. 6. Install the dust cap so the arrow points up. 7. Check that the air cleaner hose clamps are tight. N 07370 220 (S/N 508211999 & Below) Excavator 1 2 Service Manual
FUEL SYSTEM A Fuel Specifications Use Number 2 diesel fuel in the engine. During very cold temperatures, Number 1 fuel can be used. Fuel System Service 1 The fuel level in the tank is indicated by the plastic tube (Item 1) [A] on the side of the tank. N 07371 Stop and cool the engine before adding fuel. NO SMOKING! Failure to obey warnings can cause an explosion or fire. B W 2063 0887 Use the key to unlock the fuel fill cap [B]. N 07372 C Turn the fill cap to remove it from the fuel tank [C]. NOTE: The fuel fill strainer can be removed for cleaning. Make sure it is installed before adding fuel to the tank. Use a clean, approved safety container to add fuel to the tank. Add fuel only in an area that has a free movement of air and no open flames or sparks. NO SMOKING! After the tank is full, install and tighten the fuel fill cap. N 07373 220 (S/N 508211999 & Below) Excavator 1 3 Service Manual
FUEL SYSTEM (Contd) A Always clean up spilled fuel or oil. Keep heat, flames, sparks or lighted tobacco away from fuel and oil. Failure to use care around combustibles can cause explosion or fire which can result in injury or death. W 2103 1285 N 07375 To remove the water and sediment from the fuel tank, open the drain in the bottom of the tank [A]. 220 (S/N 508211999 & Below) Excavator 1 4 Service Manual
ENGINE LUBRICATION SYSTEM A Checking the Engine Oil Check the engine oil every day. Stop the engine. Open the engine cover. Remove the dipstick [A]. Keep the oil level between the marks on the dipstick. Use a good quality motor oil that meets API Service Classification of CC or CD. (See Fuel, Coolant and Lubricants Chart Page 8 9.) N 07378 Engine Oil and Filter Replacement B See the SERVICE SCHEDULE Page 1 1 for the correct service interval. Use the following procedure to change the oil and filter: Run the engine until it is at operating temperature. Turn the upper works so there is clearance for the engine oil drain plug. Stop the engine. 1 Remove the drain plug (Item 1) [B]. Drain the oil into a container. N 07379 C Remove the oil filter (Item 1) [C], using a filter wrench. Clean the filter housing surface. Put clean oil on the filter gasket. Install the new filter and hand tighten only. 1 N 07380 D Remove the oil fill cap [D]. Put 3.5 quarts (3,4 L) of oil into the engine. (See Fuel, Coolant and Lubricants Chart Page 8 9.) Start the engine and let it run for several minutes. Stop the engine. Check the oil filter for leaks. Check the oil level and add oil as needed to bring it to the top mark on the dipstick. N 07381 220 (S/N 508211999 & Below) Excavator 1 5 Service Manual
COOLING SYSTEM A Coolant Level When the engine is cool, remove the radiator cap [A]. The coolant level must be 3/4 1 (19 25 mm) below the radiator filler neck. If the coolant level is low, add premixed coolant (50% ethylene glycol and 50% water) to the radiator. Coolant Replacement N 07382 B Do not remove radiator cap when the engine is hot. You can be seriously burned. W 2070 1285 Turn the upper works so there is access to the engine and radiator underneath. Stop the engine. 1 Loosen and remove the radiator cap [A]. Open the radiator drain valve (Item 1) [B]. Drain all the coolant from the system. N 07383 When all the coolant is removed, close the drain valve. Premix 50% water and 50% ethylene glycol in a separate container. Fill the radiator with premixed coolant until it is full. Run the engine at idle speed for about 5 10 minutes to remove the air from the cooling system (leave the radiator cap off during this operation). Stop the engine. Check the coolant level and add as needed, bringing it 3/4 1 (19 25 mm) below the filler neck. Install the radiator cap and tighten. Wear safety glasses to prevent eye injury when any of the following conditions exist: When fluids are under pressure. Flying debris or loose material is present. Engine is running. Tools are being used. W 2019 1285 220 (S/N 508211999 & Below) Excavator 1 6 Service Manual
HYDRAULIC SYSTEM A Checking and Adding Fluid To check and add hydraulic fluid to the reservoir, use the following procedure: Put the machine on a flat surface. Retract the dipperstick and bucket cylinders, put the bucket on the ground, and raise the blade. Stop the engine. 1 Check the hydraulic fluid level, it must be visible and between the marks in the sight gauge (Item 1) [A]. N 09091 B If the fluid level is low, remove the four bolts from the reservoir cover [B]. N 09161 C Remove the reservoir fill cover [C]. Add the correct fluid to the reservoir until it is at the top mark in the sight gauge [A]. (See Fuel, Coolant and Lubricants Chart Page 8 9.) Install the reservoir cover, make sure the O ring is in the correct position. Install and tighten the bolts. N 09162 220 (S/N 508211999 & Below) Excavator 1 7 Service Manual
HYDRAULIC SYSTEM (Contd) A Replacement of the Hydraulic Filter See the Service Schedule Page 1 1 for the correct service interval. 1 Open the engine cover. Use a filter wrench and remove the filter element (Item 1) [A]. Clean the housing where the filter gasket makes contact. Put clean fluid on the gasket. Install the new filter element and hand tighten only. Start the engine. Run the machine through the hydraulic functions. Stop the engine. Check the fluid level at the reservoir and add as needed. Check the filter area for leaks. N 09163 B Hydraulic Reservoir 2 See the Service Schedule Page 1 1 for the correct service interval. Move the upper works so there is a clearance for the reservoir between the track frame. 1 Retract the dipperstick and bucket cylinder, lower the bucket to the ground. Stop the engine. 3 Remove the hydraulic filter. Remove the drain plug (Item 1) [B] from the bottom of the reservoir. Remove the hose clamps (Item 2) [B] and disconnect the hoses. Remove the bolts (Item 3) [B] from the flange. Turn the bolts into the threaded holes in the flange to push the mesh screen out of the reservoir. N 09090 Clean all the parts with clean solvent and air dry them. Replace the parts and tighten the bolts, hose clamps and drain plug. Add approximately 7.0 gals. (26,5 L) of fluid to the reservoir. (See Fuel, Coolant and Lubricants Chart Page 8 9.) Run the machine through the hydraulic functions. Stop the engine. Check the fluid level and add as needed. Always clean up spilled fuel or oil. Keep heat, flames, sparks or lighted tobacco away from fuel and oil. Failure to use care around combustibles can cause explosion or fire which can result in injury or death. W 2103 1285 220 (S/N 508211999 & Below) Excavator 1 8 Service Manual
USING A BOOSTER BATTERY (JUMP STARTING) A Procedure 1 If it becomes necessary to use an extra battery to start the engine, BE CAREFUL! Make sure the swing lock pin is in the engaged position. The key switch must be in the OFF position. 2 The booster battery must be 12 volt. Open the engine cover. Connect the end of the first cable to the positive (+) terminal of the booster battery. Connect the other end of the same cable to the starter terminal (Item 1) [A]. N 07387 Connect the end of the second cable to the negative ( ) terminal of the booster battery. Connect the other end of the same cable to the machine frame (Item 2) [A]. NOTE: Also see Cold Starting Procedure in the Operation & Maintenance Manual. Start the engine. After the engine is running, remove the cable (Item 2) [A] connected to the frame first. Disconnect cable from the starter terminal (Item 1) [A]. Keep arcs, sparks, flames and lighted tobacco away from batteries. When jumping from booster battery make (negative) at engine frame. final connection Do not jump start or charge a frozen battery. Warm battery to 60 F. (16 C.) before connecting to a charger. Unplug charger before connecting or disconnecting cables to battery. Battery gas can explode and cause serious injury. Damage to the alternator can occur if: Engine is operated with battery cables disconnected. Battery cables are connected when using a fast charger or when welding on the loader (Remove both cables from the battery). Extra battery cables (booster cables) are connected wrong. W 2066 0490 I 2023 1285 220 (S/N 508211999 & Below) Excavator 1 9 Service Manual
LUBRICATION OF THE EXCAVATOR A Procedure Lubricate the Hydraulic Excavator as specified in the Service Schedule Page 1 1 for the best performance of the machine. 1 2 2 Always use a good quality lithium based multi purpose grease when lubricating the machine. Apply the lubricant until extra grease shows. 3 Ref. Description (# of Fittings) 1. Blade Cylinder Rod End (1) [A]. 2. Blade Pivots (2) [A]. 3. Blade Cylinder Base End (1) [A]. N 07397 B 4. Boom Cylinder Rod End (1) [B]. 4 N 07398 C 5. Boom Pivot Pin (1) [C]. 6. Boom Swing Bracket Pivot (2) [C]. 7. Boom Cylinder Base End (1) [C]. 5 6 6 7 N 07399 8. Boom Cylinder Rod End (1) [D]. 9. Dipperstick Cylinder Base End (1) [D]. D 9 8 N 07400 220 (S/N 508211999 & Below) Excavator 1 10 Service Manual
LUBRICATION OF THE HYDRAULIC EXCAVATOR (Cont d) A 10 Procedure (Cont d) Ref. Description (# of Fittings) 11 10. Dipperstick Cylinder Rod End (1) [A]. 11. Dipperstick Pivot Pin (1) [A]. 12. Bucket Cylinder Base End (1) [A]. 12 N 07401 B 13. Bucket Cylinder Rod End (1) [B]. 14. Bucket Link Pivots (2) [B]. 15. Bucket Pivots (4) [B]. 14 15 13 15 14 15 N 07402 16. Boom Cylinder Base End (1) [C]. 17. Swing Circle Pinion (1) [C]. C 16 17 N 07403 18. Swing Circle (2) [D]. D 18 N 07404 220 (S/N 508211999 & Below) Excavator 1 11 Service Manual
FINAL DRIVE CASE A 220 Excavator Service Manual (S/N 508211999 & Below) #6720230 Preventive Maintenance Section Checking Oil Level Put the machine on a flat level surface. 1 Position the plug (Item 1) [A] parallel to the ground. Remove one of the plugs (Item 1) [A]. Add oil through the hole if the oil level is below the hole. (See Fuel, Coolant and Lubricant Chart Page 8 9.) Install and tighten the plug. Repeat the procedure for the other side. P 05906 Draining Final Drive Case B See the Service Schedule Page 1 1 for the correct service interval. Put the machine on a flat level surface with the plugs positioned as shown in figure [A]. Remove the bottom plug (Item 1) [B] and the top plug (Item 2) [B]. 2 After the oil is removed, install and tighten the bottom plug. 1 Add .33 quarts (0,3 L) of oil to the top plug hole. Install the plug. Use the same procedure for Checking Oil Level. Add oil as needed. P 05907 Repeat the procedure for the other side. 220 (S/N 508211999 & Below) Excavator 1 12 Service Manual
HYDRAULIC SERVICE INFORMATION A 1 When repairing hydrostatic and hydraulic systems, clean the disassembly and keep all parts clean. Always use caps and plugs on hoses, tubelines and ports to keep dirt out. Dirt can quickly damage the system. work area before 2 I 2003 0888 1 MC 01205 There are two main relief valves (Item 1) [A] and port relief valves (Item 2) [A] in the hydraulic system. B Checking The Main Relief Valves The tools listed will be needed to do the following procedure: 2 OEM1238 OEM1239 Hydraulic Tester 6657708 Test Fitting 6657709 Hose Adapter 1 Stop the engine and raise the engine cover. Disconnect the outlet hose (Item 1 or 2) [B] from the hydraulic pump and connect that hose to the outlet of the tester. N 07538 NOTE: Install the adapter 6657709 between outlet hose of tester and outlet hose of the pump. Remove the outlet fitting from the pump being tested and install the test fitting 6657708. Connect the inlet of the tester to the test fitting in the pump. 220 (S/N 508211999 & Below) Excavator Revised July 97 2 3 Service Manual
HYDRAULIC SERVICE INFORMATION (Contd) A Checking the Main Relief Valves (Cont d) NOTE: Open the flow control knob (Item 1) [A] fully to prevent pump damage. 1 NOTE: Refer to the hydraulic flow chart valve section. Start the engine and run at low RPM. Make sure the tester is connected correctly. If no flow is indicated at the tester, the hoses are connected wrong. Increase the engine speed to full RPM. Warm the hydraulic fluid to 140 F (60 C) by turning the restrictor valve until the gauge reads about 1000 PSI (6895 kPa). Do not exceed system pressure. N 11433 Stroke a cylinder to it s limit, in the section being tested, to open the relief valve. The relief valve pressure should open at 2133 PSI (14707 kPa) 75 PSI. The flow should be 10.7 GPM (40,5 L/min.) on a new pump. Release the pressure on the cylinder being tested. Close the flow control knob (Item 1) [A] slowly, to 100 PSI below relief valve setting, and record the high pressure. NOTE: The high pressure flow must be at least 80% of free flow. HIGH PRESSURE FLOW (GPM) % = X 100 FREE FLOW (GPM) If high pressure flow is less than 80% of free flow, remove the hydraulic pump for repair or replacement. Repeat the testing procedure and use the same readings as shown above. 220 (S/N 508211999 & Below) Service Manual Revised July 97 2 4
HYDRAULIC PUMP A Removal And Installation 1 When repairing hydrostatic and hydraulic systems, clean the disassembly and keep all parts clean. Always use caps and plugs on hoses, tubelines and ports to keep dirt out. Dirt can quickly damage the system. work area before N 07537 I 2003 0888 B Disconnect the two inlet hoses (Item 1) [A] from the hydraulic pump. Drain the hydraulic fluid in a container. Disconnect the two pressure hoses [B]. N 07538 C Loosen the pump mounting bolts [C]. N 07539 Remove the bolts and washers from the pump flange [D]. D N 07540 220 (S/N 508211999 & Below) Excavator Revised July 97 2 5 Service Manual
HYDRAULIC PUMP (Contd) A Removal And Installation (Cont d) Remove the hydraulic pump from the bell housing [A]. N 07541 220 (S/N 508211999 & Below) Service Manual Revised July 97 2 6
HYDRAULIC PUMP Parts Identification 1. 2. 3. 4. 5. 6. 7. 8. 9. 10. 11. 12. 13. 14. 15. 16. 17. 18. 19. 20. 21. 22. 23. 24. 25. 26. Snap Ring Seal Cover Backup Ring Backup Ring Seal Bushing Bushing Gear Gear Bushing Bushing Drive Coupler Seal Housing Center Plate Bushing Bushing Gear Gear Bushing Bushing Housing Cover Washer Bolt 5 12 16 10 8 6 5 4 14 15 14 13 11 9 7 6 4 25 2 3 1 5 26 22 20 18 24 6 14 4 5 23 14 21 19 17 6 4 B 14926 220 (S/N 508211999 & Below) Excavator Revised July 97 2 7 Service Manual
HYDRAULIC PUMP A 1 Disassembly When repairing hydrostatic and hydraulic systems, clean the disassembly and keep all parts clean. Always use caps and plugs on hoses, tubelines and ports to keep dirt out. Dirt can quickly damage the system. work area before P 08236 I 2003 0888 B Use solvent to clean the outside of the hydraulic pump of oil and dirt. NOTE: During disassembly, put all parts on clean work surface. Clamp the mounting flange of the pump in a vise that has padded jaws. Mark the housing for ease of assembly. Remove the four bolts (Item 1) [A] and washers. Remove the cover [B]. P 08237 Remove the two back up rings (Item 1) [C]. C 1 P 08238 Remove the two seals (Items 1 & 2) [D]. D 1 2 P 08239 220 (S/N 508211999 & Below) Service Manual Revised July 97 2 8
HYDRAULIC PUMP (Contd) A Disassembly (Cont d) Remove the pump section body [A]. P 08240 Remove the back up rings (Item 1) [B] from the bottom of the pump section. B 1 P 08292 Remove the two seals (Items 1 & 2) [C] from the bottom of the pump section. C 1 2 P 08241 D Remove the two bushings (Items 1 & 2) [D] from the bottom of the pump section. 1 2 P 08242 220 (S/N 508211999 & Below) Excavator Revised July 97 2 9 Service Manual
HYDRAULIC PUMP (Contd) A Disassembly (Cont d) Remove the gears (Items 1 & 2) [A]. 2 1 P 08243 Remove the two bushings (Item 1) [B] from the top of the pump section. B 1 P 08244 Remove the center plate from the pump section [C]. C P 08245 Remove the drive coupler (Item 1) [D] from the drive gear. D 1 P 08246 220 (S/N 508211999 & Below) Service Manual Revised July 97 2 10
HYDRAULIC PUMP (Contd) A Disassembly (Cont d) Remove the two back up rings (Item 1) [A]. 1 P 08247 Remove the two seals (Items 1 & 2) [B]. B 2 1 P 08248 Remove the pump section [C]. C P 08249 Remove the two back up rings (Item 1) [D] from the bottom of the pump section. D 1 P 08250 220 (S/N 508211999 & Below) Excavator Revised July 97 2 11 Service Manual
HYDRAULIC PUMP (Contd) A Disassembly (Cont d) Remove the two seals (Items 1 & 2) [A] from the bottom of the pump section. 2 1 P 08251 Remove the two bushings (Item 1) [B] from the bottom of the pump section. B 1 P 08252 Remove the two drive gears (Items 1 & 2) [C] from the bottom of the pump section. C 2 1 P 08253 Remove the two bushings (Item 1) [D] from the top of the pump section. D 1 P 08254 220 (S/N 508211999 & Below) Service Manual Revised July 97 2 12
MORE MANUALS: https://www.ebooklibonline.com/ Suggest: If the above button click is invalid. Please download this document first, and then click the above link to download the complete manual. Thank you so much for reading
HYDRAULIC PUMP (Contd) A Disassembly (Cont d) Remove the snap ring (Item 1) [A] and seal (Item 2) [A] from the flange. 2 1 P 08255 Assembly B Clean all parts in solvent and dry with compressed air. Apply clean hydraulic fluid to all seals and back up rings. Apply clean hydraulic fluid to the bushings and inside of both pump sections. Install the new seal (Item 2) [A] and snap ring (Item 1) [A]. Install the bushings (Item 1) [B] at the same time in the pump section until they are flush with top surface. 1 2 NOTE: Install the bushings as shown towards the intake side (large port) (Item 2) [B]. P 08254 NOTE: Do not force the bushings. C Turn the pump section over. Do not allow the bushings to drop out of the pump section. Install the gears (Items 1 & 2) [C]. 1 2 P 08253 Install the bushings (Item 1) [D]. D NOTE: Install the bushings as shown towards the intake side (large port) (Item 2) [D]. 1 2 P 08252 220 (S/N 508211999 & Below) Excavator Revised July 97 2 13 Service Manual
https://www.ebooklibonline.com Hello dear friend! Thank you very much for reading. Enter the link into your browser. The full manual is available for immediate download. https://www.ebooklibonline.com


")


")
")


")

")


")
")
")
")

")