Step-by-Step Guide to Using Eclipse IDE for Java Development

Explore the comprehensive tutorial on utilizing Eclipse IDE for Java development. Learn how to set up Eclipse, create projects, manage workspaces, and add new classes, accompanied by detailed instructions and images.

Download Presentation

Please find below an Image/Link to download the presentation.
The content on the website is provided AS IS for your information and personal use only. It may not be sold, licensed, or shared on other websites without obtaining consent from the author. Download presentation by click this link. If you encounter any issues during the download, it is possible that the publisher has removed the file from their server.
E N D
Presentation Transcript
Author: Contributions: Chua Jie Sheng, Li Mengran, Peh Shao Hong, Oo Theong Siang, Tong Chun Kit, Tania Chattopadhyay Loh Jianxiong Christopher
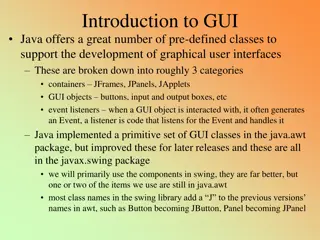
Introduction to Eclipse A powerful IDE (Integrated Development Environment) Provides many features and tools to aid in software development Download the latest version of Eclipse from: http://www.eclipse.org/downloads/ 2
Starting Eclipse When you first start Eclipse, you will be asked to set a workspace folder, which is the location where all your project related files will be stored 3
Creating HelloWorld Project On the top menu bar, click: File New Project. [For Mac Users] If New menu is empty, right click on a blank area of the Package Explorer. (See Next Slide) 4
Creating HelloWorld Project (Mac Users) Right-click on the blank area of Package Explorer, click: New Project. 5
Hello World! Select Java Project from the wizard, and click Next> 6
HelloWorld Type in our project name HelloWorld and click Finish . 7
The Workbench That should bring you to the Workbench . It has following main components. The package explorer pane displays the various files (some source, some bytecode) included in your project in the form of a tree. Click the triangular buttons to the left of the individual folders to expand or collapse them. (If a folder is empty, the expand/collapse button is not displayed) This is the editor area. Since no file is opened, it s blank. Task list is the place where you can assign tasks within the project. This is where various output from the IDE are displayed. We are currently at the Problems pane. The Outline pane displays an outline of a structured file that is currently open in the editor area, and lists structural elements. 8
Adding a new class Now, let us add a new class to our project. Right click on the folder src and select New -> Class 9
Name the new class In the Name field, type in HelloWorld Then press Finish . 10
Start Editing To star editing, double click HelloWorld.java in Package Explorer to open it up in the editor pane. 11
Eclipse Code-Assist Now write the main function as shown and type in: System.out.println( Hello World! ); When typing code, the code-assist window pops up to help the user. This is called the code assist feature. Double-clicking a selection (or press Enter at it) will have Eclipse fill in the rest of the code automatically. 12
Outline Pane Notice that the Outline pane gives a structural view of HelloWorld.java , that it contains the class HelloWorld , in which there is a function main . 13
Save File A * preceding the class name indicates that the class is not saved. To save HelloWorld.java, select File -> Save or press Ctrl+S. 14
Running HelloWorld To run our project, select Run -> Run As -> Java Application Note: In Eclipse, there is no need to compile before running (compilation is done automatically as you type). 15
Note: If the file is not saved If you run an unsaved file, the Save and Launch window appears. Select the classes you want to save and click Ok . 16
Output Program output is displayed below the editor window under the Console tab 17
To View the Console If the console is not visible, click: Window Show View Console. 18
Error Detection and Correction in the left margin means there is an error on that line. Red squiggly lines ( ) indicates where the error is. Moving the mouse over either will bring up a description of the error. For example, had we forgotten to type the semicolon (;), we d see this error below. 19
Error Detection and Correction Sometimes Eclipse can attempt to correct errors. This is available when a light bulb icon ( ) is displayed on the left margin. Click the light bulb icon to open the suggestion box. We can pick a suggestion listed and Eclipse will do the correction accordingly. 20
Auto Formatting Select Source code according to Java conventions. Format orpress Ctrl+Shift+F. Eclipse will auto format your 21


")