AmeriCorps Member Tutorial on OnCorps Reports 2.0 - Overview and Login Instructions
AmeriCorps Member Tutorial on OnCorps Reports 2.0 provides essential information on using the web-based application to gather data required for reporting purposes. Learn about OnCorps Reports features, accessing the platform, logging in and out, and utilizing the program's web resources effectively.
Download Presentation

Please find below an Image/Link to download the presentation.
The content on the website is provided AS IS for your information and personal use only. It may not be sold, licensed, or shared on other websites without obtaining consent from the author. Download presentation by click this link. If you encounter any issues during the download, it is possible that the publisher has removed the file from their server.
E N D
Presentation Transcript
AmeriCorps Member Tutorial OnCorps Reports 2.0, Standard Reports
Whats OnCorps? OnCorps Reports is a web based application that is intended to help AmeriCorps programs gather the data they need to meet their reporting requirements. In OnCorps you will find an audit tested AmeriCorps Member timesheet system, reporting tools that let you gather data from the bottom up, financial forms, and many other features. For the 2018-2019 service year, NDA will use OnCorps specifically for timesheets. This is our first year rolling out this system! Thanks for being the first group to help us get started.
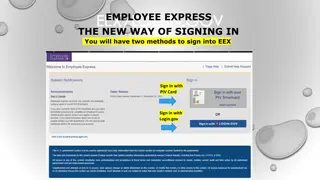
Logging Into and Logging Out of OnCorps Reports Getting Started > Logging In and Logging Out of OnCorps Reports You can access OnCorps Reports via http://ndmv.oncorpsreports.com Select a program year from the drop down box on the right of the page and click the Submit button. Because the data for each program year is stored in a separate database, if you select the wrong program year, your login will not work.
Logging Into and Logging Out of OnCorps Reports Getting Started > Logging In and Logging Out of OnCorps Reports Once you have selected the program year, the portal for all NDA cities for the selected program year will open. Find your city in the list. Then click on the AmeriCorps Members link under your program to open your login page.
Logging Into and Logging Out of OnCorps Reports Getting Started > Logging In and Logging Out of OnCorps Reports On the login page, enter your login name and password in the box on the right side (your Site Director will provide you with this). After you login for the first time, you will be prompted to change your password.
Logging Into and Logging Out of OnCorps Reports Getting Started > Logging In and Logging Out of OnCorps Reports To log out of OnCorps Reports, click on the logout link at the end of the first line of the header in the upper right corner
Program Web Site and Resources Page The Program Web Site and the Resources Page may contain content created by your Site Director or the National Office. On the Program Web Site, you are likely to see reminders for important events, service stories, and other information relating to your program. On the Resources Page, you can download files, including documents and images.
Timeline Timesheets are due every two weeks and coincide with the payroll cycle. Payroll cycles begin on Sunday and end on the second following Saturday. Timesheets must be entered and approved by you the next day Sunday at the latest. Timesheets must be approved by your supervisor the following day Monday at the latest.
Rules of the Road For each day, enter the number of hours you spent on each category. If you serve 12 or more hours in one category during the day, please explain why (unless this is a standard occurrence in your schedule that is verified by your site director). If you log hours in any of the following categories you must briefly explain what the service entailed: Fundraising Individual outside service Individual outside training For outside service and training activities, you must provide signed documentation to your site director, which they will add to your file.
Enter Timesheets Time Tracking > Enter Timesheets To open a timesheet, select the date range for that timesheet from the Select a Period drop down menu, and click the Choose button.
Enter Timesheets Time Tracking > Enter Timesheets Enter in your hours. Hours can only be entered in quarter hour increments (numbers ending in .00, .25, .50, and .75). For hours served outside of your normal service location, or for entries exceeding 12 hours, include a note in the box at the bottom.
Enter Timesheets Time Tracking > Enter Timesheets Some members may have the option to submit their timesheets to multiple supervisors. If that is the case, at least one supervisor must be selected in order to submit your timesheet.
Enter Timesheets Time Tracking > Enter Timesheets To save your hours so you can come back and edit the timesheet later, click the Save button. When you have entered all of you hours into the timesheet, click the Authorize and Submitbutton to send the timesheet to your supervisor(s) for approval. After you click the Authorize and Submit button, a popup window will appear asking you to confirm that you want to submit your timesheet. In the pop-up window, click OK to send the timesheet to your supervisors or click Cancel to abort and return to editing your timesheet
Enter Timesheets Time Tracking > Enter Timesheets Timesheets that have been submitted or approved are locked to prevent changes. They may still be viewed-and will have a padlock icon in the upper right corner.
Time Tracking Members log in, fill out a timesheet and submit it to the supervisor(s) who supervised them during the timesheet period. The timesheet is now locked and members can no longer revise it. An e-mail is sent to all of the supervisors selected by the member that they have a timesheet ready for approval. A notice also appears on the supervisor's Home page.
Time Tracking The supervisor logs in to OnCorps and reviews the member's timesheet. The supervisor can either: Approve the timesheet. (All supervisors that received the timesheet must approve.) Reject the timesheet and enter in the reason why (Only one supervisor needs to reject a timesheet to reject it for all supervisors it was sent to) An e-mail will be sent to the member and a notice will appear on their Home page upon timesheet rejection. The rejected timesheet is now open for revisions by the member. The member logs in, goes to the timesheet, corrects the timesheet, and resubmits the timesheet to their supervisors, who must then review and either approve or reject it.
Time Tracking Once a timesheet has been approved by all of the supervisors it was sent to, it is available for viewing by site directors. Site directors viewing approved timesheets can either Approve the timesheet Unlock the timesheet and enter in the reason why it is being sent back to the member for revisions. An e-mail will be sent to the member and supervisor and a notice will appear on their Home pages when a timesheet is unlocked. The unlocked timesheet is now open for revisions by the member. The member logs in, goes to the timesheet, corrects the timesheet, and resubmits the timesheet to their supervisors, who must then review and either approve or reject it.
Timesheets Time Tracking > List Timesheets Search for approved, submitted or rejected timesheets by selecting a timesheet period using the Select a Period drop down menu. You can also view timesheets by their status (Approved, Submitted, Rejected, Late, or Not Started) using the Select a Timesheet Status drop down. Click the View button next to an unapproved timesheet to view that timesheet in a pop-up window. If a timesheet has been approved, you can download a PDF of that timesheet for your records.
Member Hours Time Tracking > Total Hours YTD The Member Hours Year-To-Date table shows the status of all hours that have been entered into a member timesheet. The columns show hours that are: Committed, Total, Approved, Pending, and Breakdown by Service Categories Also shown are: Weeks Left Hours Left (Committed - (Pending + Approved) Average left per week: (Hours Left / Weeks Left)
My Profile Directories > My Profile My Profile allows users to update their own basic contact information so that it is always up to date. Users can use this form to make any changes necessary to their basic contact information. Users can also use this form to change their passwords. When finished, select Save to save the report. Click on the Save and Print button if you would like to create a PDF of the report in addition to saving it.
Help The Help menu contains pages where you can find resources to help answer your questions about the OnCorps Reports system, including: Tutorials FAQs Form to request assistance from OnCorps Reports. The pages under the Help menu are listed below: Request Help Ticket FAQ
