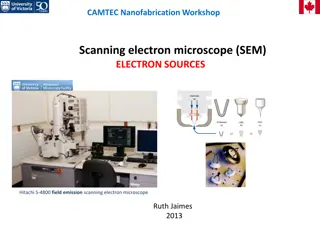
Understanding Specimen Preparation in Electron Microscopy
Living things cannot survive in an electron microscope due to the high temperature generated by the electron beam, vacuum inside the microscope, and need for specimen preparation steps like fixation, dehydration, freezing, cutting, and mounting. Fixation involves stabilizing tissue with chemicals, dehydration removes water, freezing prevents damage, cutting with care ensures precision, and mounting enhances contrast in images.
Download Presentation

Please find below an Image/Link to download the presentation.
The content on the website is provided AS IS for your information and personal use only. It may not be sold, licensed, or shared on other websites without obtaining consent from the author. Download presentation by click this link. If you encounter any issues during the download, it is possible that the publisher has removed the file from their server.
E N D
Presentation Transcript
There are two reasons why living things cant survive in an electron microscope: The power of the electron beam that s directed at the sample. The vacuum inside the microscope. The temperature can get up to 150 C where the beam hits the sample. This temperature is far too high for living cells to survive.
To be visualised by an electron microscope, biological samples need to be: Fixation: sample is fixed (stabilised) so the electron beam doesn t destroy them Dehydration : sample is dried thoroughly so the vacuum doesn t affect them.
Fixation The living tissue is chemically treated to stabilise it. This kills the tissue sample at the same time. Osmium tetraoxide, formaldehyde are the popular fixatives. Ascending concentration of alcohols used for 5-15 min. Dimethoxypropane is used for rapid dehydration. Propylene oxide is used as clearing agent Fixing should be quick as possible because, as soon as tissue is removed from its natural environment, it starts to change. For example, oxygen levels start to drop as soon as tissue is removed from an organism. This causes mitochondria to start to change their appearance. Another common change in the fixation process is that lipids tend to form micelles.
How to solve the problem? Freeze the sample very quickly instead of fixing it. Freezing locks up the water and prevents it from evaporating inside the microscope. Freezing samples is common in SEM (and is known as cryoSEM).
Cutting a specimen Cutting with abrasives may cause a large amount of damage, whilst the use of a low-speed diamond saw can cause fewer problems. The samples are embedded in hard resin to make them easier to cut. Specimens can be hot mounted (at around 200 C) using a mounting press, either in a thermosetting plastic (e.g. phenolic resin), or a thermosoftening plastic (e.g. acrylic resin). Then, an instrument called an ultramicrotome cuts the samples into ultra- thin slices (100 nm or thinner) For TEM the SEM aren t cut into thin sections, because the SEM visualises the surface of three-dimensional objects.
Mounting The biological specimen are electron transparent The mounting material should also be electrically conducting. Uranium and lead salts are used for staining. TEM samples are also treated with heavy metals to increase the level of contrast in the final image. The parts of the sample that interact strongly with the metals show up as darker areas. Instead, SEM samples are coated with a thin layer of metal (usually gold or gold-palladium). The metal coating makes samples conductive. https://www.youtube.com/watch?v=403ruZpNw2k
Etching Etching is used to reveal the microstructure of the metal through selective chemical attack. It also removes the thin, highly deformed layer introduced during grinding and polishing. In alloys with more than one phase, etching creates contrast between different regions through differences in topography or reflectivity. The rate of etching is affected by crystallographic orientation, the phase present and the stability of the region. This means contrast may arise through different mechanisms therefore revealing different features of the sample. In all samples, etchants will preferentially attack high energy sites, such as boundaries and defects.
The specimen is etched using a reagent. For example, for etching stainless steel or copper and its alloys, a saturated aqueous solution of ferric chloride, containing a few drops of hydrochloric acid is used. This is applied using a cotton bud wiped over the surface a few times (Care should be taken not to over-etch - this is difficult to determine, however, the photos below may be of some help). The specimen should then immediately be washed in alcohol and dried. Following the etching process there may be numerous small pits present on the surface. These are etch pits caused by localised chemical attack and, in most cases, they do not represent features of the microstructure. They may occur preferentially in regions of high local disorder, for example where there is a high concentrationof dislocations. If the specimen is over etched, ie. etched for too long, these pits tend to grow, and obscure the main features to be observed. If this occurs it may be better to grind away the poorly etched surface and re-polish and etch, although it is important to remember what features you are trying to observe repeatedly grinding a very thin sample may leave nothing to see.
