Using Python to Control WS2812 RGB LED Flexi-Strip with Micro:bit
Explore how to control a WS2812 RGB LED Flexi-Strip using MicroPython with a Micro:bit and a Grove Inventor Kit. Learn about hardware connections, software setup, program download methods, and utilizing Neopixel blocks for LED control.
Download Presentation

Please find below an Image/Link to download the presentation.
The content on the website is provided AS IS for your information and personal use only. It may not be sold, licensed, or shared on other websites without obtaining consent from the author.If you encounter any issues during the download, it is possible that the publisher has removed the file from their server.
You are allowed to download the files provided on this website for personal or commercial use, subject to the condition that they are used lawfully. All files are the property of their respective owners.
The content on the website is provided AS IS for your information and personal use only. It may not be sold, licensed, or shared on other websites without obtaining consent from the author.
E N D
Presentation Transcript
Using Python to Control WS2812 RGB LED Flexi-Strip MicroPython
WS2812 RGB LED Flexi-Strip Neopixel strip is made up of a series of special LEDs that can be controlled using only one IO. WS2812 has an internal control chip which can control the red, green, and blue LED. Every LED can show 28= 256 kinds of color. With three colors combined, it can show 256 x 256 x 256 = 16777216 kinds of color. It s very easy to control strip with micro:bit.
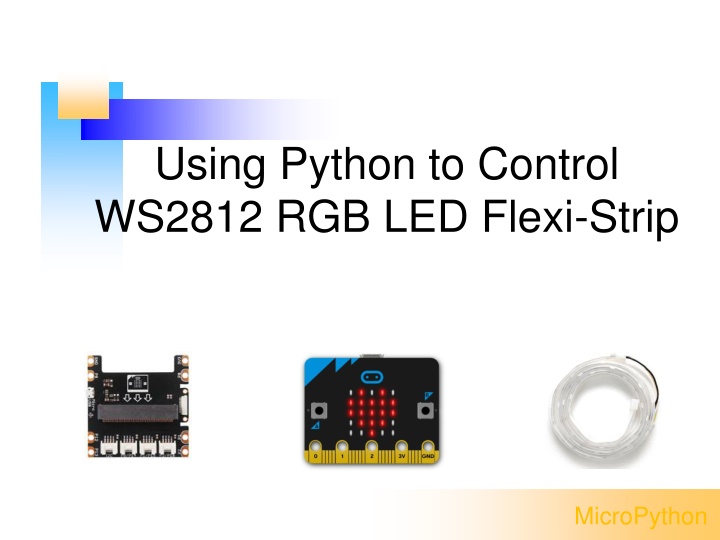
Experiment Equipment micro:bit x 1 From grove inventor kit: Base Shield x 1 WS2812 strip x 1 Micro USB cable(Android data cable) Network-enabled computer
Hardware Connection First, plug micro:bit into Grove Shield for micro:bit v2.0 Then, connect the strip to the port labeled with P1/P15(It s OK to use other port, only if you modify the control port later) Finally, connect micro:bit to PC via micro USB cable.
Software Chrome kernel web browser(version greater than 67) PythonEditor community https://micropython.top/ Update DAPLink firmware of micro:bit to greater than 0247 which support webusb.
Software Using Chrome web browser Goto https://micropython.top Click Blockly to change to Blocks Editor
Download the program After you finish writing the program, click Flash and you can download the program by webusb. In the pop-up selection box, the program will be downloaded and run automatically after you select the device.
Download the program in traditional way If you haven t update the firmware, you have to download the HEX file and paste it into microbit to run.
Blocks of Neopixel From navbar on the leftside, you can find a category named Neopixel, it has four function to control the Neopixel.
Function Description of Blocks These blocks will be used to set which and how many pins controling the neopixels, turn off lights, refresh color setting, and set colors of neopixels. You can use any pin to control neopixel, and the quantity could be from 1 to 256.It s OK if you have more. However, micro:bit has small memory, too large a number will make program easier to go wrong and lights may go dim for the power of Grove Shield is not large enogh.
Blocks Editing Program below shows the basic way to control neopixels. The case shows the pattern of red light from dim to bright. Use pin1 to control, the number of lights of neopixels in the kit is 30.
Blocks & Code When you are using blocks to program, the corresponding Python code will be shown on the right side of the page.
Program with Code The picture below shows the corresponding code of the blocks. Campare to using blocks to make program, code is more concise and efficient. from microbit import * import neopixel display.show(Image.HEART) np = neopixel.NeoPixel(pin1, 30) for i in range(30): np[i] = (i, 0, 0) np.show()
Controlling Neopixels From the previos program we can tell that the basic way to control neopixels is: Define the number of neopixels, set the controlling pin and the number of neopixels(The number of neopixlels from Grove kit is 30) Set the color of light (one LED at a time) Using function show() to light up the LED We can see that it s quite easy to control neopixels. Using basic control and different algorithms to change the color regularly, we can make different patterns. Now we ll see how it works.
Neopixels Program 1Stars Shining Pattern: LEDs of the neopixels light up randomly, mimic the way of stars shining at night. How to make it work: Choose 3 LEDs from neopixel randomly Set the color of these three LEDs randomly Light up LEDs quickly to mimic the way stars shine Turn off LEDs after delay
Code of Star Shining import neopixel import random from microbit import * np = neopixel.NeoPixel(pin1, 30) while True: for count in range(int(random.randint(1, 3))): np[(random.randint(0, 29))] = ((random.randint(0, 32)),\ (random.randint(0, 32)),\ (random.randint(0, 32))) np.show() sleep(200) np.clear()
Neopixels Prgram 2: Breathing Light Pattern: The whole neopixels light up gradually and then dim gradually. How to make it work Increase or Decrease the color of LED(we take red for example later) Increase from 0 and decrease when it reaches apex
Code of Breathing Light import neopixel from microbit import * np = neopixel.NeoPixel(pin1, 30) r = 0 dr = 1 while True: for i in range(30): np[i] = (r, 0, 0) np.show() sleep(50) r = r + dr if r == 0 or r == 32: dr = 0 - dr
Neopixels Program 3: Breathing Light + Star Shining Pattern: Combine the last two examples,to show that random lights light up and dim gradually. How to make it works Combine the methods we use in making star shining and breathing light Use random number to produce the change in 3 colors
Code of Breathing Light + Star Shining import neopixel import random import math from microbit import * np = neopixel.NeoPixel(pin1, 30) while True: p = random.randint(0, 29) r = random.random() g = random.random() b = random.random() n = 0 d = 1 for i in range(51): np[p] = ((round(r * n)), (round(g * n)), (round(b * n))) np.show() sleep(10) np.clear() n = n + d if n >= 25: d = -1
Neopixels Program4Flow LED Pattern: Light up LEDs on the strip one by one, to make it look like the lights are flowing How to make it work Set a variable r, representing the position of LED Set the color of LED, light up the strip, turn them off after a delay Increase 4, when reaching its maximum number 30, it becomes 0 Only one LED light up at a time, and one by one
Code of Flow LED import neopixel from microbit import * np = neopixel.NeoPixel(pin1, 30) r = 0 while True: np[r] = (0, 30, 0) np.show() sleep(50) np.clear() r = r + 1 if r == 30: r = 0
Change of Flow LED Use different way to control flow LED, we can make different patterns of flow LED. Round Trip flow LED Color changing flow LED Variable speed flow LED
Color Changing Flow LED import neopixel import random from microbit import * np = neopixel.NeoPixel(pin1, 30) c = (0, 30, 0) while True: np[r] = c np.show() sleep(50) np.clear() r = r + 1 if r == 30: r = 0 c = (random.randint(0, 32),\ random.randint(0, 32),\ random.randint(0, 32))
Variable Speed Flow LED import neopixel import random from microbit import * np = neopixel.NeoPixel(pin1, 30) c = (0, 30, 0) d = 50 while True: np[r] = c np.show() sleep(d) np.clear() r = r + 1 if r == 30: r = 0 c = (random.randint(0, 32),\ random.randint(0, 32),\ random.randint(0, 32)) d = random.randint(20, 120)
Round Trip Flow LED import neopixel import random from microbit import * np = neopixel.NeoPixel(pin1, 30) c = (0, 30, 0) dr = 1 while True: np[r] = c np.show() sleep(50) np.clear() r = r + dr if r == 29 or r == 0: dr = -dr c = (random.randint(0, 32),\ random.randint(0, 32),\ random.randint(0, 32))
Neopixels ProgramSpinning Rainbow Pattern: Set the color of strip to gradient rainbow color, and show in spinning way. How to make it works Define function np_rainbow(np, num, bright, offset) to set the color of the strip. num is the number of LEDs in the strip bright is the greatest brightness offset is the starting position Divide the strip into 7 equally, set the color of each LED according to the color of the rainbow. By decreasing offset to make the effect of spinning
Code of Spinning Rainbow from microbit import * import neopixel np = neopixel.NeoPixel(pin1 ,32) def np_rainbow(np, num, bright=32, offset = 0): rb = ((255,0,0), (255,127,0), (255,255,0), (0,255,0),\ (0,255,255), (0,0,255), (136,0,255), (255,0,0)) for i in range(num): t = 7*i/num t0 = int(t) r = round((rb[t0][0] + (t-t0)*(rb[t0+1][0]-rb[t0][0]))*bright)>>8 g = round((rb[t0][1] + (t-t0)*(rb[t0+1][1]-rb[t0][1]))*bright)>>8 b = round((rb[t0][2] + (t-t0)*(rb[t0+1][2]-rb[t0][2]))*bright)>>8 np[(i+offset)%num] = (r, g, b) n = 0 while 1: np_rainbow(np, 30, offset = n) np.show() n += 1 sleep(30)


