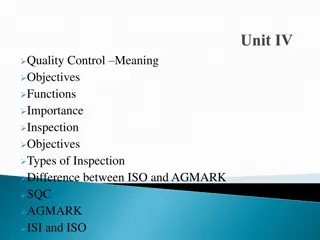
Quality Assurance and Inspection Processes in Manufacturing
Quality assurance and inspection play a crucial role in ensuring products meet standards. Inspection is categorized into receiving, in-process, and final stages. Standards of measurement, interchangeability, and factors influencing quality are discussed, along with planning and types of inspection. Various stages, types, and factors influencing manufacturing quality are highlighted, emphasizing the importance of measurement and gauging in maintaining standards.
- Quality assurance
- Inspection processes
- Manufacturing standards
- Measurement and gauging
- Interchangeability
Download Presentation

Please find below an Image/Link to download the presentation.
The content on the website is provided AS IS for your information and personal use only. It may not be sold, licensed, or shared on other websites without obtaining consent from the author. Download presentation by click this link. If you encounter any issues during the download, it is possible that the publisher has removed the file from their server.
E N D
Presentation Transcript
INSPECTION AN INSPECTION DETERMINES IF THE MATERIAL OR ITEM IS IN PROPER QUANTITY AND CONDITION, AND IF IT CONFORMS TO THE APPLICABLE OR SPECIFIED REQUIREMENTS. INSPECTION IS GENERALLY DIVIDED INTO THREE CATEGORIES: (1) RECEIVING INSPECTION (2) IN-PROCESS INSPECTION (3) FINAL INSPECTION
Units of Measurement 1.Length:-Metre 2.Mass:-Kilogram 3.Time:-Second 4.Electric Current:-Ampere 5.Temperature:-Kelvin 6.Luminous Intensity:-Candela 7.Matter:-Mole
INTERCHANGEABILITY An interchangeable part is one which can be substituted for similar part manufactured to the same drawing. TYPES OF INTERCHANGEABILITY: UNIVERSAL INTERCHANGEABILITY. SELECTIVE ASSEMBLY.
STANDARDS OF MEASUREMENTS PRIMARY STANDARDS. SECONDARY STANDARDS. TERTIARY STANDARDS. WORKING STANDARDS
Standards of Measurement A Standard is defined as something which is setup and established by authority, as a rule for the measurement of physical quantity or property. The various standards are:- 1.Line Standard 2.End Standard 3.Wavelength Standard
Planning of Inspection Various Stages to Plan an Inspection:- 1.What to Inspect? 2.When to Inspect? 3.Who Should Inspect? 4.Where to Inspect? 5.How to Inspect? 6.How much to Inspect?
Types of Inspection 1.Remedial Inspection 2.Preventive Inspection 3.Operative Inspection 4.Incoming Inspection 5.Inprocess Inspection 6.Centralised Inspection 7.Final Inspection
Factors Influencing the Quality of Manufacture:- Market Survey Organization Capacity Manufacturing Policies and Methods Design of the product Machines and Modernization Quality of Raw Material Skill of Labour Working Environment
Measurement and Gauging
Calipers A caliper is a device used to measure the distance between two opposite sides of an object. A caliper can be as simple as a compass with inward or outward-facing points. The tips of the caliper are adjusted to fit across the points to be measured, the caliper is then removed and the distance read by measuring between the tips with a measuring tool, such as a ruler.
Micrometers A micrometer sometimes known as a micrometer screw gauge, is a device incorporating a calibrated screw widely used for precise measurement of components[1]in mechanical engineering and machining as well as most mechanical trades, along with other metrological instruments such as dial, vernier, and digital calipers[2].
Dial Indicator A dial test indicator, also known as a lever arm test indicator or fingerindicator, has a smaller measuring range than a standard dial indicator. Types:- 1.Probe Indicator 2.Dial Test Indicator 3.Test Indicator 4.Digital Indicator
Surface Plate A surface plate is a solid, flat plate used as the main horizontal reference plane for precision inspection, marking out (layout), and tooling setup. Types:- 1. Granite Surface Plate 2. Cast Iron Surface Plate
Try Square A try square is a woodworking or a metalworking tool used for marking and measuring of pieces. The square refers to the tool's primary use of measuring the accuracy of a right angle (90 degrees); to try a surface is to check its straightness or correspondence to an adjoining surface. A piece of wood that is rectangular, flat, and has all edges (faces, sides, and ends) 90degrees is called four square.
Sine Bar A sine bar consists of a hardened, precision ground body with two precision ground cylinders fixed at the ends. The distance between the centers of the cylinders is precisely controlled, and the top of the bar is parallel to a line through the centers of the two rollers.
Slip gauges were first developed by Johnson, and sometimes also called as Johnson Gauge Blocks . These are rectangular blocks of steel having a cross-section of about 32 mm x 9 mm. Slip gauges are the universally accepted standard of length in industries. These are the simplest possible means of measuring linear dimensions very accurately. Slip Gauges
1. Levelling of the Machine. 2. True Running of Locating Cylinder of Main Spindle. 3. Axial Slip of Main Spindle and True Running of Shoulder Face of Spindle Nose. 4. True Running of Headstock Centre. 5. Parallelism of the Main Spindle to Saddle Movement. 6. True running of taper socket in main spindle. 7. Parallelism of tailstock guideways with the movement of carriage. Alignment Tests on Lathe Machine
1.Levelling of the Machine Before the various tests on any machine tool are carried out, it is very essential that it should be installed in truly horizontal and vertical planes. In horizontal plane, both longitudinal and transverse directions are equally important. If, say, any long lathe bed is not installed truly horizontal the bed will undergo a deflection, thereby producing a simple bend and undesirable stresses will be introduced. If the bed is not installed truly horizontal in transverse direction, twist will be introduced.
2.True Running of Locating Cylinder of Main Spindle. 2.True Running of Locating Cylinder of Main Spindle. Locating cylinder is provided to locate the chuck or face plate. However locating surface can t be threaded one as threads get worn out soon and thus introducing play in face plate or chuck. Thus locating surface is cylindrical and this must run truly; for only then the face plate etc., can run truly.
3. Axial Slip of Main Spindle Axial Slip of Main Spindle The spindle is supported between two bearings. Due to running of spindle, there will be a rise in temperature and thermal expansion of spindle would be there. If no axial play is allowed, it would try to bend.
4. True Running of Headstock Centre True Running of Headstock Centre Headstock centre is live centre and the workpiece has to rotate with this centre. If it is not true with the axis of movement of the spindle, eccentricity will be caused while turning a work, as the job axis would not coincide with the axis of rotation of main spindle.
5. Parallelism of the Main Spindle to Saddle Movement Parallelism of the Main Spindle to Saddle Movement This has to be checked in both vertical and horizontal planes. In this we require the use of mandrel. An important precaution in the use of mandrels and dial indicator is mentioned here. The mandrel must be so proportioned that its overhang does not produce appreciable sag, or else the sag must be calculated and accounted for.
1. Flatness of clamping surface of base. 2. Flatness of clamping surface of table. 3. Perpendicularity of drill head guide to the base plate. 4. Perpendicularity of drill head guide with table. 5. Perpendicularity of spindle sleeve with base plate. 6. True running of spindle taper. 7. Parallelism of the spindle axis with its vertical movement. 8. Squareness of clamping surface of table to its axis. Alignment Tests on Drilling Machine
1. Flatness of clamping surface of base 1. Flatness of clamping surface of base The test is performed by placing a straight edge on two gauge blocks on the base plate in various positions and the error is noted down by inserting the feeler gauges. This error should not exceed 0.1/1000 mm clamping surface and the surface should be concave only.
2.True running of spindle taper 2.True running of spindle taper For this test, the test mandrel is placed in the tapered hole of spindle and a dial indicator is fixed on the table and its feeler made to scan the mandrel. The spindle is rotated slowly and readings of indicator noted down.
3.Perpendicularity of drill head guide with table. 3.Perpendicularity of drill head guide with table.
1. Test for flatness of work table. 2. Test for parallelism of the work table. 3. True Running of Internal Taper of main spindle. 4. Table surface parallel with arbor rising towards overarm. 5. Test for Table Surface Parallel with Longitudinal Movement. 6. Central T-Slots Parallel with Longitudinal Movement of table. Alignment Tests on Milling Machine
Total Quality Management A SYSTEM OF MANAGEMENT BASED ON THE PRINCIPLE THAT EVERY MEMBER OF STAFF MUST BE COMMITTED TO MAINTAINING HIGH STANDARDS OF WORK IN EVERY ASPECT OF A COMPANY'S OPERATIONS.
ISO 9000 is a set of international standards on quality management and quality assurance developed to help companies effectively document the quality system elements to be implemented to maintain an efficient quality system. They are not specific to any one industry and can be applied to organizations of any size. ISO 9000 can help a company satisfy its customers, meet regulatory requirements, and achieve continual improvement. However, it should be considered to be a first step, the base level of a quality system, not a complete guarantee of quality. ISO 9000
It is a model for quality assurance in design, development, production, installation and servicing. ISO-9001 applies to industries who produce, install product and provide services after sales as per the requirements of the customer. ISO 9001
An ISO 9002 international certificate is a written assurance by a certification body that a company follows the requirements, specifications and guidelines set out by the International Organization for Standardization in its ISO 9002 standard. ISO-9002 gives a model quality assurance in production and installation. ISO 9002
ISO 9003 refers to a standard developed and published by the International Organization for Standardization (ISO). The ISO-9003 model provides assurance in Quality system in final inspection. ISO 9003
ISO-9004 It gives the guidelines for quality management.
The 7 Basic Tools of Quality are: Cause and Effect Diagram (Ishikawa Diagram / Fishbone Diagram) Control Chart Pareto Chart Scatter Diagram Histogram Check Sheet Flow Chart QC TOOLS
KAIZEN 5S 5S is the foundation of all improvements and is the key component of establishing a Visual Workplace. Both are a part of Kaizen a system of continual improvement.
Advantages of 5S Methodology 1 2 3 4 5 Reducing the waste and other losses in an organization. Improving the workplace environment. Improving the quality. Improving the efficiency of process. Improving the employee safety.
The empirical distribution, or empirical distribution function, can be used to describe a sample of observations of a given variable. Its value at a given point is equal to the proportion of observations from the sample that are less than or equal to that point. Empirical Distribution
Histograms A histogram is a plot that lets you discover, and show, the underlying frequency distribution (shape) of a set of continuous data. This allows the inspection of the data for its underlying distribution (e.g., normal distribution), outliers, skewness, etc.
Standard Deviation a quantity expressing by how much the members of a group differ from the mean value for the group is known as standard deviation.
Control Chart The control chart is a graph used to study how a process changes over time. Data are plotted in time order. A control chart always has a central line for the average, an upper line for the upper control limit and a lower line for the lower control limit. These lines are determined from historical data.
Sampling Plans Nonprobability sampling. Simple random sampling. Systematic sampling. Stratified sampling. Probability-proportional-to-size sampling. Cluster sampling. Quota sampling. Minimax sampling.
Inspection Plan Format


