Effective Data Management in the New CountrySTAT Platform

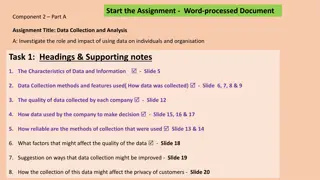
Streamline data management processes in the new CountrySTAT platform through training focal points on the CountrySTAT/FENIX system. Learn the ins and outs of the Data Structure Definition (DSD) editor, data uploading, and dataset editing. Explore the workflow for creating and publishing tables, ensuring proper codification, data readiness, and metadata completion. Get hands-on experience with the DSD editor to create structured datasets for seamless data management.

Uploaded on Sep 12, 2024 | 0 Views
Download Presentation

Please find below an Image/Link to download the presentation.
The content on the website is provided AS IS for your information and personal use only. It may not be sold, licensed, or shared on other websites without obtaining consent from the author. Download presentation by click this link. If you encounter any issues during the download, it is possible that the publisher has removed the file from their server.
E N D
Presentation Transcript
CountrySTAT / FENIX Overview of the DSD and DATA editor in the new CountrySTAT platform TRAINING OF FOCAL POINTS ON THE CountrySTAT/FENIX SYSTEM
Overview Uploading tables in CountrySTAT DSD Editor: Creation of the DSD structure Data Editor: Uploading values Retrieving tables in CountrySTAT Editing an already uploaded dataset
Work flow Create your table following the rules Use the right codification Have the data ready CVS format No columns with labels CPC 2.1 HS GAUL CountrySTAT indicators Unit of Measurement DAC Attributes Flag Forestry production Fishery production Scientific Fishery production metadata ready Have the Title Subject Data type Domain Your table is published Go to the metadata editor Upload the values Create the DSD structure Fill all metadata 12/09/2024 3
DSD editor The "edit resource" box contains three buttons: "Metadata", which brings back to the metadata editor tool. "DSD" to create the DSD structure mirroring the one of your dataset (Next step) "Data" to upload your dataset from your CSV file (Last step)
DSD editor Start adding columns to the DSD structure by clicking the "+" symbol The structure should mirror the one of the dataset you wish to upload Dimension refers to time and geo information as well as indicators and products Value refers to actual numeric or percentages values Other refers to flag and unit of measurement columns.
DSD editor Click on the Dimension +" button will lead to this page in which the following information can be entered: Column label in your final dataset. DO NOT call it e.g. product code Title, which refers to the column header s name Subject, which refers to the type of data contained in the column Data type, which specifies the type of data chosen in the subject Domain, which requires the user to select the appropriate codelist from those available, if needed Once finished, do not forget to click here!
DSD editor exemple: YEAR
DSD editor exemple: YEAR
DSD editor exemple: INDICATOR
DSD editor exemple: INDICATOR
DSD editor exemple: PRODUCT
DSD editor exemple: PRODUCT Choose the appropriate one
DSD editor exemple: VALUE
DSD editor exemple: VALUE
DSD editor exemple: FLAG
DSD editor exemple: FLAG flag
DSD editor exemple: UNIT OF MEASUREMENT
DSD editor exemple: UNIT OF MEASUREMENT
DSD editor Do not forget to save it After having filled all the columns, we will this result! Unit of measurement : it is not a key dimension meaning that two identical datasets that differ uniquely by the UM can not be uploaded
Data Editor You will be brought again to the page with the three buttons. To continue with the upload, please click on Data . As a reminder: The "edit resource" box contains: "Metadata", which brings back to the metadata editor tool. "DSD" to create the DSD structure mirroring the one of your dataset "Data" to upload and modify your dataset
Data Editor Once the DSD has been saved, it is recommended to wait until the bar, indicated by the red arrow, is completely showed on the screen. At this stage you can go on.
Data Editor In the "Data Editor" section, before uploading the table from your computer, it is important to specify the separator used in your CSV file. The default separator is : semicolon for French computers comma for English Computer
Data Editor After having selected the appropriate type of separator, the dataset can be uploaded by clicking on Choose file" Do not forget that the dataset must be necessarilyin CSV format
Data Editor Once the dataset you wish to upload is selected, a new interface will open. Here you will have to align the columns of your dataset with the ones you created through the DSD editor. To switch two columns simply drag and drop the name of any column. Do not forget to press the OK button once finished
Data Editor Once the dataset has been uploaded, it will look as above! These are only the first few lines of your dataset, PLEASE check them to see if they correspond to your original Excel file
Data Editor Do not forget to click the "Save" button to complete the uploading process
Retrieving tables in CountrySTAT In order to retrieve a previously stored table, please click on Data Management
Retrieving tables in CountrySTAT Tables retrieval is driven by the metadata previously stored during the uploading of the dataset. By clicking on the Search button, datasets can be retrieved by imposing metadata fields as filters.
Retrieving tables in CountrySTAT By clicking on data domain , Reference area (and so on by clicking on the + button) the retrieval of datasets can be filtered. More than one filter can be selected at once. Here you have all the list of dataset available in the website
Retrieving tables in CountrySTAT The more criteria are imposed the more the dataset s retrieval will be refined, since, by selecting more than one filter at once, only datasets compliant with every one of those filters will be shown.
Editing an already uploaded dataset After successfully retrieving a dataset, by clicking on the Data button from the Edit Resource box, the above-mentioned dataset will be shown
Editing an already uploaded dataset By clicking on the Pencil button of any row, a pop-up will be displayed allowing the chosen row to be modified. By clicking on the Dustbin button of any row, the chosen row will be removed from the dataset.
Editing an already uploaded dataset A new row can be added to the dataset without uploading it again from the beginning. This can be done by clicking on the Plus button located at the bottom left of the page and compiling the newly- appeared pop-up.
Editing an already uploaded dataset After all the editing has been done, remember to click on the Save button on the top right of the page.