Splinting Procedures and Equipment: A Comprehensive Guide
Learn about the indications for splinting, necessary equipment, plaster preparation, and general splinting procedures for various conditions such as acute arthritis, fractures, and dislocations. The guide includes detailed steps and images to assist in properly applying splints for optimal patient care.

Download Presentation

Please find below an Image/Link to download the presentation.
The content on the website is provided AS IS for your information and personal use only. It may not be sold, licensed, or shared on other websites without obtaining consent from the author. Download presentation by click this link. If you encounter any issues during the download, it is possible that the publisher has removed the file from their server.
E N D
Presentation Transcript
Procedures: Splinting NORTHWESTERN EM ORTHO CURRICULUM
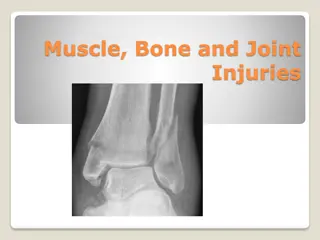
Indications for Splinting Acute arthritis, including acute gout Severe contusions and abrasions Skin lacerations that cross joints Tendon lacerations Tenosynovitis Puncture wounds/bites to the hands, feet, and joints Fractures and sprains Reduced joint dislocations
Splinting Equipment Stockinette Splinting material Plaster of Paris (at NMH) Strips or rolls (2-, 3-, 4- or 6-inch widths) Prefabricated Splint Rolls Plaster Fiberglass with polypropylene padding (at CMH) Padding (Webril) Ace Wrap Bucket/receptacle of warm water Trauma sheers
Plaster Preparation Length: Measure out the dry splint at the extremity to be splinted remember the plaster shrinks slightly when wet, if too long, the ends can be folded back Use plaster width that is slightly greater than the diameter of the limb Can be measured on the contralateral extremity to avoid excessive manipulation of the injured extremity Thickness: UE: 8-10 layers LE 10-12 layers
General Splinting Procedure 1) Stockinette is applied 2) Webril is applied 3) The wet plaster is positioned 4) Elastic bandage is applied 5) The plaster is molded
General Splinting Procedure Measure and prepare the plaster Apply the stockinette so that it extends 2 or 3 inches beyond the plaster Apply 2 or 3 layers of Webril over the area to be splinted Be generous Avoid wrinkles Place extra padding around bony prominences Place Webril between digits that are going to be splinted to avoid maceration Wet the plaster and place it over the area to be splinted Submerge the premeasured plaster in unused warm water Remove the splint from the water and squeeze out the excess water and remove wrinkles Fold the ends of stockinette over the the plaster to smooth the edges of the splint
General Splinting Procedure (contd) Place a layer of Webril over the plaster Apply the ace wrap around the splint to secure it in place Unwrap the bandage without placing too much tension around the extremity While still wet, mold the plaster to conform to the shape of the extremity Use the palms of your hand rather than the fingers Place the patient s extremity in the position desired Keep the patient still until the splint has dried and hardened (the plaster will become warm as it s drying) Fast-drying: 5-8 minutes Extra-fast drying: 2-4 minutes After the splint has dried, check the splinted extremity for function, arterial pulse, capillary refill, temperature of skin, and sensation
Specific Splints Lower Extremity Upper Extremity Long arm posterior splint Double sugar tong splint Volar splint Sugar tong splint Thumb spica splint Ulnar gutter splint Radial gutter splint Finger splints Posterior knee splint Jones compression dressing Posterior ankle splint U-splint/stirrup splint
Long Arm Posterior Splint Indications Injuries of the elbow and proximal forearm Construction Starts on the posterior aspect of the proximal arm Down the ulnar aspect of arm Ends at the MCP joints Application/Positioning Cut hole in stockinette for thumb Elbow at 90 degrees Forearm neutral position with thumb up Neutral or slightly extended wrist (10 -20 degrees)
Double Sugar Tong Indications Complex and unstable forearm and elbow fractures Construction Forearm splint from MC heads on the dorsal hand, around elbow to volar MCP joints Arm splint from anterior proximal humerus, around elbow, to posterior arm to prox humerus Application/Positioning Cut hole in stockinette for thumb Elbow at 90 degrees Forearm neutral with thumb up Slightly extended wrist (10 -20 degrees)
Volar Splint Indications Soft tissue injuries of the hand and wrist Carpal bone fractures, 2nd 5thMC head fractures Construction Starts in the palm at the MC heads, down the volar aspect of forearm to distal forearm Application/Positioning Cut hole in stockinette for thumb Forearm in neutral position with thumb up Wrist slightly extended (10-20 degrees)
Sugar Tong Splint Indications Distal radius and ulna fractures Construction From MC heads on the dorsal hand, around elbow to volar MCP joints Application/Positioning Cut hole in stockinette for thumb Elbow at 90 degrees Forearm neutral with thumb up Slightly extended wrist (10 -20 degrees)
Thumb Spica Splint Indications Injuries to scaphoid, lunate, thumb and 1stmetacarpal Gamekeeper s thumb De Quervain tenosynovitis Construction From just distal to the interphalangeal joint of thumb to mid-forearm Application/Positioning Cut hole in stockinette for thumb Forearm in neutral position with thumb in wineglass position
Ulnar Gutter Splint Indications Fractures and soft tissue injuries of 5thdigit Fractures of the neck, shaft, and base of 4thand 5th metacarpals. Construction Starts at mid-forearm, runs along ulnar aspect of forearm to just beyond the DIP joint Include the 4thand 5thdigits Application/Positioning Forearm in neutral Slight wrist extension (10-20 degrees) PIP and DIP joints 10-15 degrees of flexion 50 degrees of flexion of MCP joints If Boxer s fracture -> MCP joint flexed to 90 degrees
Radial Gutter Splint Indications Fractures and soft tissue injuries of index and 3rd digits Fractures of the neck, shaft and base of the 2ndand 3rd metacarpals Construction Starts at mid-forearm, down the radial aspect of forearm to just distal to the DIP joint of 2ndand 3rddigits Application/Positioning Cut hole in stockinette and plaster for the thumb Hand in position of function Forearm in neutral position Wrist slightly extended MCP 50 degrees of flexion PIP and DIP joints 5 to 10 degrees of flexion
Finger Splints Buddy tape Indications: minor finger sprains Aluminum finger splints Phalanx fractures After tendon repairs
Finger Splints for Mallet Finger Indication Mallet Finger Construction Splint only the DIP joint Application/Positioning Splint DIP joint in hyperextension Cannot be removed for 6-8 weeks
Posterior Knee Splint Indications Patients with legs too large for knee immobilizer Angulated fractures Injuries that require urgent operative fixation Construction Starts just below buttocks crease on dorsal aspect of leg to 5 to 8 cm above the malleoli Application/Positioning Slightly flexed knee (especially in kids so they don t bear weight)
Jones Compression Dressing Indications Short-term immobilization of soft tissue injuries of knee Not for injuries that require strict immobilization Construction Webril and Ace wrap from the groin to a few inches above the malleoli 2 to 3 layers of webril Application Slight flexion of the knee
Posterior Ankle Splint (Post Mold) Indications Severe ankle sprains Fractures of distal fibula and tibia Reduced ankle dislocations Can add stirrup splint for unstable ankle fractures Construction From plantar surface of the metatarsal heads to the level of the fibular head posteriorly Application/Positioning Most easily applied in the prone position Ankle to 90 degrees
U-Splint/Stirrup Splint Indications Severe ankle sprains Fractures of distal fibula and tibia Reduced ankle dislocations Can be added to post mold for unstable ankle fracture Construction Passes under the plantar surface of foot and extends up medial and lateral sides of leg to just below level of fibular head Application/Positioning Most easily applied in the prone position Ankle to 90 degrees If placed with post mold, place post mold first


")


")