Procedures for Creating a Requisition Leading to a Purchase Order
Learn how to create a requisition that results in a purchase order. Follow detailed steps from accessing the special requests form to checking out, reviewing, and submitting the requisition. Utilize the eSHOP portal for catalog items and special requests for non-catalog items. Ensure all necessary details are entered accurately for a smooth process.
Download Presentation

Please find below an Image/Link to download the presentation.
The content on the website is provided AS IS for your information and personal use only. It may not be sold, licensed, or shared on other websites without obtaining consent from the author.If you encounter any issues during the download, it is possible that the publisher has removed the file from their server.
You are allowed to download the files provided on this website for personal or commercial use, subject to the condition that they are used lawfully. All files are the property of their respective owners.
The content on the website is provided AS IS for your information and personal use only. It may not be sold, licensed, or shared on other websites without obtaining consent from the author.
E N D
Presentation Transcript
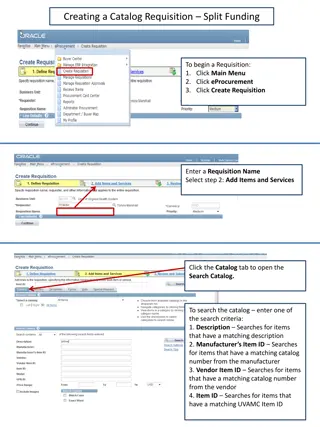
Create Requisition Procedures for Creating a Requisition which results into a purchase order.
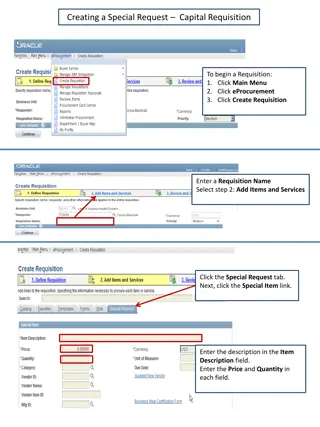
Navigation NAV BAR MENU FINANCIALS E-PROCUREMENT CREATE REQUISITION
Create Requisition: Create Requisition: Home Page Home Page The Create Requisition screen will have the Special Request form available as the default home screen. You can access eSHOP, Templates, and Favorites by expanding the Request Options to the left of the page, if needed it is not already expanded. User Guide for Making eSHOP Purchases https://www.uttyler.edu/procurement- services/files/user-guide-eshop-purchases.pdf
Create Requisition: Create Requisition: Special Requests Special Requests Fill out the Special Requests form to create requisitions for goods or services that are not included in eSHOP or shop by accessing the eSHOP Portal (SciQuest eSHOP Portal). Enter Details (1-9 Non eSHOP Requisition) 1. Enter the Item Description 2. Enter the Price for the non-catalog item 3. Enter the Quantity 4. Enter or search the Category 5. Enter or search the Unit of Measure 6. Enter or select the Due Date. Checkout The cart icon gives you a line count in your shopping cart. The summary of your cart will display to the right if you click on the link. 7. Enter or search the Supplier ID or the Supplier Name. If you fill out the Supplier ID, then the Supplier Name will auto-fill and vice versa 8. Enter or search the Mfg ID, if applicable 9. Enter or search the Mfg Item ID, if applicable 10. Under Additional Information, enter additional comments Note: Steps 1-9 are excluded from eSHOP purchases. Please see the link below for eSHOP job aid. https://www.uttyler.edu/procurement-services/files/user-guide- eshop-purchases.pdf 11. Check the appropriate boxes 12. Click Add to Cart to add to your shopping cart
Create Requisition: Create Requisition: Checkout Checkout- -Review and Review and Submit Submit Review your Requisition. The fields are generally the same for the Checkout-Review and Submit page. There are some additions highlighted below. 1. Enter Requisition Name. 2. Expand the details using the arrow next to the Requisition Line to modify the Accounting Lines. 3. Use the SpeedChart to auto-populate Chartfield values. 4. Enter Requisition Comments and Attachments here or Approval Justification. 5. Check the appropriate boxes. 6. Click Add More Items if you wish to go back and add more non-catalog items. 7. Click Save for Later if you wish to save and modify this requisition later. NOTE: All steps included on slide 5 will need to be completed for eSHOP and non-eSHOP requisitions.
Create Requisition: Create Requisition: Checkout Checkout- -Review and Review and Submit (Continued) Submit (Continued) 1. Use the Pre-Check budget or Check Budget link to validate available funds. Using the pre-check budget will initiate the budget processor and check the budget without reserving funds. The check budget feature will apply a pre-encumbrance for this requisition (if valid). See the budget checking section (Slide 8) for more details. 2. Once you have reviewed your requisition there is an option to Save it for Later. 3. If you are ready to submit the requisition, click Check Budget. Once you receive a Valid status, click Save and Submit for approval workflow. 4. If you receive a Budget Error, proceed to slide 9 for further instructions. NOTE: All steps included on slide 6 will need to be completed for eSHOP and non-eSHOP requisitions.
Create Requisition: Create Requisition: Mass Change Mass Change (Optional) (Optional) Mass Change is an optional method to enter Shipping/Accounting details for selected lines, where you can change the shipping location, delivery date, and so on. It is also the best way to Modify multiple lines for any requisition using the same distribution chartfield. 1. Select the line or lines you wish to change. Once lines have been selected, click Mass Change. 2. Enter Ship to Location, Due Date,Attention, and SpeedChart. Add additional comments if needed. 3. Select the appropriate option fitting your needs for the Distribution Change. Select OK
Create Requisition: Create Requisition: Mass Change Mass Change (Optional) Continued (Optional) Continued As steps 1-3 are completed on slide 7, you will return to the Review and Submit summary. The image below reflects line 2 has been changed per Mass Change. You can proceed with the remaining steps on slides 5 and 6.
system s process of checking a purchase against a budget prior to committing to a vendor. The difference between a Budget Check and a Pre-Check Budget is that a pre-encumbrance (funds reduced from budget) is not recorded for a pre-budget check and is recorded for the budget check process. Budget Check is the term used to describe the PeopleSoft Using a Pre-Check Budget if the funds are available for the purchase, the system will indicate that the budget status is Provisionally Valid meaning that the funds are available at the time the check was done but they have not been encumbered. Budget Budget Checking Checking Using Budget Check if the funds are available for the purchase, the system will indicate that the budget status is Valid meaning that the funds are available at the time the check was done and funds have been pre-encumbered. If the funds are not available (Pre Budget-Check or Budget Check), the system will display an error and the purchase requisition will not move forward.
Budget Statues Budget Statues Budget Statues are as follows: Not Chk d (not checked) - This is the requisition's initial budget-checking status. The status may also return to this value after a value change that affects the budget status. Provisionally Valid - The Pre-Budget Check process has verified that the funds are available, but the funds have not been encumbered, Valid - The requisition has been successfully budget-checked and the funds have been encumbered. Error - The requisition has failed budget checking. The text is enabled as a link, which you can click to access the Requisition Exceptions page where you can view budget check exceptions for this requisition. Users with appropriate authority can override the budget exceptions on the Requisition Exceptions page. If you receive a budget error, please email budget@uttyler.edu to review and override the error. Once you have a Valid budget, submit the requisition to the budget authority for approval.
Q & A Q & A What happens after the requestor submits a requisition with a Valid budget? The requisition will route through workflow, awaiting Budget Authorities approval. What happens after the Budget Authority approves a requisition? (Two Parts) Once a Budget Authority approves a requisition under $15,000.00, it will auto-dispatch a purchase order to the requestor by email. Once a Budget Authority approves a requisition over $15,000.00, it will move into a Pending purchase order status. Procurement Services will need a signed executed agreement if applicable and all supporting documents for approval. Upon approval, the purchase order will be emailed to the requestor to be forwarded to the supplier.
Procurement Services purchasing@uttyler.edu
