How to Enter a Requisition Blanket PO in Tyler Menu
Detailed step-by-step guide on entering a requisition for a blanket purchase order in Tyler Menu. Covers important reminders about blanket POs, including single line item requirement, approved vendor usage, limitations on items to be purchased, and maximum amount per blanket PO. Instructions include selecting BISD, adding a new requisition, completing required fields, adding vendor sourcing notes, and printing the purchase order.
Download Presentation

Please find below an Image/Link to download the presentation.
The content on the website is provided AS IS for your information and personal use only. It may not be sold, licensed, or shared on other websites without obtaining consent from the author.If you encounter any issues during the download, it is possible that the publisher has removed the file from their server.
You are allowed to download the files provided on this website for personal or commercial use, subject to the condition that they are used lawfully. All files are the property of their respective owners.
The content on the website is provided AS IS for your information and personal use only. It may not be sold, licensed, or shared on other websites without obtaining consent from the author.
E N D
Presentation Transcript
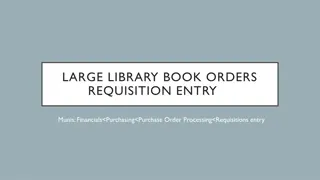
HOW TO ENTER A REQUISITION BLANKET PO Tyler Menu: Munis > Financials > Purchasing > Purchase Order Processing > Requisition Entry
THINGS TO REMEMBER ABOUT BLANKET PO S Blanket PO s are always 1 line item only Must utilize an approved vendor No furniture, technology, or equipment to be purchased No fixed asset ($500 single item) Max amount of $5,000 per blanket & per vendor *Exceptions: Contracts with known amounts whereby the blanket is encumbering the full contract amount. Closed quarterly Tracking of purchases is required (original receipts must be kept) Those who can make purchases under each blanket should be designated by the department/campus
Click Add to start a new requisition
Your department/campus # will auto populate. Tab down to be assigned the next available requisition number.
Tab through to complete the following fields: General Description short description to identify the order quickly. Must include Blanket. Receive By must be clicked to Amount
Tab through to complete the following fields: Vendor number can found on the Approved Vendors List. Tab & info will auto populate. Delivery Method must be marked Print only Reference Who to contact with questions and who the order is for Click Vendor/Sourcing Notes
Click Add to start a new vendor sourcing note In the box enter the Vendor Sourcing # found on the Approved Vendors List This is your place to communicate with Purchasing and special instructions that are needed Click Print on PO to check the box for information to print on the purchase order Click Back to return to your requisition
You will know your Vendor Sourcing is completed when be folder turns yellow Click Accept to add line items
Quantity always will be 1.00 Description list of what will be purchased Amount the total amount that will need to be spent over the period of time Account enter the budget code(s) that is applicable for the purchase. Questions about account codes should be directed to the Business Office Click Accept & Back to return to the main page of the requisition
Click Release to release the requisition for approvals 1. Rejected: The requisition has been rejected by an approver. Click the Approvers button to view the rejection comments. To update a rejected requisition, click the Activate button. 2. Created: The requisition header (general) details have been entered, but general ledger (GL) details have not been entered, or the requisition has a header and GL detail, but does not have the appropriate budget to move to status 4. 4. Allocated: The requisition has been entered and has been allocated (charged) to a general ledger account, therefore money is being taken from the available budget. The requisition has not been released into the workflow. A requisition must be in a status 4-Allocated to be released into the workflow; click Release to initiate the workflow process. 6. Released: The requisition has been released into the workflow and is awaiting approval. Click the Approvers button to see the current approval status. 8. Approved: The requisition has been fully approved in the workflow and is ready to be converted to a purchase order. 0. Converted: The requisition has been converted to a purchase order. The number is included on the Terms/Miscellaneous tab in Requisition Entry.
