Layout Arrangements in App Inventor

 
- Sharing,
- Layout,
- & using Screens
with App Inventor
 
Earl Bergquist, Garfield High School
 
Crucial Things to know:
 
Installing and Sharing an App
 
Installing an App to a Device:
1.
Build
 the 
App
 as a 
QR Code
: the displayed QR code is simply is
a link to a copy of your .apk file online for the next couple
hours.  Use a scanner App to Scan the QR code, taking you to
the URL of the .apk that can be download and installed.
2.
Build
 the 
App
 “save .apk to my computer” simply does that,
you will find the .apk file in your downloads, and you can
manually copy or share that file to be installed on any Android
device.
 
Note: Android Devices (enabled for "Unknown Sources”)
allow one to install Apps files (.apk) that are downloaded
from the internet or copied to the device.  AI has two
options under the “Build” tab to accomplish this:
 
 
Sharing an App Inventor Project
 
Sharing an AI Project (.aia file):
Export .aia
: Under Projects tab, there is the item to
“Export selected project (.aia) to my computer” (or
all of them).  This will assemble the project and
download its .aia file to your computer.  This file can
then be shared or turned in as an assignment.
Import .aia: 
Under the Projects tab, there is the
item to “Import project (.aia) from my computer …”
which will allow you to select the file to be
imported and then adds a full copy of that project
to your account.
 
Note
: Android Apps files (.apk) do not allow one to
view a Project Design or Blocks in App Inventor,
this requires importing a copy of the project via
the .aia file:
 
http://appinventor.mit.edu/explore/ai2/share.html
 
Layout Arrangements
 
Unlike LucidChart, App Inventor auto
arranges components in one of three ways:
Horizontally
Vertically
Tables
 
 
These can be found in the 
Layout
 tab.
 
http://ai2.appinventor.mit.edu/reference/components/layout.html
 
Horizontal
 
Example: Three buttons lined up horizontally
 
http://ai2.appinventor.mit.edu/reference/components/layout.html#HorizontalArrangement
 
Vertical
 
Example: Image and label lined up Vertically,
and automatically centered
 
http://ai2.appinventor.mit.edu/reference/components/layout.html#VerticalArrangement
 
Table
 
Example: a 2 x 4 table of labels
 
http://ai2.appinventor.mit.edu/reference/components/layout.html#TableArrangement
 
Combination
 
Example: a vertical arrangement with an image
and a horizontal arrangement with 2 buttons
 
http://ai2.appinventor.mit.edu/reference/components/layout.html
 
Screens
 
Additional Screens can be add and deleted to create
the pages of an App:
 
Under 
Control
, add Blocks to “open another screen”
by name (i.e. when a button is clicked) and make
sure to “close screen” the current.


Note
: the clever use
of an “if true” block
to include both the
screen blocks here,
since there is no bump
below the “open” block.
 
Warning
 about Screens
 
Screens can be flaky when used with AI Companion.
Hopefully this will be fixed soon, but…
If the device is not going to the next screen when using
the AI Companion, simply change the screen manually
from App Inventor.
 
The best way to test navigating screens is to Build and
install the .apk file to a device.
There is an alternative using on Screen with a series of
Templates to accomplish the pages of an App; for more
details see this webpage:
https://sites.google.com/site/garfieldappsclass/home/class-resources/templates-for-app-inventor-2


Screens and Data
 
You can pass one data value (variable) from screen
to screen, using these two control blocks:


But if you have more data, it is best to use a
database (DB).  See Tutorial videos on the 
TinyDB
and 
TinyWebDB
 at the 
Technology Alliance 
page:
 
https://vimeo.com/technologyalliancewa/videos
 
There’s lots to help out there
 
- The MIT App Inventor site 
(
appinventor.mit.edu
) has a ton
of 
Resources
 to help: 
Tutorials
, Curriculum, Forums and
excellent 
Concept Cards 
(even better when laminated):
http://appinventor.mit.edu/explore/resources/beginner-app-inventor-concept-cards.html
 
                         
-  
AppInventor.org
 has Beginner & Intermediate
   
       Video Tutorials & a “Course in a box”
+ 
Plus an Excellent Book
:
App Inventor 2: Create your own
Android Apps 
by David Wolber
Free online at:
http://www.appinventor.org/book2
Also available in print…
Slide Note

About us

TA – STEM initiative

1. Develop or increase “STEM identity” for Washington state students traditionally underrepresented in STEM fields.

2. Positively shift educator, community, and students’ knowledge, attitudes, and skills in STEM, with a specific emphasis on computer science.

3. Use apps development to stimulate the qualities of entrepreneurship, design, and inventiveness among our youth.

Youth Apps Challenge is funded through the American Recovery and Reinvestment Act (ARRA) and administered by the Washington State Broadband Office of the Department of Commerce.

about Apps for Good

Non-profit based in the UK, started in 2009.

Goal to transform the way technology is taught in schools; to empower students from all backgrounds to seize the opportunities of our digital age and create solutions to the problems they care about, using technology.

20,000 students in 230 schools with 800 educators who tap into more than 400 industry experts.

Expanding internationally. WA first intl pilot

Learn today:

Youth Apps/Apps for Good curr resources

Basic computer programming concepts

How to make an app prototype

How to facilitate apps

Embed
Share

Explore how to share, install, and manipulate screens in App Inventor with ease. Learn crucial aspects such as sharing projects, layout arrangements like horizontal and vertical setups, and utilizing tables effectively.

  • App Inventor
  • Layout Arrangements
  • Screen Sharing
  • Screen Installation
  • Mobile App Development

Uploaded on Sep 29, 2024 | 0 Views


Download Presentation

Please find below an Image/Link to download the presentation.

The content on the website is provided AS IS for your information and personal use only. It may not be sold, licensed, or shared on other websites without obtaining consent from the author. Download presentation by click this link. If you encounter any issues during the download, it is possible that the publisher has removed the file from their server.

E N D

Presentation Transcript


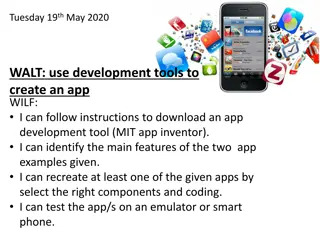
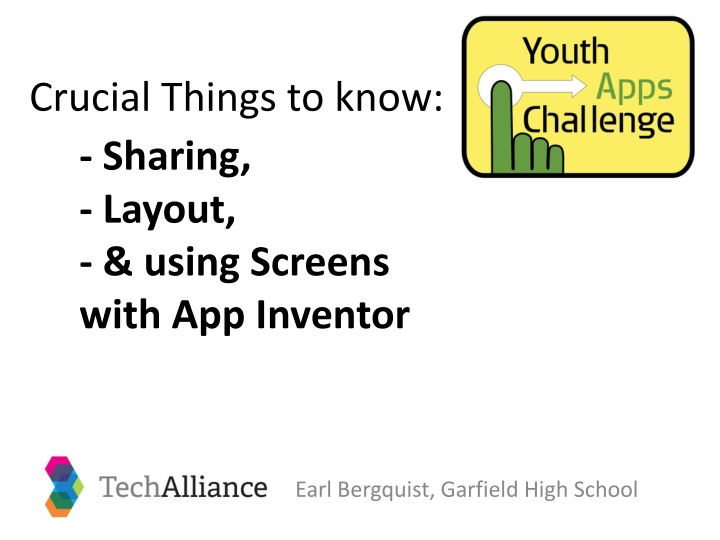
  1. Crucial Things to know: - Sharing, - Layout, - & using Screens with App Inventor Earl Bergquist, Garfield High School

  2. Installing and Sharing an App http://appinventor.mit.edu/explore/ai2/share.html Note: Android Devices (enabled for "Unknown Sources ) allow one to install Apps files (.apk) that are downloaded from the internet or copied to the device. AI has two options under the Build tab to accomplish this: Installing an App to a Device: 1. Build the App as a QR Code: the displayed QR code is simply is a link to a copy of your .apk file online for the next couple hours. Use a scanner App to Scan the QR code, taking you to the URL of the .apk that can be download and installed. 2. Build the App save .apk to my computer simply does that, you will find the .apk file in your downloads, and you can manually copy or share that file to be installed on any Android device.

  3. http://appinventor.mit.edu/explore/ai2/share.html Sharing an App Inventor Project Note: Android Apps files (.apk) do not allow one to view a Project Design or Blocks in App Inventor, this requires importing a copy of the project via the .aia file: Sharing an AI Project (.aia file): Export .aia: Under Projects tab, there is the item to Export selected project (.aia) to my computer (or all of them). This will assemble the project and download its .aia file to your computer. This file can then be shared or turned in as an assignment. Import .aia: Under the Projects tab, there is the item to Import project (.aia) from my computer which will allow you to select the file to be imported and then adds a full copy of that project to your account.

  4. Layout Arrangements Unlike LucidChart, App Inventor auto arranges components in one of three ways: Horizontally Vertically Tables These can be found in the Layout tab. http://ai2.appinventor.mit.edu/reference/components/layout.html

  5. Horizontal Example: Three buttons lined up horizontally http://ai2.appinventor.mit.edu/reference/components/layout.html#HorizontalArrangement

  6. Vertical Example: Image and label lined up Vertically, and automatically centered http://ai2.appinventor.mit.edu/reference/components/layout.html#VerticalArrangement

  7. Table Example: a 2 x 4 table of labels http://ai2.appinventor.mit.edu/reference/components/layout.html#TableArrangement

  8. Combination Example: a vertical arrangement with an image and a horizontal arrangement with 2 buttons http://ai2.appinventor.mit.edu/reference/components/layout.html

  9. Screens Additional Screens can be add and deleted to create the pages of an App: Under Control, add Blocks to open another screen by name (i.e. when a button is clicked) and make sure to close screen the current. Note: the clever use of an if true block to include both the screen blocks here, since there is no bump below the open block.

  10. Warning about Screens Screens can be flaky when used with AI Companion. Hopefully this will be fixed soon, but If the device is not going to the next screen when using the AI Companion, simply change the screen manually from App Inventor. The best way to test navigating screens is to Build and install the .apk file to a device. There is an alternative using on Screen with a series of Templates to accomplish the pages of an App; for more details see this webpage: https://sites.google.com/site/garfieldappsclass/home/class-resources/templates-for-app-inventor-2

  11. Screens and Data You can pass one data value (variable) from screen to screen, using these two control blocks: But if you have more data, it is best to use a database (DB). See Tutorial videos on the TinyDB and TinyWebDB at the Technology Alliance page: https://vimeo.com/technologyalliancewa/videos

  12. Theres lots to help out there - The MIT App Inventor site (appinventor.mit.edu) has a ton of Resources to help: Tutorials, Curriculum, Forums and excellent Concept Cards (even better when laminated): http://appinventor.mit.edu/explore/resources/beginner-app-inventor-concept-cards.html - AppInventor.org has Beginner & Intermediate Video Tutorials & a Course in a box + Plus an Excellent Book: App Inventor 2: Create your own Android Apps by David Wolber Free online at: http://www.appinventor.org/book2 Also available in print

More Related Content

giItT1WQy@!-/#giItT1WQy@!-/#giItT1WQy@!-/#