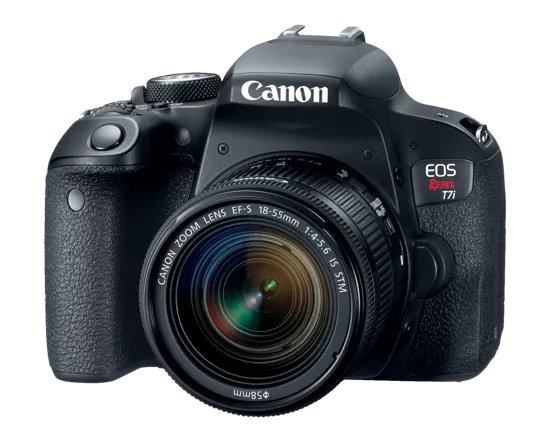
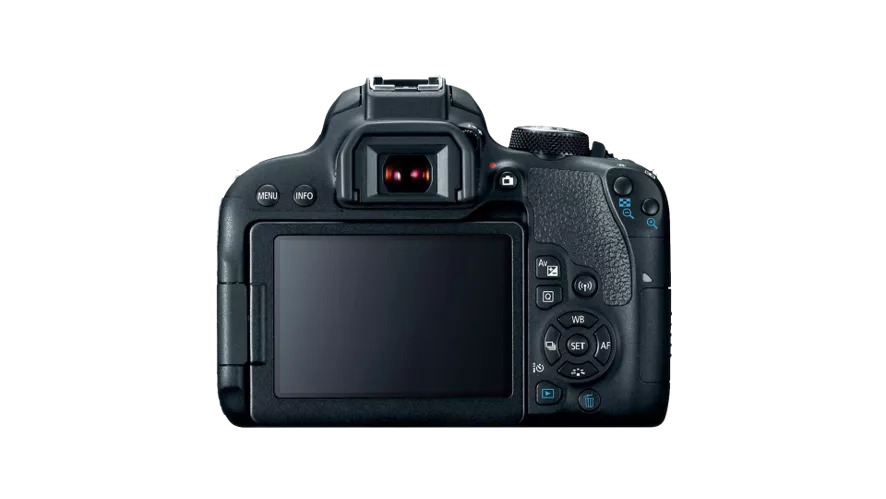
Canon Rebel T7i User Guide - Setup and Shooting Instructions
Get started with your Canon Rebel T7i camera by following these step-by-step instructions to set up the camera, adjust settings for shooting, capture moments, and retrieve your footage. Learn about configuring shooting modes for different scenarios.
Download Presentation

Please find below an Image/Link to download the presentation.
The content on the website is provided AS IS for your information and personal use only. It may not be sold, licensed, or shared on other websites without obtaining consent from the author.If you encounter any issues during the download, it is possible that the publisher has removed the file from their server.
You are allowed to download the files provided on this website for personal or commercial use, subject to the condition that they are used lawfully. All files are the property of their respective owners.
The content on the website is provided AS IS for your information and personal use only. It may not be sold, licensed, or shared on other websites without obtaining consent from the author.
E N D
Presentation Transcript
Canon Rebel T7i User Guide
Setting Up The Camera - Step 1: Make sure your battery is inserted into the slot at the bottom of the camera. - Additionally, check to see that an SD card is inserted in the SD card slot.
Setting Up The Camera - Step 2: Turn the nob on the top-right side of the camera to the on position. - Remember to also remove the lens cap before shooting! - Put the slider on the on position for photos, and the camera icon for videos
Setting Up Your Shot - Step 3: Adjust the Aperture, ISO, and Shutter Speed on the touchscreen. Make sure to keep your Shutter Speed at 60! - Step 4: Select your desired shooting style with the circular knob at the top of the camera (More info in the configuration guide). More info in the configuration guide.
Setting Up Your Shot - Step 5: Choose your desired style of focus with the slider near the top-left side of the lens (More info in the configuration guide). - Additionally, you can adjust the zoom with the slider in the middle of the lens, and the focus with the slider at the edge of the lens. Zoom Focus
Capturing/Recording - Step 6: Press the small button on the right side of the eye piece to take a picture/start recording your video. - Press the button with a blue play-button icon at the back of the camera to view the photo/video View Media (Press the trashcan icon next to the view media button to delete any unwanted photos/videos)
Retrieving Your Footage/Pictures - When you are finished shooting, return the knob on the top of the camera to the off position and transfer your files from the SD card to a computer.
Configuration Guide
Shooting Modes - Four ideal shooting settings: Manual (M), Av (Aperture Priority), Tv (Shutter Priority), and P (Program AE)
Shooting Modes M (Manual): Gives you full control of Aperture, Shutter Speed and ISO all at once. Allows for most control. Av (Aperture Priority): Allows for easier control of depth-of-field. Best used when shooting in a place with bright light. Tv (Shutter Priority): Allows you to set the level of shutter speed, while the camera automatically sets ISO and Aperture. Best used for sporting events or fast-moving pictures. P (Program AE): Aperture and Shutter Speed are adjusted automatically for you based off the brightness of the subject. Best used when photographing a dark subject against a light background or vice versa.
Choosing Your Focus - There are two settings for the kind of focus you would like on the top-left side of your lens: AF (Automatic Focus), and MF (Manual Focus)
Choosing Your Focus AF (Automatic Focus): Automatically adjusts the camera s focus based on the subject, or by tapping the desired subject on the camera s touch screen. Best used for shooting scenes with a rack focus. MF (Manual Focus): Allows you to adjust the focus yourself with a slider found near the front of the lens. Allows for more control of how you want your scene/subject to look.

 undefined


