Guide to Setting Up and Enjoying a School Field Trip
A school field trip is a journey of exploration and learning where students observe the local environment. This guide covers preparation steps like learning cardinal directions, gathering necessary items, and following safety instructions. During the trip, students are encouraged to observe their surroundings, sketch maps, and understand the science of cartography. It emphasizes the importance of engaging with nature and developing key geographical skills.

Uploaded on Oct 04, 2024 | 0 Views
Download Presentation

Please find below an Image/Link to download the presentation.
The content on the website is provided AS IS for your information and personal use only. It may not be sold, licensed, or shared on other websites without obtaining consent from the author. Download presentation by click this link. If you encounter any issues during the download, it is possible that the publisher has removed the file from their server.
E N D
Presentation Transcript
What is a school field trip? A school field trip is a journey of exploration and learning. Your class gets to observe the local environment. A field trip could involve a trip around the school grounds, or you might travel further afield to a town or a natural attraction. You can follow four simple steps to help set up a field trip.
Step 1 Preparation Preparation takes place before you leave the classroom. Your teacher might revise cardinal directions with the class to remind you how to use a compass. It is important to know the four main points on a compass: north (N), south (S), east (E), west (W). Practise using the compass by walking around your classroom and finding north, south, east and west.
Step 1 Preparation (contd.) Before your field trip, consider the things you might see. For example, if you are going on a street trail, you could expect to see street signs and different types of vehicles. Sketch two or three items that you think you might see.
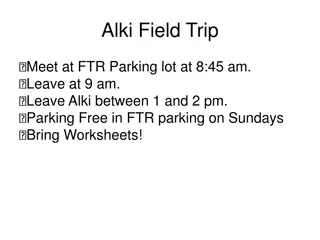
Step 1 Preparation (contd.) Gather the items you need to bring, such as paper, crayons, a pencil and a small bag. Your teacher might provide a different list of items, depending on the type of field trip.
Step 1 Preparation (contd.) The final part of the preparation is to pay attention to all safety instructions. You might have to walk next to or cross a busy road, so you must pay attention to your teacher and follow their directions.
Step 2 Observe During the field trip, it is important to observe your surroundings. Look carefully at the environment, including the trees, plants and any other natural features you can see. Sketch a map of the area on a blank sheet of paper. Include a key below the map. A key is a list of symbols for features of interest shown on the map.
Step 2 Observe (contd.) Drawing maps and using them are useful skills for a geographer. Cartography is the science of drawing maps. A person who draws maps is called a cartographer. In the past, maps were drawn by hand. The oldest surviving world maps date back to 900 BC, almost 3,000 years ago!
Step 3 Record Record your findings. You might be asked to fill in a trail worksheet or simply record what you see on a blank sheet of paper. Making rubbings of items such as tree bark, a wooden fence or a cement path is a fun way to record the texture of materials.
Step 3 Record (contd.) You could list the natural and man- made features that you observe. For example, record the different types of trees in the area. Make a list of the man-made features you can see, such as bridges, footpaths and steps.
Step 3 Record (contd.) Make a note of any animals you observe. For example, you might see birds that are native to the area. A magnifying glass is a great tool for observing minibeasts. If you are at the beach, you might find a jellyfish, crab or fish in a rock pool.
Step 3 Record (contd.) You might be able to collect plant samples such as leaves or wildflowers. If you cannot pick them, draw them or take a photograph.
Step 4 Present The final step is to present your findings. Once you are back in the classroom, you can complete your project. It will be fun to display what you have observed and recorded! Presentations can be given to other classes or to your family to show what you have learned from your field trip!
Illustrations Shutterstock Beehive


")
")
")

")

")
")
")