Presentation Slides Instructions for PowerPoint Template
"This template provides guidance on using PowerPoint for your presentation slides. It includes step-by-step instructions, style examples, and tips for customization. Easily create engaging presentations by following these guidelines and leveraging the template's features."
Download Presentation

Please find below an Image/Link to download the presentation.
The content on the website is provided AS IS for your information and personal use only. It may not be sold, licensed, or shared on other websites without obtaining consent from the author. Download presentation by click this link. If you encounter any issues during the download, it is possible that the publisher has removed the file from their server.
E N D
Presentation Transcript
[Entity Name] CRICOS code 00025B CRICOS code 00025B [Presentation Title] | [Date] 2
Thank you Dr Kim Peters | Senior Lecturer School of Psychology kpeters@uq.edu.au 07 0000 000 facebook.com/uniofqld Instagram.com/uniofqld CRICOS code 00025B
Thank you Dr Kim Peters | Senior Lecturer School of Psychology kpeters@uq.edu.au 07 0000 000 facebook.com/uniofqld Instagram.com/uniofqld
Instructions for using this template PowerPoint 2007, 2010, 2013 & 2016
[Entity Name] Slides in this template The following slides are instructions for using this PowerPoint template. They also contain examples of programmed styles, charts and diagrams. When you are ready to begin your presentation, delete the slides by selecting them in the left thumbnail window and pressing Delete on your keyboard. If you are unsure of how to use the template, you can leave these slides in the presentation and insert new slides before or after. Remember to delete them before finalising your presentation. CRICOS code 00025B CRICOS code 00025B [Presentation Title] | [Date] 6
[Entity Name] Slides in this template CRICOS code 00025B CRICOS code 00025B [Presentation Title] | [Date] 7
[Entity Name] New slides Choose New Slide from the Home tab on the ribbon. Select the desired layout from the thumbnails in the dropdown or after the slide has been chosen by choosing the Layout button (next to New Slide ). There are options for different text and content layouts. CRICOS code 00025B CRICOS code 00025B [Presentation Title] | [Date] 8
[Entity Name] Title and content slide layout Content text is entered here. The layouts have 3 options for bullets set up in what is called a level system. To change the text to the next list level design, press Tab at the start of the line (or use the Increase List Level button). Pressing Shift+Tab (or the Decrease List Level button) will take you back through the bullet list levels. Content areas In any of the slides, the text area can also contain other content. You will notice under the Click to enter text line are icons displaying options to insert graphs, pictures, videos, Excel tables etc. CRICOS code 00025B CRICOS code 00025B [Presentation Title] | [Date] 9
[Entity Name] Text levels and content areas This is the first level used as body text This is the second level - This is the third level This is the fourth level This is the first level used as body text 1. This is the preferred numbering hierarchy. 1cm indents. a. This is the third level i. This is the fourth level This is the fifth level used as a Heading 1 or Subheading in the content area This is the sixth and final level used as Heading 2 in the content area CRICOS code 00025B [Presentation Title] | [Date] 10
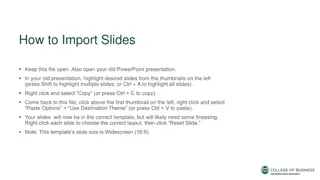
[Entity Name] Formatting existing presentations (except different dimensions, e.g.4:3 to 16:9, see next slide) You can easily insert and re-format slides from existing presentations. Select the slides in the existing presentation via the slide thumbnails panel to the left of the program Copy, then paste into the template presentation slide thumbnails panel Choose the Layout for each slide as appropriate Make sure to select the Slides once more and choose Reset . This will ensure all items within the slide are forced to adopt the new layout. Any custom slide layout masters in old presentations/templates will copy through. In these cases it is best to copy content from inside text areas rather than the whole slide. CRICOS code 00025B CRICOS code 00025B [Presentation Title] | [Date] 11
[Entity Name] Formatting 4:3 ratio presentations into this 16:9 template As per previous slide select, copy, paste slides into the slide thumbnails panel Pictures may copy through with incorrect ratios (they may look squished or stretched). To correct: Right click image Change each Layout to a standard University of Queensland PPT Template layout Make sure to select all slides once more and choose Reset . This will ensure all items within the slide are forced to adopt the new layout. - This action will copy over old presentation masters. To remove these: Open the Slide Master under the View tab Scroll to the end of the thumbnails panel and delete any slides after the Full slide image layout. Size and Position Under the Size and Properties area ensure Scale Height & Scale Width are the same percentage. CRICOS code 00025B [Presentation Title] | [Date] 12
[Entity Name] Changing footer, Entity Name and CRICOS code Footer & Entity Name CRICOS code The CRICOS code is held in the master as all other available footer fields are in use. To update: Go to the Insert tab Select Header & Footer Tick or untick the footer - Over type text into this footer area Tick or untick date which holds the Entity Name - Select the Fixed date area and overtype the Entity Name where the existing text is Tick or untick page numbers as required View tab Slide Master Click onto the very top slide (the University of Queensland master) and overtype the code Close Master View Apply to all . CRICOS code 00025B [Presentation Title] | [Date] 13
[Entity Name] File Size / Image Resolution To reduce the file size of the presentation PC - Go to the Save As function - Tool s dropdown (next to the Save button) - Compress Pictures - Select the option you want. The lower the resolution the smaller the file. - OK - Save Mac - Click File - Compress Pictures - Select the option you want. The lower the resolution the smaller the file. - OK - Save File size issues - compress single pictures If you know of a single image that is large in file size, you can reduce that particular image to a very low compression. This will mean there won t be any quality reduction in the logos and other imagery in the presentation. Select the image Go to Picture Format tab Click on the Compress Pictures button Ensure Apply only to this picture is ticked Choose Email 96 ppi OK CRICOS code 00025B [Presentation Title] | [Date] 14
[Entity Name] File Size / Image Resolution File size issues external image compression Sometimes the inserted images were too large to begin with. There is only so much PowerPoint can do to compress the images when in the program. It is recommended that you reduce the large image files before inserting them to the presentation. This will ensure you don t suffer slow computer performance. As a guide, a photographic image at full slide size should be no more than 1mb. A free program called Image Resizer for Windows released by Brice Lambson is available online which allows the user to easily right-click and resize images in the folder location. It has minimal quality loss and significantly reduces image file size. Check first with your IT department or relevant superior if you have authority to install this program. Printing your PPT presentation: It can sometimes be easier to print from a PDF rather than directly from PowerPoint. To create the PDF: - You can either print to the Adobe PDF printer (select from available printers); or - Save as Adobe PDF. CRICOS code 00025B CRICOS code 00025B [Presentation Title] | [Date] 15
[Entity Name] Chart/Smart Art colours Chart and smart art colours are fully customisable. By default charts will use the colour palette. Alternatively, you can select one of the chart elements (such as a bar or pie chart slice) and manually change the Shape Fill under the Chart tools Format tab. The corresponding legend will update automatically. The approved UQ colours are in the top row, starting from the 5th colour along. These colours are automatically picked up in charts/smartart and can be used to create a more contrasting presentation. To change the whole chart s colours use the Change Colours menu under the Chart tools Design tab: CRICOS code 00025B [Presentation Title] | [Date] 16
[Entity Name] The University of Queensland colours Main colours used in this template: R 81 G 36 B 122 R 230 G 38 B 69 R 0 G 162 B 199 R 235 G 96 B 43 R 64 G 133 B 198 R 46 G 168 B 54 Additional colours available for use: R 150 G 42 B 139 R 215 G 209 B 204 R 153 G 148 B 144 R 200 G 174 B 115 R 251 G 184 B 0 CRICOS code 00025B CRICOS code 00025B [Presentation Title] | [Date] 17
[Entity Name] Supplementary Table Slide Custom table designs cannot be created in PPT or saved into the master setup (the selection shown in New Slide or Layout menus). We have formatted a table below that can be copied and pasted as needed. Click on the outer edge of a table below and Ctrl+C to copy. Then click on the outer edge of the content placeholder where you want to paste the table and Ctrl+V to paste. Be careful when deleting this instructional text that you do not delete the table slide as you may need it when compiling your presentation. Table Heading Table Text Table Heading Table Text CRICOS code 00025B [Presentation Title] | [Date] 18


