Exploring Orthographic Drawing in Design and Technology Education
Delve into the world of orthographic drawing through St. Columba's Design and Technology Department's S1 Graphic Communication program. Discover the significance of orthographics in visualizing 3D objects as 2D drawings, learn about orthographic views like Elevation, Plan, and End Elevation, and explore how to apply drawing skills to produce accurate orthographic drawings. Uncover the origins of the term "orthographic" and its importance in architecture, engineering, and design. Participate in class discussions, evaluate your work, and provide constructive feedback to enhance drawing capabilities and understand the fundamentals of this essential design technique.
Download Presentation

Please find below an Image/Link to download the presentation.
The content on the website is provided AS IS for your information and personal use only. It may not be sold, licensed, or shared on other websites without obtaining consent from the author. Download presentation by click this link. If you encounter any issues during the download, it is possible that the publisher has removed the file from their server.
E N D
Presentation Transcript
St Columbas Design and Technology Department St Columba s Design and Technology Department S1 Graphic Communication S1 Graphic Communication Orthographics
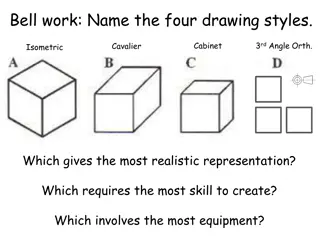
St Columbas Design and Technology Department S1 Graphic Communication Orthographics Orthographic drawings are used to show 3D objects as a set of 2D drawings. Orthographics are used by architects, engineers and designers every day to help them visualise their work.
St Columbas Design and Technology Department S1 Graphic Communication Orthographics Learning Intentions Understand the purpose of orthographic drawing Apply drawing boards skills to produce various orthographic drawings Communicate various objects clearly through drawing Evaluate my own and others work to provide effective feedback Success Criteria Participate in class discussions on purpose of orthographics Produce orthographic drawings of objects 1-9 Use of correct drawing standards and conventions Complete self-evaluation after each drawing Complete peer evaluation at halfway and end point of topic
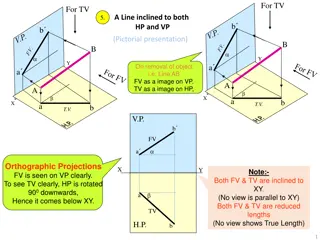
St Columbas Design and Technology Department S1 Graphic Communication Orthographic Views The orthographic views show different planes (sides) of the 3D object. The front of the object is known as the Elevation. The top of the object is known as the plan. The left and right hand sides of the object are known as End Elevations.
St Columbas Design and Technology Department S1 Graphic Communication Orthographic Views Plan End Elevation Elevation
St Columbas Design and Technology Department S1 Graphic Communication One last thing The word orthographic comes from the Greek words orthos which means straight and graph which means drawing. The word was devised by the Roman architect and engineer Marcus Vitruvius Pollio who lived in the first century!
St Columbas Design and Technology Department S1 Graphic Communication Page Setup Whether the orthographic has been produced manually or on the PC, certain items must always be on the page. Scale Projection Symbol Title Block
St Columbas Design and Technology Department Peer Assessment Use the ideas below to help you give feedback to your peer S1 Graphic Communication You have used your drawing equipment well Your construction lines are light Your drawings are all in the correct position You have labelled your drawings correctly, in block capitals You have a dark outline around the finished drawings Your title box includes the drawing name, scale and 3rd angle projection symbol Next time try to make your construction lines lighter Remember to outline the finished drawing Make sure you use the 45 set square to draw the bounce line Hold set square on sliding rule for straight, vertical lines Use block capitals to label each part of the drawing


