Creating a Hungry Shark Game with PictoBlox and evive

Dive into the world of game development by creating a fun and interactive "Hungry Shark" game using PictoBlox to control the shark's movements with evive's potentiometer. Follow step-by-step instructions to set up the stage, bring in sprites, interface evive with PictoBlox, and assign movements to the shark. Learn how to track scores and make the game engaging for players. Start coding and unleash your creativity in designing a feeding frenzy for the hungry shark!

Download Presentation

Please find below an Image/Link to download the presentation.
The content on the website is provided AS IS for your information and personal use only. It may not be sold, licensed, or shared on other websites without obtaining consent from the author. Download presentation by click this link. If you encounter any issues during the download, it is possible that the publisher has removed the file from their server.
E N D
Presentation Transcript
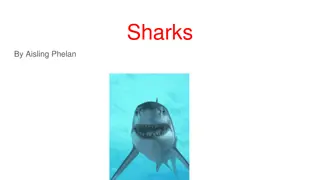
The Hungry Shark In this activity you will make a game in PictoBlox where the aim of the game is to feed the shark as many fish as you can by controlling it with evive s potentiometer. 2
Setting up the Stage Click on the purple colored icon which says Choose a Backdrop. Select the underwaterbackdrop from the library. 4
Bringing in the Sprites In this game, we need two sprites: the shark and the fish. Open thesprite library as we did in the previous chapter and choose thefishandShark2sprites. 5
Assigning Movements to Shark 6
Interfacing evive with PictoBlox Connect evive to your laptop/PC and open PictoBlox. In PictoBlox, go to the menu and click on the Boards Select the evive. 7
Interfacing evive with PictoBlox Once you ve selected the board, click on the Connect tab and connect the board. 8
Upload Firmware You have to upload the firmware into the device before interacting with it. Click on Upload Firmware button. Once you successfully uploaded the firmware you will see evive logo on evive display. 9
Assigning Movements to Shark We will control the shark movement using potentiometer. The shark will start from a fixed center point and will keep on moving until game is over. User can only change the direction of the shark using Point in direction block. Make a variable Score to track no of fish shark has eaten in the game. 10
Assigning Movements to Shark We want to control the direction of the shark using the potentiometer, but here is a catch: the potentiometer gives values in the range of 0 to 1023 and our shark can rotate only 360 . Therefore, we will map the potentiometer values using the following mathematical formula: Shark s direction = (Potentiometer value *360)/1023 11
Assigning Movements to Shark Shark s direction = (Potentiometer value *360)/1023 12
Cloning the Fish It s time to write the scripts for the fish. Make sure that the fish sprite is selected. Make the code to clone the fish every 1 second. 14
Assigning Movements to the Clones The clone will show up at a random point on the stage and will move a random point in 2 seconds. This adds uncertainty and makes game fair. After the movement, we will delete the clone. 15
Eating the Fish Every time the shark eats a fish, theScoreshould increase. In this script we are detecting when the clone touches the shark, then increase the score and delete the clone. 16
Eating Animation When the fish sprite broadcasts the message Eat, we want the shark sprite to make a sound and to look as if it has eaten the fish. Follow the steps below to write a script for the same. Make sure that the sharksprite is selected. 17
Addon To make the game more challenging, you can time the game. Try adding another script for the timer! There are various ways in which you can write the timer script. One of them is shown below: 19


 Scripts")