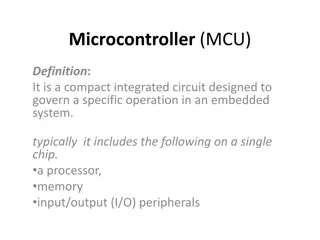
Understanding Interrupts and Timers in Microcontrollers
Microprocessors function as finite state machines, with instructions loaded from memory and executed in sequence. However, interrupts allow for urgent out-of-turn servicing of signals, providing a way to handle asynchronous events. Learn how to utilize interrupts efficiently with examples on Arduino, including basic interrupt handling and utilizing timer interrupts for tasks like pulse counting. Explore the capabilities of interrupts and timers in microcontrollers to enhance the functionality of your projects.

Download Presentation

Please find below an Image/Link to download the presentation.
The content on the website is provided AS IS for your information and personal use only. It may not be sold, licensed, or shared on other websites without obtaining consent from the author. Download presentation by click this link. If you encounter any issues during the download, it is possible that the publisher has removed the file from their server.
E N D
Presentation Transcript
Lecture 4: Interrupts 1/9
The microprocessor works as a finite state machine. Instructions are loaded serially from the FlashRAM Decoded in the instruction decoder Appropriate sub-functions called as per the instruction (eg: write value to I/O register, perform calculation etc) These state transitions are orchestrated by the system CPU clock. With no possibility of indeterminate states loop() function runs continuously 3/9
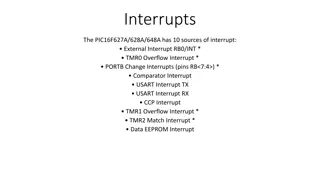
INTERRUPT Sometimes, an input signal may need urgent out-of-turn servicing i.e. the FSM transition sequence needs to be interrupted 4/9
How to service asynchronous signals on the Arduino As a bare minimum, the Arduino accepts interrupts on digital pins 2 and 3 These are called interrupts 0 and 1 However, the Arduino can be triggered by interrupts on any of the I/O pins. A little bit of low-level code needed to set Interrupt Control Registers.. see Arduino language reference, datasheet, Look for PCMSK1, PCMSK2, PCICR and experiment! 5/9
Basic interrupt example #include <avr/interrupt.h> // must have this to use interrupts volatile int GlobalSharedVariable = 0; // this var will be shared by ISR void setup() { attachInterrupt(0, myISR, CHANGE); // call function myISR every time digital pin 2 // changes state (can also use HIGH or LOW as args) } void loop() { // twiddle thumbs do other things // Note: must not change GlobalSharedVariable here! } void myISR() { GlobalSharedVariable++; // yay! Pin 2 changed state, // Return to main prog quickly } 6/9
Stopwatch (Timer) interrupts Arduino has three special internal Timer interrupts - these work like software stopwatches Load the timer with a number and start it off. Every time it counts down to zero, an interrupt is issued See http://www.arduino.cc/playground/Code/Timer1 7/9
Example: Interrupts are useful for keeping count of signals that arrive asynchronously. Objective: Keep track of number of pulses arriving on pin 2 - setup ISR to trigger on HIGH edge detected at pin 2 - ISR increments a variable count Note: Alternative is to keep polling the state of pin 2 using analogRead(2); What is the problem with that? 1) Limited by loop() speed: what if two edges arrive very quickly? 2) What if you want to count number of pulses on pins 1 and 2 at the same time? 8/9
Example: Want to measure the average Frequency of pulses on pin 2 Load Timer0 with a number and start it off. Every time it counts down to zero, an interrupt is issued (In parallel) have a second ISR running that keeps count of number of pulses on pin 2 Set Timer0 to run for a period of 1 sec - When Timer0 triggers, number of counts on pin 2 is the frequency of waveform on pin 2 9/9


 interrupts")