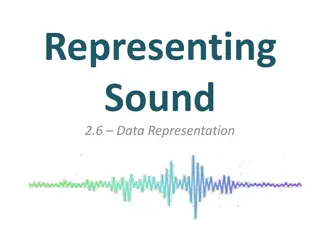
Understanding the Conversion of Sound to Digital Data with ADC

Sound waves are converted into digital data using an Analog-to-Digital Converter (ADC) to enable computer processing. The ADC captures snapshots of the sound wave at specific intervals, turning them into numerical codes that computers can interpret. The sample rate determines the frequency of these snapshots, with each represented by a binary number. This process allows the storage and processing of sound waves in a digital format. Explore the key steps involved in this conversion and the significance of sample rates in translating sound into a language computers understand.

Download Presentation

Please find below an Image/Link to download the presentation.
The content on the website is provided AS IS for your information and personal use only. It may not be sold, licensed, or shared on other websites without obtaining consent from the author. Download presentation by click this link. If you encounter any issues during the download, it is possible that the publisher has removed the file from their server.
E N D
Presentation Transcript
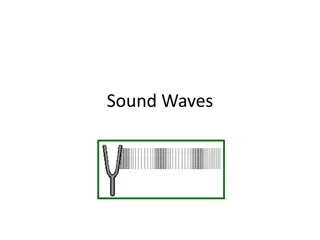
Converting sound into digital data Sound wave.jpg Image source Wikipedia: Sound wave.jpg
Sound waves Sound is carried through the air by changes in air pressure. We think of this as wavy lines, but computers don't understand wavy lines, so we need to change them into a different kind of language that computers can understand. Sound wave.jpg Image source Wikipedia: Sound wave.jpg
Analog-to-Digital Converter (ADC). To do this, we use something called an Analog-to-Digital Converter (ADC). File:CPT-Sound-ADC-DAC.svg Image source Wikipedia : File:CPT-Sound-ADC-DAC.svg
How an ADC works The ADC takes pictures of the sound wave at certain points. It takes these pictures regularly, like every little bit of time. Each picture is like a snapshot of the sound wave at that moment. File:CPT-Sound-ADC-DAC.svg Image source Wikipedia : File:CPT-Sound-ADC-DAC.svg
Once the ADC has taken all these pictures , it turns them into numbers. File:CPT-Sound-ADC-DAC.svg Image source Wikipedia : File:CPT-Sound-ADC-DAC.svg
These numbers are like codes that the computer can read. It s a way of storing the sound wave in digital form so the computer can process it. File:CPT-Sound-ADC-DAC.svg Image source Wikipedia : File:CPT-Sound-ADC-DAC.svg
Sample rate Refers to the number of samples taken per second. When converting sound waves to digital form, each sample needs to be represented by a binary number. The sample rate determines how frequently these samples are taken and have binary values assigned to them.
Sample rate For example, if we have a sample rate of 44,100 samples per second, it means we take 44,100 snapshots of the sound wave every second, and each snapshot is represented by a binary number.
Bitrate The bitrate is the number of bits used to store each sample. Instead of values between 0 and 10, an 8-bit bitrate allows for whole numbers from 00000000 (decimal 0) to 11111111 (decimal 255).
Converting a sound wave into a digital file Imagine you have a sound wave that you want to convert into a digital file. To do this, you need to take samples of the sound wave at regular intervals and represent them using binary numbers.
Converting a sound wave Sample rate Let s say we have a sample rate of 4 samples per second. It means we take 4 snapshots of the sound wave every second. To represent each sample in binary, we can use a single digit (bit). Let's take four samples at different moments.
Converting a sound wave into a digital file: sample rate Sample rate Four samples taken at different moments: Sample 1: The sound wave is at a high point -> We represent it as 1. Sample 2: The sound wave is at a low point -> We represent it as 0. Sample 3: The sound wave is at a middle point -> We represent it as 0. Sample 4: The sound wave is at a high point -> We represent it as 1. So, using a sample rate of 4 samples per second, we would have the binary sequence: 1001.
Converting a sound wave into a digital file: Bit rate Bitrate The bitrate is the number of bits used to store each sample. Instead of values between 0 and 10, an 8-bit bitrate allows for whole numbers from 00000000 (decimal 0) to 11111111 (decimal 255).
Bitrate and controlling distortion Increasing the bitrate to 16-bits allows for whole numbers from 00000000 00000000 (decimal 0) to 11111111 11111111 (decimal 65535). This allows more accurate sample values. To our ear, this means less distortion in the sound.
Example: converting sound wave into a digital file An example: First sample: 10 -> In binary, it represents the number 2. Second sample: 10 -> In binary, it represents the number 2. So, using a bit rate of three bits per sample, our sound wave can be represented by the numbers 2 and 2.
Summary The sample rate determines how often we take snapshots of the sound wave and represent them using binary. The bitrate determines the number of bits used to store each sample, allowing us to represent more detailed information about the sound wave.
Helpful terms Terms that will help you understand how this transformation to sound waves happens. Digital audio: Digital audio is when we take sound waves and change them into numbers that computers can work with. It s like translating the language of sound into a language that computers can understand. Analog-to-Digital Conversion (ADC): Analog-to-Digital Conversion is the process of changing the continuous sound waves into individual numbers. It s like taking a picture of the sound wave at regular intervals and writing down the numbers that represent its loudness.
Helpful terms (cont.) Sampling: Sampling is the name given to this picture-taking process. We take small snapshots of the sound wave at specific times. The more snapshots we take, the better quality the digital representation will be. Bit depth: Bit depth tells us how detailed each snapshot is. It's like how many colours we can use to paint each snapshot. The more colours we have, the more details we can capture.


.")


")