Maximizing Efficiency with Concur Training for Travel Office Management
Discover how to streamline travel booking, expense management, and profile customization using Concur Training. Explore functionalities like trip search tools, profile updates, e-receipt activation, and expense delegate management efficiently through step-by-step guidance provided in this comprehensive resource.
Download Presentation

Please find below an Image/Link to download the presentation.
The content on the website is provided AS IS for your information and personal use only. It may not be sold, licensed, or shared on other websites without obtaining consent from the author.If you encounter any issues during the download, it is possible that the publisher has removed the file from their server.
You are allowed to download the files provided on this website for personal or commercial use, subject to the condition that they are used lawfully. All files are the property of their respective owners.
The content on the website is provided AS IS for your information and personal use only. It may not be sold, licensed, or shared on other websites without obtaining consent from the author.
E N D
Presentation Transcript
Concur Training Travel Office Contact: Traveloffice@csusm.edu
Concur Home Page
Section Description Trip Search This section provides the tools you need to book a trip with any or all of these: Flight: Use to book a flight. You can also book hotel and reserve a car at the same time. Car, Hotel, or Rail: Use to book hotels, reserve rental cars, etc. if not including them while booking a flight (Flight tab). Concur Home Page Alerts This section displays informational alerts about Travel features. Company Notes Content is provided by Travel Office My Trips This section lists your upcoming trips. My Tasks This section lists Open Requests, Available Expenses, Open Reports and Required Approvals.
Review and Update Profile Use the profile options to set or change your personal preferences. To access your profile information: Click Profile > Profile Settings. The Profile Options page appears. Click the appropriate option from the left-side menu under Expense Settings.
Expense Preferences On the Expenses Preferences screen, you can select the options that define when you receive the following: Email notifications Prompts
Expense Approvers On the Expense Approvers screen, you can view your approver.
Enabling E-Receipts To sign up for e-receipts: A message will appear on the home screen in the Alerts section, prompting you to sign up. On the home page, click Sign up here, and the E-Receipt Activation page will appear. Click Profile > Profile Settings > E-Receipts Activation (in the Other Settings section of the left-side menu).
Adding Expense Delegates Action Can prepare Description If selected, the delegate can create expense reports and requests on your behalf. Option If selected, the delegate can view receipt images on your behalf. Receives Emails If selected, the delegate receives a copy of each Expense related email that you receive, except for approval emails. Can Approve If selected, the delegate can approve expense reports, and requests on your behalf, without date constraints. Can Approve Temporary If selected, the delegate can approve expense reports and requests on your behalf but only for the specified period. If you select this option, you must also select beginning and ending date. Delegate can preview for approver If selected, the delegate can preview expense reports and requests on behalf of another employee. Receives Approval Emails If selected, the delegate receives a copy of each Expense approval- related email that you receive.
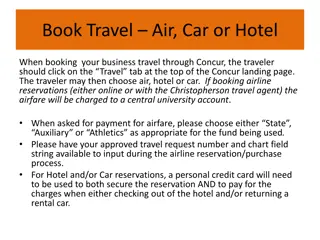
State employees using state funds should submit a travel request via concur. Submit a Travel Request The Travel Request should be submitted and approved prior to booking any travel. Note: Per CSU Travel Procedures, Section IX.A "Travel Expense Claim must be submitted to the campus Travel Reimbursement office within 60 days of the end of a trip unless there is recurrent local travel, in which case Claims may be aggregated and submitted monthly." Please be aware Approved Travel Requests will automatically close 60 days after the travel end date
Submit a Travel Request Click Request on the header toolbar, and then select New Request on the request page. -or- From the home page, click new, then start a request.
Submit a Travel Request The Request Header tab appears. Complete all required fields with asterisk.
Submit a Travel Request Field Name Request/Trip Name Description Enter a meaningful trip name, similar to a name given to a travel expense report. Your department may implement a standard naming protocol. Suggested naming convention Destination City, State and dates of Travel (ex. Long Beach, CA 5/18-5/21) Trip Type How will you book you Trip? Select from the drop-down list 1 - Book via Concur Travel - Use the online booking travel wizard. 2 - Book Outside of Concur Travel - Book over phone with CBT or if arrangements will be made/paid for by another source other than CSUS. Travel Start Date Date business expenses start. If personal days precede business dates, please set travel start date to the date you leave for the trip. Travel End Date Date business expenses end. If personal days are after business dates please set travel end date to the date you return from trip. Traveler Type Trip Purpose If Faculty, is class covered? Personal Date of Travel Destination City/State Select from the drop-down list Select from the drop-down list Only Required for Faculty. Select from the drop down list Enter all dates which are personal. If none, place NA in field If you anticipate travelling to more than one city and/or country, enter where you plan to spend the majority of your travel time. Final Destination Country Are you traveling to a banned state? Chart String The country will pre-populate based on the destination city selected. Select from the drop-down list Chart field String will pre-populate based on your dept. If necessary, changes can be made by traveler or approver.
Creating a New Expense Report To create a report: On the home page, on the Quick Task Bar, place your mouse pointer over New, and then click Start a Report. or Click Request on the header toolbar, and then select Expense under the Action column of the approved Request.
