Mastering Professional Newsletters in Microsoft Word 2007
Dive into Chapter 6 of Microsoft Word, focused on creating a polished newsletter. Learn to enhance your document with WordArt, symbols, floating graphics, and multiple columns. Elevate your design skills by formatting characters as drop caps.
Download Presentation

Please find below an Image/Link to download the presentation.
The content on the website is provided AS IS for your information and personal use only. It may not be sold, licensed, or shared on other websites without obtaining consent from the author.If you encounter any issues during the download, it is possible that the publisher has removed the file from their server.
You are allowed to download the files provided on this website for personal or commercial use, subject to the condition that they are used lawfully. All files are the property of their respective owners.
The content on the website is provided AS IS for your information and personal use only. It may not be sold, licensed, or shared on other websites without obtaining consent from the author.
E N D
Presentation Transcript
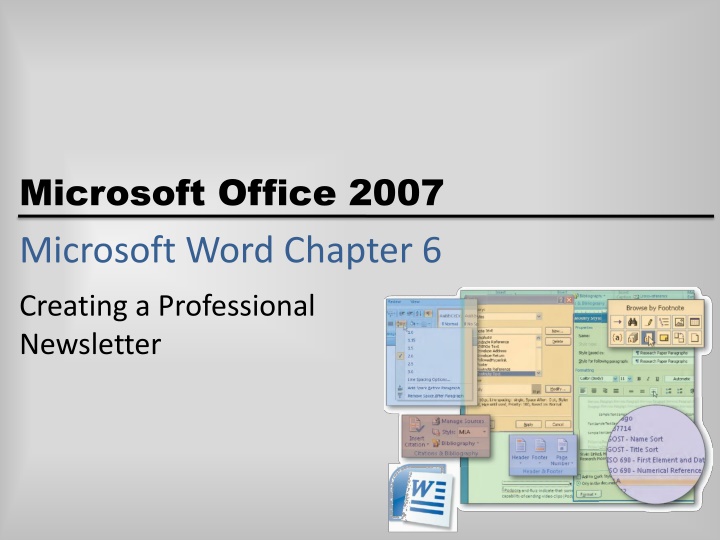
Microsoft Office 2007 Microsoft Word Chapter 6 Creating a Professional Newsletter
Objectives Create and format WordArt Insert a symbol in a document Insert and format a floating graphic Format a document in multiple columns Format a character as a drop cap Insert a column break Modify a style Microsoft Office 2007: Complete Concepts and Techniques - Windows Vista Edition 2
Objectives Place a vertical rule between columns Insert and format a text box Copy and paste using a split window Balance columns Modify and format a SmartArt graphic Add a page border Microsoft Office 2007: Complete Concepts and Techniques - Windows Vista Edition 3
Starting Word Start Microsoft Word 2007 as directed on page WD 389 Microsoft Office 2007: Complete Concepts and Techniques - Windows Vista Edition 4
Setting Custom Margins Display the Page Layout tab. Click the Margins button on the Page Layout tab to display the Margins gallery Click Custom Margins in the Margins gallery to display the Page Setup dialog box. If necessary, click the Margins tab in the dialog box Type .75 in the Top text box to change the top margin setting and then press the TAB key to position the insertion point in the Bottom text box Microsoft Office 2007: Complete Concepts and Techniques - Windows Vista Edition 5
Setting Custom Margins Type .75 in the Bottom text box to change the bottom margin setting and then press the TAB key Type .75 in the Left text box to change the left margin setting and then press the TAB key. Type .75 in the Right box to change the right margin setting Click the OK button to set the custom margins for this document Microsoft Office 2007: Complete Concepts and Techniques - Windows Vista Edition 6
Setting Custom Margins Microsoft Office 2007: Complete Concepts and Techniques - Windows Vista Edition 7
Changing Theme Colors and Fonts Display the Home tab. Click the Change Styles button on the Home tab, point to Colors on the Change Styles menu, and then click Metro in the Colors gallery to change the document theme colors to Metro Click the Change Styles button on the Home tab, point to Fonts on the Change Styles menu, and then click Aspect in the Fonts gallery to change the document theme fonts to Aspect Microsoft Office 2007: Complete Concepts and Techniques - Windows Vista Edition 8
Inserting WordArt Display the Insert tab Click the WordArt button on the Insert tab to display the WordArt gallery Click WordArt style 1, the style in the upper-left corner of the WordArt gallery, to display the Edit WordArt Text dialog box Type Health Bits in the Text text box, as the WordArt text. Microsoft Office 2007: Complete Concepts and Techniques - Windows Vista Edition 9
Inserting WordArt Click the Font box arrow in the dialog box; scroll to and then click Brush Script MT, or a similar font, to change the font of the WordArt text Click the Size box arrow in the dialog box; scroll to and then click 72 to change the font size of the WordArt text Click the OK button to display the WordArt text in the document window Microsoft Office 2007: Complete Concepts and Techniques - Windows Vista Edition 10
Inserting WordArt Microsoft Office 2007: Complete Concepts and Techniques - Windows Vista Edition 11
Resizing WordArt Drag the bottom-right sizing handle to the right and slightly downward until the WordArt size is similar to Figure 6 7 If the values in the Shape Height and Shape Width text boxes are not approximately equal to 1.4" and 7", respectively, change their values so that the WordArt is similar in size to Figure 6 7 Microsoft Office 2007: Complete Concepts and Techniques - Windows Vista Edition 12
Resizing WordArt Microsoft Office 2007: Complete Concepts and Techniques - Windows Vista Edition 13
Changing the WordArt Fill Color With the WordArt selected, click the Shape Fill button arrow on the WordArt Tools Format tab to display the Shape Fill gallery Point to Gradient in the Shape Fill gallery to display the Gradient gallery Click More Gradients in the Gradient gallery to display the Fill Effects dialog box. If necessary, click the Gradient tab in the dialog box In the Colors area, click Two colors, which causes two separate color text boxes to appear in the dialog box Microsoft Office 2007: Complete Concepts and Techniques - Windows Vista Edition 14
Changing the WordArt Fill Color Click the Color 1 box arrow and then click Gold, Accent 3, Lighter 60% (third row, seventh column) in the color gallery Click the Color 2 box arrow and then click Green, Accent 1, Darker 25% (fifth row, fifth column) in the color gallery Click From center in the Shading styles area and then, if necessary, click the left variant in the Variants area Click the OK button to change the colors of the WordArt Microsoft Office 2007: Complete Concepts and Techniques - Windows Vista Edition 15
Changing the WordArt Fill Color Microsoft Office 2007: Complete Concepts and Techniques - Windows Vista Edition 16
Change the WordArt Shape Click the Change WordArt Shape button on the Format tab to display the WordArt Shape gallery Click the Cascade Up shape in the WordArt Shape gallery to instruct Word to form itself into the Cascade Up shape Microsoft Office 2007: Complete Concepts and Techniques - Windows Vista Edition 17
Change the WordArt Shape Microsoft Office 2007: Complete Concepts and Techniques - Windows Vista Edition 18
Centering the Newsletter Title Click the paragraph mark to the right of the WordArt text to deselect the WordArt and position the insertion point in the paragraph containing the WordArt If necessary, display the Home tab, and then click the Center button on the Home tab to center the paragraph containing the WordArt Microsoft Office 2007: Complete Concepts and Techniques - Windows Vista Edition 19
Bordering One Edge of a Paragraph Click the Border button arrow on the Home tab and then click Borders and Shading in the Border gallery to display the Borders and Shading dialog box Click Custom in the Setting area because you are setting just a top border Scroll through the style list and click the style which has a thick middle line between two thin lines Click the Color button arrow and then click Pink, Accent 2, Darker 50% (sixth column in the last row of Theme Colors) in the Color gallery Click the Top Border button in the Preview area of the dialog box to show a preview of the selected border style Click the OK button to place the defined border above the newsletter title Microsoft Office 2007: Complete Concepts and Techniques - Windows Vista Edition 20
Bordering One Edge of a Paragraph Microsoft Office 2007: Complete Concepts and Techniques - Windows Vista Edition 21
Clearing Format With the insertion point positioned at the end of line 1 press the ENTER key Click the Clear Formatting button on the Home tab to remove any existing formatting Microsoft Office 2007: Complete Concepts and Techniques - Windows Vista Edition 22
Setting a Right-Aligned Tab Stop Click the Bold button on the Home tab. Click the Font Color button arrow on the Home tab and change the font color to Pink, Accent 2, Darker 50%. Type Monthly Newsletter on line 2 of the newsletter Click the Paragraph Dialog Box Launcher to display the Paragraph dialog box and then click the Tabs button in the Paragraph dialog box to display the Tabs dialog box Type 7 in the Tab stop position text box, which is the location of the right margin Click Right in the Alignment area to specify alignment for text at the tab stop Microsoft Office 2007: Complete Concepts and Techniques - Windows Vista Edition 23
Setting a Right-Aligned Tab Stop Click the Set button in the Tabs dialog box to set a right-aligned custom tab stop, which places the entered tab stop position, the number 7 in this case, in the Tab stop position list box Click the OK button to place a right tab marker at the 7" mark on the ruler Microsoft Office 2007: Complete Concepts and Techniques - Windows Vista Edition 24
Setting a Right-Aligned Tab Stop Microsoft Office 2007: Complete Concepts and Techniques - Windows Vista Edition 25
Inserting a Symbol Press the TAB key. Type Vol. 4 and then press the SPACEBAR Display the Insert tab Click the Symbol button on the Insert tab Click More Symbols in the Symbol gallery to display the Symbol dialog box. If Symbol is not the Font displayed in the Font box, click the Font box arrow in the dialog box and then scroll to Symbol and click it In the list of symbols, if necessary, scroll to and then click the dot symbol shown in Figure 6 18 Click the Insert button to place the dot symbol in the document to the left of the insertion point Click the Close button in the Symbol dialog box Microsoft Office 2007: Complete Concepts and Techniques - Windows Vista Edition 26
Inserting a Symbol Microsoft Office 2007: Complete Concepts and Techniques - Windows Vista Edition 27
Entering Text and Adding a Border Press the SPACEBAR. Type Issue 9 at the end of the issue information line Display the Home tab. Click the Border button arrow on the Home tab and then click Bottom Border in the Border gallery to place a bottom border on the current paragraph using the same formats as the previously defined border Microsoft Office 2007: Complete Concepts and Techniques - Windows Vista Edition 28
Entering Text and Adding a Border Microsoft Office 2007: Complete Concepts and Techniques - Windows Vista Edition 29
Saving a Document With a USB flash drive connected to one of the computer s USB ports, click the Save button on the Quick Access Toolbar to display the Save As dialog box Save the document on a USB flash drive with the file name, Health Bits Newsletter Microsoft Office 2007: Complete Concepts and Techniques - Windows Vista Edition 30
Inserting Clip Art from the Web Display the Insert tab. Click the Clip Art button on the Insert tab to display the Clip Art task pane. In the Clip Art task pane, type caduceus in the Search for text box Click the Go button to display a list of clips that match the description, caduceus Scroll to and then click the clip art of the caduceus that matches the one in Figure 6 20. (If the clip art image does not appear in the task pane, click the Close button on the Clip Art task pane and then proceed to the shaded steps on the next page) Click the Close button on the Clip Art task pane title bar to close the task pane Microsoft Office 2007: Complete Concepts and Techniques - Windows Vista Edition 31
Inserting Clip Art from the Web Microsoft Office 2007: Complete Concepts and Techniques - Windows Vista Edition 32
Resizing the Clip Art Image Drag the top-right sizing handle inward until the size of the clip art image is similar to Figure 6 21 If necessary, double-click the clip art image to display the Picture Tools Format tab. If the values in the Shape Height and Shape Width text boxes are not approximately equal to .67 each, change their values so that the clip art image size is similar to Figure 6 21 Microsoft Office 2007: Complete Concepts and Techniques - Windows Vista Edition 33
Resizing the Clip Art Image Microsoft Office 2007: Complete Concepts and Techniques - Windows Vista Edition 34
Formatting a Graphic as Floating If necessary, double-click the clip art image to display the Picture Tools Format tab Click the Text Wrapping button on the Format tab to display the Text Wrapping menu In the Text Wrapping menu, click In Front of Text so that the image changes to a floating object that can be positioned in front of text on the page Microsoft Office 2007: Complete Concepts and Techniques - Windows Vista Edition 35
Formatting a Graphic as Floating Microsoft Office 2007: Complete Concepts and Techniques - Windows Vista Edition 36
Moving a Graphic Point to the middle of the graphic, and when the mouse pointer has a four-headed arrow attached to it, drag the graphic to the location Microsoft Office 2007: Complete Concepts and Techniques - Windows Vista Edition 37
Moving a Graphic Microsoft Office 2007: Complete Concepts and Techniques - Windows Vista Edition 38
Flipping a Graphic With the graphic still selected, click the Rotate button on the Format tab to display the Rotate gallery Click Flip Horizontal on the Rotate gallery, so that Word flips the graphic to display its mirror image Microsoft Office 2007: Complete Concepts and Techniques - Windows Vista Edition 39
Flipping a Graphic Microsoft Office 2007: Complete Concepts and Techniques - Windows Vista Edition 40
Adjusting the Brightness of a Graphic Click the Brightness button on the Format tab to display the Brightness gallery Point to -10 % in the Brightness gallery to display a live preview of that decrease in brightness applied to the selected clip art image Click -10 % in the Brightness gallery to darken the clip art image Microsoft Office 2007: Complete Concepts and Techniques - Windows Vista Edition 41
Adjusting the Brightness of a Graphic Microsoft Office 2007: Complete Concepts and Techniques - Windows Vista Edition 42
Clearing Format Click at the end of line 2 (the issue information line) so that the insertion point is immediately after the 9 in Issue 9. Press the ENTER key Display the Home tab. Click the Clear Formatting button on the Home tab to apply the Normal style to the location of the insertion point Microsoft Office 2007: Complete Concepts and Techniques - Windows Vista Edition 43
Entering Text as a Heading Style Click Heading 2 on the Home tab Type Health Concerns Related to Computer Use to enter the feature title in the Heading 2 style Microsoft Office 2007: Complete Concepts and Techniques - Windows Vista Edition 44
Modifying a Style Using the Modify Style Dialog Box Right-click Heading 2 on the Home tab to display a shortcut menu Click Modify on the shortcut menu to display the Modify Style dialog box Click the Color box arrow and then click Green, Accent 1, Darker 25% to change the color to a darker shade of green Place a check mark in the Automatically update check box so that any additional changes you make to the Heading 2 style will automatically modify the style Click the OK button to update the Heading 2 style Microsoft Office 2007: Complete Concepts and Techniques - Windows Vista Edition 45
Modifying a Style Using the Modify Style Dialog Box Microsoft Office 2007: Complete Concepts and Techniques - Windows Vista Edition 46
Inserting a Continuous Section Break With the insertion point at the end of the feature article press the ENTER key to position the insertion point below the article title Display the Page Layout tab Click the Insert Page and Section Breaks button on the Page Layout tab to display the Insert Page and Section Breaks gallery Click Continuous in the Insert Page and Section Breaks gallery to insert a continuous section break above the insertion point Microsoft Office 2007: Complete Concepts and Techniques - Windows Vista Edition 47
Inserting a Continuous Section Break Microsoft Office 2007: Complete Concepts and Techniques - Windows Vista Edition 48
Changing the Number of Columns Click the Columns button on the Page Layout tab to display the Columns gallery Click Three in the Columns gallery to divide the section containing the insertion point in three evenly sized and spaced columns Microsoft Office 2007: Complete Concepts and Techniques - Windows Vista Edition 49
Changing the Number of Columns Microsoft Office 2007: Complete Concepts and Techniques - Windows Vista Edition 50
