Comprehensive Overview of Firefighter Ladder Training & Maintenance

Explore the essentials of ladder training for firefighters, covering ladder parts, types, maintenance, and usage. Understand the importance of overhaul procedures and arson awareness. Discover the vocabulary, materials, maintenance tips, and various methods of carrying ladders. Dive into the diverse applications of ladders in rescue, ventilation, and fire operations.

Download Presentation

Please find below an Image/Link to download the presentation.
The content on the website is provided AS IS for your information and personal use only. It may not be sold, licensed, or shared on other websites without obtaining consent from the author.If you encounter any issues during the download, it is possible that the publisher has removed the file from their server.
You are allowed to download the files provided on this website for personal or commercial use, subject to the condition that they are used lawfully. All files are the property of their respective owners.
The content on the website is provided AS IS for your information and personal use only. It may not be sold, licensed, or shared on other websites without obtaining consent from the author.
E N D
Presentation Transcript
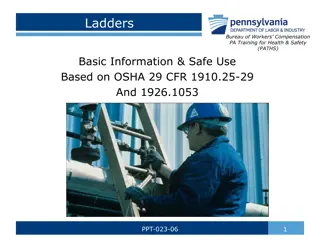
CFD Basic Training Ladders & Overhaul
Objective To discuss & review parts of the ladder and to know the different types of ladders carried by the Commack Fire Department. To be able to remove and return ladders to the apparatus. Carry, climb and know the maintenance of the ladders. Have the firefighters understand why we do overhaul and the methods used. To understand the problems of arson awareness
Vocabulary Beam - Sides rails to give the ladder its length Butt - The bottom of the beams, they sometimes have swiveling shoes or spikes for better footing Tip - The top of the beams, it may be painted a light color or reflective paint. Rungs - The steps of the ladder 14 apart and 1 in diameter. Halyard - The rope used for hoisting and lowering the fly sections of a ground ladder Base Section - The bottom section (bed section) of the extension ladder Fly Section - The moving part of the extension ladder Middle section - Also a moving section of a three-section extension ladder Dogs/Pawls - The locking items on the moving section of the extension ladder Stops - An item to prevent you from extending the moving section of the extension too far. Hooks A pair of sharp curved devices at the top of a roof ladder that folds outward from each beam. Heat Sense Label A label affixed to the ladder beam near the tip to provide a warning that the ladder has been subjected to excessive heat. Climbing Angle Label To indicate that the ladder is at the correct climbing angle (75 degrees)
Material Wood Does not lose strength when expose to heat but is affected by moisture Aluminum Conducts electric. Its lightweight and its not affected by moisture.
Maintenance A full inspection is done yearly by an outside agency. Keep the ladder clean and wipe with clean cloth. Do not allow grease and dirt to build-up. Check Halyard on extension ladders look for fraying. On Aluminum ladders, look for cracks in welds and loose or bent rungs. On wood ladders, check varnish finish for chafed or scraped in the varnish. Check for cracks and splinters. Look for colonization (meaning exposed to high heat) If you question the integrity of a ladder, use a different one and report it ASAP
Use of Ladders Rescue Ventilation Get to different levels (up or down) Bridge floor Replace stairs Cross fences Salvage Brace overhead doors open
Method of Carry Shoulder carry upper beam on shoulder Suit Case Carry Ladder between arm and body, hand on lower beam Arm Length Carry Hand on upper beam, Both Firefighters will carry the ladder the same way. Butt end is carried to the fire building first, except for the roof ladder which is carried with the tip first so it can be passed up the other ladders.
Ladder Placement Safety Avoid overhead obstacles and hazards. Do not put directly in from of windows or doors if going to the roof or upper window Once the ladder is in place and used, never move it. There is no such thing as too many ladders Do not take extension ladders apart unless it s a last resort Do not use extension ladders upside down Always face the ladder when ascending or descending Always check the heat sensor when putting the ladder back on the truck Do not overreach when working on the ladder
Placement of the Tip To enter a window, place the tip of the ladder at the window sill To vent a window, set the ladder on the upwind side of the window (remember the angle of using tools) and use a leg lock To get to the roof, the ladder should be 3 to 5 rungs over the top of the roof To fire escape, place the tip to the building, 2 to 3 rungs above the railing
Climbing Angle The correct angle is 75.5 degrees. This can be determined by taking the working length of the ladder (distance from the butt and to where the ladder touches the building) and divide by 4. This will give you the distance the butt should be from the building. It can be check by looking at the decal on the beam of the ladder or by standing between the beams of the ladder at the butt and reaching forward with your arms at 90-degree angle to your body, and your hands should touch the beam of the ladder. This angle allows the ladder to provide maximum strength without too steep for rescue operation. The butt of the ladder can be moved away from the building to about a 60 degree angle
Raising the Ladder The firefighter at the butt end is in charge of this operation. The ladder can be raise flat or on one beam The butt end is carried to the location that the ladder is to be raised
Butt Man 1. Step on the bottom rung and grasp the 3rdrung. Beam raise step on lower beam with full foot and grasp upper beam under beam under the 3rdrung. Raising Man Take position at the tip with back to the butt. Grasp 2ndrung from tip. Beam raise position distance from tip and grasp upper beam Butt Man 2. Give command prepare to raise raise Raising Man 2. Partially bend knees and prepare to lift Butt Man 3. Push down with feet & pull with hands Raising Man 3. Lift ladder from the ground and pivot under ladder as you turn to face the butt man than walk to the butt man
Butt Man 4. Extend fly, butt the left beam, untie knot in halyard, and pull with an underhand grasp Raising Man 4. Take boxers stance dead center between beams grasp both beams with both hands about shoulder height Butt Man 5. Lock in both dogs (4 if its 3 sections), tie off halyard on base only Raising Man Stabilize ladder and never look up. Butt Man 6. Give command to Place ladder against Building grasps both breams at shoulder height. Look forward but not upward. Butt both beams with your feet Raising Man Place hands on rungs at shoulder height (palms down) and look up and guide ladder into the building NOTE: In the Commack Fire Department the fly section must face out. Butt Man 7. Adjust climbing angle (75 degrees) Raising Man Adjust climbing angle (75 degrees)
Lowering the Ladder: The ladder is returned to a vertical position in reverse order of placing against the building lowering the fly and the ladder is in the reverse order of extending and raising the ladder. Secure halyard to base section.
Carrying Vertical Ladder With the ladder in a vertical position each firefighter moves to his/hers right, facing beam. They grasp the beam in front of them with their left hand above their head and their right hand on the 3rdrung from the butt. The firefighter facing the direction of travel gives the command Ready Lift and both firefighters lift the ladder a few inches off the ground. On Command Carry both fighters move. The firefighter facing the direction of travel will check the tip to avoid obstruction. Command Ready Halt when you reach the new location. Another way to move the ladder is roll it (beam to beam) from one location to another. Remember you want the fly on the outside when you re done.
Climbing the Ladder When climbing have a firefighter butt or heel the ladder. This should be from the front or outside the ladder. The butting firefighter places his/hers left foot in the center of the bottom rung maintaining downward pressure. Both hands are placed against the beams to steady the ladder. If the climber is to work off one side of the ladder, the butt man will move his/hers foot to the opposite beam. The ladder can also be secure at the tip by the first climber. When on the ladder, climb on the balls of your feet near the arch, left and right of center rung. Grasp the underside of the beams with your hands and climb in a rhythmic coordinated movement. During the climb your eyes should look forward (at wall or up the top of the ladder). If a tool is to be carried, it should be balanced in the carrying hand that holds onto the side of the beam. The free hand continues to grasp the underside of the beam. Do not carry the tool close to the body or inside the ladder over the rungs. If the tool falls, it can cause injury to the butt man. During freezing weather, position feet under the arch of the boot next to the heel. Position feet next to the beams and hands remain on the underside of the beams. When required to work from the ladder, you should use a leg lock or life belt for safety. Roof ladders are carried tips first to the building. Before passing the roof ladder up, the hooks are turned 90 degrees into a locking position. The ladder is pasted up and slides across the roof hooks down or on a beam until the hooks go over the edge of the peak and catches solidly. To vent upper floor windows, one firefighter is in full gear can position ladder in line with the window and drop ladder into the window using the weight of the ladder and its tip to break the glass. Be careful of falling glass. Do not hold on to the ladder when you drop it, glass can slide down the beam and cut you.
Rescue There are several methods for lowering conscious and unconscious victims. A conscious victim can be walked down the ladder, remember they face the ladder and you may have to assist in placing their feet step by step on the rungs of the ladder. Small children can be carried (cradled in the arms of the rescuer). Unconscious victims can be lowered facing the ladder with their feet and arms outside the beam. The rescuer supports them under the arms and a knee between the victim s legs. The victim can be cradled between the rescuer and the ladder with the victim s legs over the rescuer shoulders. This is affective with very heavy victims.
Overhaul Overhaul operation consist of the search for and extinguishment of hidden or remaining fires; placing the building, its contents, and the fire area in a safe condition and to also detect and safeguard signs of arson. During overhaul, it is important to remember to keep your full firefighter gear on along with your SCBA. In the search for hidden fire, you must be thinking of the type of building construction and the common route that the flames, heat, smoke and gases will travel (example, stairwells, pipe holes, cock- lofts truss roofs or floors and drop ceilings). Watch new building as they are being constructed remember the term Size-Up . Observation on arrival are very important in detecting arson, like broken windows and doors, gasoline cans and people fully dressed at 03:00 AM, no cloths in the closets, blocked hydrants and building entrances, gasoline balloons, candles and two or more separate fires.
Fire Department Action Make a mental note of what you see, try to preserve the area (rope it off if you have to) and notify your officer as to what you discovered. It may not seem important by itself, but when added to other pieces of information, it may complete the Big Picture . Many of the tools and equipment used in overhaul are the same as those used for other firefighter operations. Some of the tools used may include: Pike poles, axes, booster or 1 line, carryall, shovels, hooks, heat gun and the thermal image camera Once the main body of the fire is knocked down, the officers will start to determine the conditions of the structure s stability. The Officers will have a CO meter reading taken to determine if it is safe for you to remove your (SCBA) mask. We work from the point of origin, (V-pattern), heaviest damage, charring, etc. Suspected hot spots should be checked, you might have to open walls, pull ceilings etc. until you reached clean areas. Always check the header over doors, windows and truss. There should be a minimum use of water. Large item of furniture may be removed but cushions and mattresses may re-ignite when they reach fresh air. Small items may be put in sinks or tubs. Always think safety as you work and remember to always have a way out.