Caterpillar Cat CS-551 VIBRATORY COMPACTOR (Prefix 6ZD) Service Repair Manual Instant Download (6ZD00001 and up)
Please open the website below to get the complete manualnn// n
Download Presentation

Please find below an Image/Link to download the presentation.
The content on the website is provided AS IS for your information and personal use only. It may not be sold, licensed, or shared on other websites without obtaining consent from the author. Download presentation by click this link. If you encounter any issues during the download, it is possible that the publisher has removed the file from their server.
E N D
Presentation Transcript
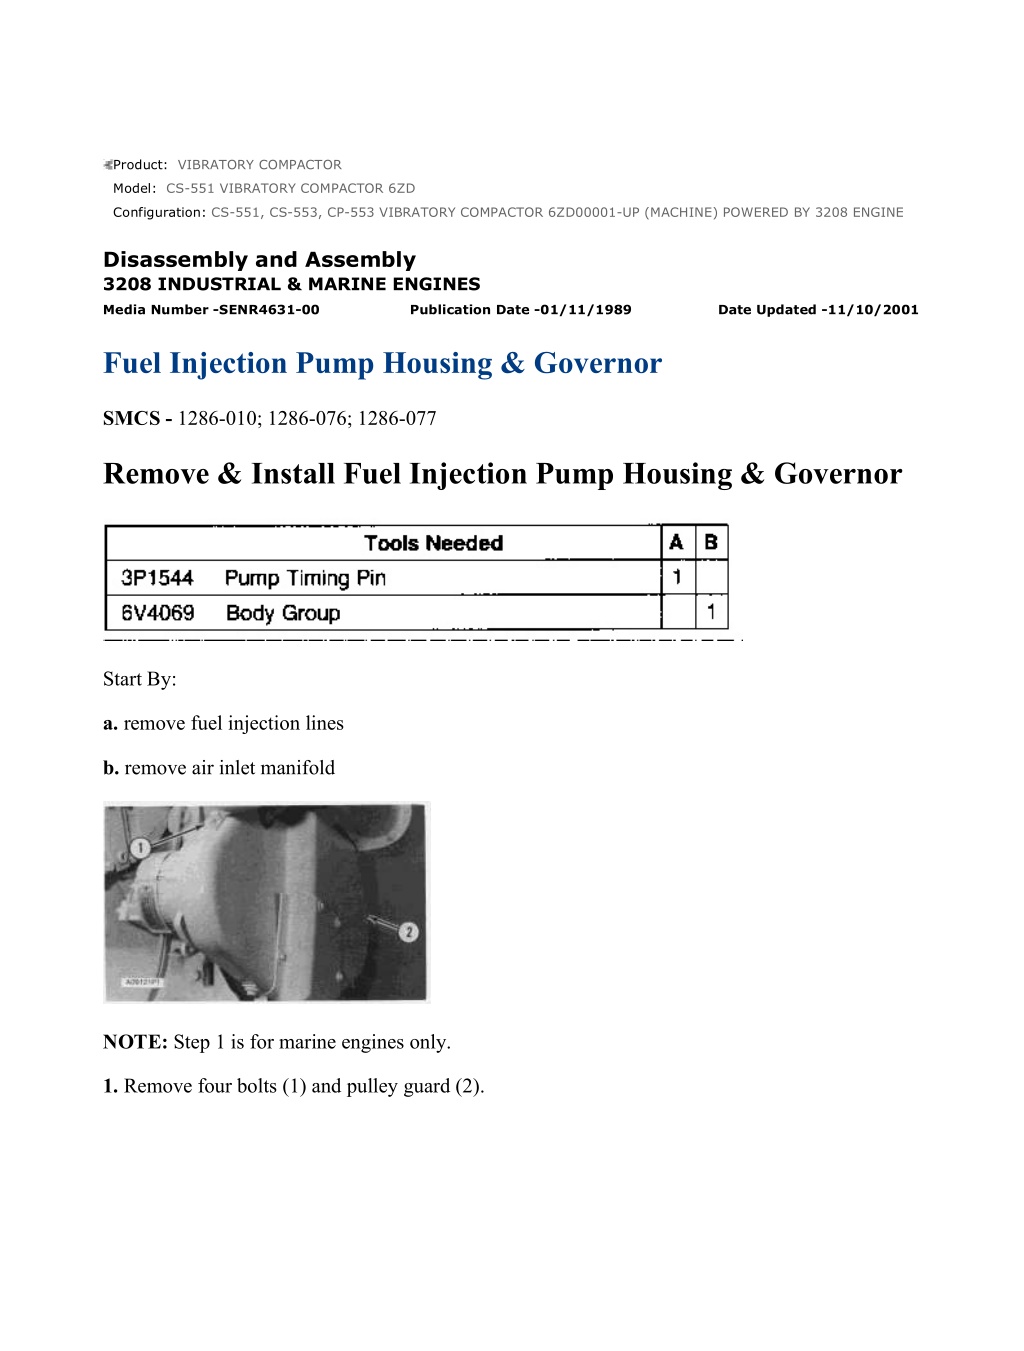
CS-551, CS-553, CP-553 VIBRATORY COMPACTOR 6ZD00001-UP (MACHINE) ... 1/16 Product: VIBRATORY COMPACTOR Model: CS-551 VIBRATORY COMPACTOR 6ZD Configuration: CS-551, CS-553, CP-553 VIBRATORY COMPACTOR 6ZD00001-UP (MACHINE) POWERED BY 3208 ENGINE Disassembly and Assembly 3208 INDUSTRIAL & MARINE ENGINES Media Number -SENR4631-00 Publication Date -01/11/1989 Date Updated -11/10/2001 Fuel Injection Pump Housing & Governor SMCS - 1286-010; 1286-076; 1286-077 Remove & Install Fuel Injection Pump Housing & Governor Start By: a. remove fuel injection lines b. remove air inlet manifold NOTE: Step 1 is for marine engines only. 1. Remove four bolts (1) and pulley guard (2). https://127.0.0.1/sisweb/sisweb/techdoc/techdoc_print_page.jsp?returnurl=/sisw... 2022/1/5
CS-551, CS-553, CP-553 VIBRATORY COMPACTOR 6ZD00001-UP (MACHINE) ... 2/16 2. Remove the plug from the cover and install tool (A). Turn the crankshaft (clockwise) until the timing pin drops into the groove (slot) in the fuel injection pump camshaft. 3. Remove two nuts (4) and tachometer drive cover (3). 4. Remove tachometer drive shaft (5). Old 5P2371 Puller Plate shown for location purposes only. 5. Install tooling (B) into the camshaft drive gear for the fuel injection pump. Turn the center bolt of tooling (B) until the drive gear is free of the shaft. Remove tooling (B). https://127.0.0.1/sisweb/sisweb/techdoc/techdoc_print_page.jsp?returnurl=/sisw... 2022/1/5
CS-551, CS-553, CP-553 VIBRATORY COMPACTOR 6ZD00001-UP (MACHINE) ... 3/16 6. Remove the plug from the timing hole in the front cover and install a 5/16"-18 NC bolt (6) 2 1/2 in. long. The cover bolt from hole (7) can be used. Turn the crankshaft (clockwise) until bolt (6) can be installed into the timing gear and is in the center of the timing hole. The camshaft for the fuel injection pump is now in correct time to the engine. 7. Remove lines (8) and bolts (9). 8. Remove the fuel injection pump housing and governor as a unit. NOTE: The following steps are for installation of the fuel injection pump housing and governor. 9. Put the fuel injection pump housing and governor in position on the engine. 10. Install bolts (9) and lines (8). Earlier tachometer drive shaft https://127.0.0.1/sisweb/sisweb/techdoc/techdoc_print_page.jsp?returnurl=/sisw... 2022/1/5
https://www.ebooklibonline.com Hello dear friend! Thank you very much for reading. Enter the link into your browser. The full manual is available for immediate download. https://www.ebooklibonline.com
CS-551, CS-553, CP-553 VIBRATORY COMPACTOR 6ZD00001-UP (MACHINE) ... 4/16 Later tachometer drive shaft NOTE: Illustration A23394P1 shows earlier tachometer drive shaft that must be tightened to a torque of 110 7 N m (80 5 lb ft). Illustration A23857P1 shows a later tachometer drive shaft. When the engine is equipped with the later tachometer drive shaft, tighten it to a torque of 149 14 N m (110 10 lb ft). 11. Install tachometer drive shaft (5) and tighten it to a torque of 110 7 N m (80 5 lb ft). 12. To check the timing, remove the timing pin [tool (A)] and bolt (6). Turn the crankshaft (clockwise) two revolutions and install the timing pin [tool (A)] and bolt (6) back in place. If the timing pin or bolt can not be installed, the fuel injection pump camshaft must be put in time again before doing Step 13. 13. Remove bolt (6) from the timing gear. Install the plug into the timing hole. 14. Remove tool (A) from the timing groove (slot) in the fuel injection pump camshaft and install the plug. 15. Install tachometer drive housing (3) and nuts (4). NOTE: Step 16 is for marine engines only. 16. Install pulley guard (2) and bolts (1). End By: a. install air inlet manifold b. install fuel injection lines Separate Fuel Injection Pump Housing & Governor (Serial Numbers 90N1-90N6120) https://127.0.0.1/sisweb/sisweb/techdoc/techdoc_print_page.jsp?returnurl=/sisw... 2022/1/5
CS-551, CS-553, CP-553 VIBRATORY COMPACTOR 6ZD00001-UP (MACHINE) ... 5/16 Start By: a. remove fuel injection pump housing & governor 1. Install the fuel injection pump housing on tool (A). 2. Remove bolts (1) and governor housing (2). 3. Remove two springs (4) and seat (5). 4. Remove seat (7) and spring (6). 5. Remove cover (3). 6. Remove shaft (8) and lever (9). https://127.0.0.1/sisweb/sisweb/techdoc/techdoc_print_page.jsp?returnurl=/sisw... 2022/1/5
CS-551, CS-553, CP-553 VIBRATORY COMPACTOR 6ZD00001-UP (MACHINE) ... 6/16 7. Remove thrust collar (11). 8. Remove cover (10). 9. Remove bolts (13) and torque spring assembly (12). 10. Remove pin (15). 11. Remove screw (14) and nut (16). 12. Remove the ring that holds lever (18) and remove the lever from dowel (17). NOTE: Dowel does not need to be removed unless camshaft is to be removed. 13. Remove dowel (17). https://127.0.0.1/sisweb/sisweb/techdoc/techdoc_print_page.jsp?returnurl=/sisw... 2022/1/5
CS-551, CS-553, CP-553 VIBRATORY COMPACTOR 6ZD00001-UP (MACHINE) ... 7/16 NOTICE Pull on the shield only a small amount in each location, so it will not have distortion or damage. The metal of the shield is moved (staked) around the camshaft and the shield can be damaged when it is removed. If the shield has damage, use a new part for replacement. 14. Remove the shield (19) with tool (B). 15. Install timing pin (C) to hold the camshaft. 16. Remove bolts (20) and flyweight assembly (21). 17. Remove timing pin (C). Connect Fuel Injection Pump Housing & Governor (Serial Numbers 90N1-90N6120) 1. Put the fuel injection pump housing on bracket assembly (A). 2. Install timing pin (C) to hold the camshaft. https://127.0.0.1/sisweb/sisweb/techdoc/techdoc_print_page.jsp?returnurl=/sisw... 2022/1/5
CS-551, CS-553, CP-553 VIBRATORY COMPACTOR 6ZD00001-UP (MACHINE) ... 8/16 NOTE: Be sure the pin that holds shaft (22) is in position on the back of the flyweight assembly. 3. Put flyweight assembly (21) in position on the camshaft. 4. Install the bolts that hold the flyweight assembly to the camshaft and tighten them to a torque of 13.6 2.8 N m (120 24 lb in) for earlier governor and 10.2 1.1 N m (90 10 lb in) for later governors with thin bolt heads. 5. Remove timing pin (C). 6. Put shield (19) in position over the flyweights. 7. Use driver (D) to install the shield the remainder of the way on to the camshaft. Move the metal (stake) at two places on the shield 180 5 apart to hold the shield on the camshaft. 8. Put a new O-ring seal on dowel (17) and install the dowel in the pump housing. Make the dowel even with the machined surface of the counterbore on the outside of the housing. 9. Put lever (18) on dowel (17) and install the ring that holds it on the dowel. 10. Install screw (14) and nut (16). 11. Install pin (15). https://127.0.0.1/sisweb/sisweb/techdoc/techdoc_print_page.jsp?returnurl=/sisw... 2022/1/5
CS-551, CS-553, CP-553 VIBRATORY COMPACTOR 6ZD00001-UP (MACHINE) ... 9/16 12. Put torque spring assembly (12) in position on the housing and install bolts (13). 13. Install cover (10). 14. Put thrust collar (11) in position between the flyweights. Lift the flyweights up with a piece of wire and push thrust collar (11) forward. 15. Put lever (9) in position in the housing and in the groove of the thrust collar. Put a new O-ring seal on the shaft and install shaft (8) down through the housing and into the holes in lever (9). 16. Install cover (3). 17. Install spring (6) and seat (7). https://127.0.0.1/sisweb/sisweb/techdoc/techdoc_print_page.jsp?returnurl=/sisw... 2022/1/5
CS-551, CS-553, CP-553 VIBRATORY COMPACTOR 6ZD00001-UP (MACHIN... 10/16 NOTICE Both springs must make full contact on seat (5) before they are installed in the governor housing assembly. If the springs do not make full contact on the seat, high idle speed will not be correct and low idle governor surge can be the result. Low idle setting without stability can also be the result. 18. Install seat (5) and two springs (4) in the governor housing. 19. Install governor housing (2) and bolts (1). End By: a. make an adjustment of the fuel system setting (See Fuel System in Testing & Adjusting) b. install fuel injection pump housing & governor Separate Fuel Injection Pump Housing & Governor (Serial Numbers 90N6121-Up, 75V1-Up) Start By: a. remove fuel injection pump housing & governor 1. Install the fuel injection pump housing on tool (A). 2. Remove bolts (1) and governor housing (2). https://127.0.0.1/sisweb/sisweb/techdoc/techdoc_print_page.jsp?returnurl=/sisw... 2022/1/5
CS-551, CS-553, CP-553 VIBRATORY COMPACTOR 6ZD00001-UP (MACHIN... 11/16 3. Remove two springs (4) and seat (3). 4. Remove spring (6), seat and piston assembly (9), and spring (8) from shaft (7). 5. Remove cover (5). 6. Remove shaft (10) and lever (11). 7. Remove thrust collar (13). 8. Remove cover (12). https://127.0.0.1/sisweb/sisweb/techdoc/techdoc_print_page.jsp?returnurl=/sisw... 2022/1/5
CS-551, CS-553, CP-553 VIBRATORY COMPACTOR 6ZD00001-UP (MACHIN... 12/16 9. Remove two bolts (14) and torque spring assembly (15). 10. Remove pin (16). 11. Remove screw (18) and nut (19). 12. Remove the ring that holds the lever and remove lever (20) from dowel (17). NOTE: Dowel does not need to be removed unless camshaft is to be removed. 13. Remove dowel (17). NOTICE Pull on the shield only a small amount in each location, so it will not have distortion or damage. The metal of earlier shields is moved (staked) around the camshaft and can be damaged when removed. If the shield has damage, use a new part for replacement. 14. Remove shield (21) with tool (B). https://127.0.0.1/sisweb/sisweb/techdoc/techdoc_print_page.jsp?returnurl=/sisw... 2022/1/5
CS-551, CS-553, CP-553 VIBRATORY COMPACTOR 6ZD00001-UP (MACHIN... 13/16 15. Install timing pin (C) to hold the camshaft. 16. Remove bolts (22) and flyweight assembly (23). Connect Fuel Injection Pump Housing & Governor (Serial Numbers 90N6121-Up, 75V1-Up) 1. Put the fuel injection pump housing on bracket assembly (A). 2. Install timing pin (C) to hold the camshaft. NOTE: Be sure the pin that holds shaft (24) is in position on the back of the flyweight assembly. 3. Put flyweight assembly (23) in position on the camshaft. 4. Install the bolts that hold the flyweight assembly to the camshaft and tighten to a torque of 13.6 2.8 N m (120 24 lb in) for earlier governors and 10.2 1.1 N m (90 10 lb in) for later governors with thin bolt heads. 5. Remove timing pin (C). https://127.0.0.1/sisweb/sisweb/techdoc/techdoc_print_page.jsp?returnurl=/sisw... 2022/1/5
CS-551, CS-553, CP-553 VIBRATORY COMPACTOR 6ZD00001-UP (MACHIN... 14/16 6. Put shield (21) in position over the flyweights. 7. Use driver (D) to install the shield the remainder of the way on to the camshaft. Move the metal (stake) at two places on the shield 180 5 apart to hold the shield on the camshaft. 8. Put a new O-ring seal on dowel (17) and install the dowel in the pump housing. Make the dowel even with the machined surface of the counterbore on the outside of the housing. 9. Put lever (20) on dowel (17) and install the ring that holds it on the dowel. 10. Install screw (18) and nut (19). 11. Install pin (16). 12. Put torque spring assembly (15) in position on the housing and tighten two bolts (14). https://127.0.0.1/sisweb/sisweb/techdoc/techdoc_print_page.jsp?returnurl=/sisw... 2022/1/5
CS-551, CS-553, CP-553 VIBRATORY COMPACTOR 6ZD00001-UP (MACHIN... 15/16 13. Install cover (12). 14. Put thrust collar (13) in position between the flyweights. Lift the flyweights up with a piece of wire and push thrust collar (13) forward. 15. Put lever (11) in position in the housing and in the groove of thrust collar (13). Put a new O- ring seal on the shaft and install shaft (10) down through the housing and into the holes in lever (11). 16. Install cover (5). 17. Install spring (8). 18. Install seat and piston assembly (9). 19. Turn spring (6) on the piston and seat until it just contacts the shoulders on the piston and seat. The piston and seat must be in alignment after spring (6) is installed. If not, remove the spring and install again. https://127.0.0.1/sisweb/sisweb/techdoc/techdoc_print_page.jsp?returnurl=/sisw... 2022/1/5
CS-551, CS-553, CP-553 VIBRATORY COMPACTOR 6ZD00001-UP (MACHIN... 16/16 NOTICE Both springs must make full contact on seat (3) before they are installed in the governor housing assembly. If the springs do not make full contact on the seat, high idle speed will not be correct and low idle governor surge can be the result. Low idle setting without stability can also be the result. 20. Install seat (3) and two springs (4). 21. Install governor housing (2) and bolts (1). End By: a. make an adjustment of the fuel system setting (See Fuel System in Testing and Adjusting) b. install fuel injection pump housing & governor https://127.0.0.1/sisweb/sisweb/techdoc/techdoc_print_page.jsp?returnurl=/sisw... 2022/1/5
CS-551, CS-553, CP-553 VIBRATORY COMPACTOR 6ZD00001-UP (MACHINE) ... 1/2 Product: VIBRATORY COMPACTOR Model: CS-551 VIBRATORY COMPACTOR 6ZD Configuration: CS-551, CS-553, CP-553 VIBRATORY COMPACTOR 6ZD00001-UP (MACHINE) POWERED BY 3208 ENGINE Disassembly and Assembly 3208 INDUSTRIAL & MARINE ENGINES Media Number -SENR4631-00 Publication Date -01/11/1989 Date Updated -11/10/2001 Check Valve & Bypass Valve SMCS - 1256-010 Remove & Install Check Valve & Bypass Valve NOTICE Before any service work is done on the fuel system, the outer surface of the injection pump housing must be clean. NOTE: Illustrations show fuel injection pump housing and governor removed from engine. Service work can be done with it installed on engine. 1. Remove fuel lines (3). Remove two bolts (2), flange and flange assembly (1) and the gaskets. https://127.0.0.1/sisweb/sisweb/techdoc/techdoc_print_page.jsp?returnurl=/sisw... 2022/1/5
CS-551, CS-553, CP-553 VIBRATORY COMPACTOR 6ZD00001-UP (MACHINE) ... 2/2 2. Remove check valve (4) from the flange assembly. 3. Remove seven bolts (6), cover (5), and the gasket. 4. Remove spring (7) and bypass valve (8). NOTE: For installation of the check valve and bypass valve, reverse the removal steps. https://127.0.0.1/sisweb/sisweb/techdoc/techdoc_print_page.jsp?returnurl=/sisw... 2022/1/5
Suggest: For more complete manuals. Please go to the home page. https://www.ebooklibonline.com If the above button click is invalid. Please download this document first, and then click the above link to download the complete manual. Thank you so much for reading
CS-551, CS-553, CP-553 VIBRATORY COMPACTOR 6ZD00001-UP (MACHINE) ... 1/3 Product: VIBRATORY COMPACTOR Model: CS-551 VIBRATORY COMPACTOR 6ZD Configuration: CS-551, CS-553, CP-553 VIBRATORY COMPACTOR 6ZD00001-UP (MACHINE) POWERED BY 3208 ENGINE Disassembly and Assembly 3208 INDUSTRIAL & MARINE ENGINES Media Number -SENR4631-00 Publication Date -01/11/1989 Date Updated -11/10/2001 Shutoff Housing SMCS - 1259-010 Remove & Install Shutoff Housing NOTICE Before any service work is done on the fuel system, the outer surface of the injection pump housing must be clean. NOTE: Illustrations show fuel injection pump housing and governor removed from engine. Service work can be done with it installed on engine. 1. Remove flange (1) and flange assembly (2) from cover (3). 2. Remove the seven bolts and cover (3). https://127.0.0.1/sisweb/sisweb/techdoc/techdoc_print_page.jsp?returnurl=/sisw... 2022/1/5
CS-551, CS-553, CP-553 VIBRATORY COMPACTOR 6ZD00001-UP (MACHINE) ... 2/3 3. Remove solenoid (4). 4. Remove cover (6). 5. Remove two bolts (5). 6. Remove the cover from shutoff housing (7). 7. Remove lever (10) from shaft (11). 8. Remove shaft (9) from the shutoff housing. 9. Remove lever (8) from shaft (11). 10. Remove shaft (11) from the shutoff housing. 11. Remove seal (12) from the shutoff housing. NOTE: The following steps are for installation of the shutoff housing. https://127.0.0.1/sisweb/sisweb/techdoc/techdoc_print_page.jsp?returnurl=/sisw... 2022/1/5
https://www.ebooklibonline.com Hello dear friend! Thank you very much for reading. Enter the link into your browser. The full manual is available for immediate download. https://www.ebooklibonline.com


