Caterpillar Cat CP-533E Vibratory Compactor (Prefix TLH) Service Repair Manual Instant Download (TLH00001 and up)
Please open the website below to get the complete manualnn// n
Download Presentation

Please find below an Image/Link to download the presentation.
The content on the website is provided AS IS for your information and personal use only. It may not be sold, licensed, or shared on other websites without obtaining consent from the author. Download presentation by click this link. If you encounter any issues during the download, it is possible that the publisher has removed the file from their server.
E N D
Presentation Transcript
CP-533E Vibratory Compactor TLH00001-UP (MACHINE) POWERED BY 3054C E... 1/3 Product: VIBRATORY COMPACTOR Model: CP-533E VIBRATORY COMPACTOR TLH Configuration: CP-533E Vibratory Compactor TLH00001-UP (MACHINE) POWERED BY 3054C Engine Disassembly and Assembly 3054C Engines for Caterpillar Built Machines Media Number -SENR5069-18 Publication Date -01/05/2015 Date Updated -19/09/2018 i02294259 Crankshaft Front Seal - Install SMCS - 1160-012 Installation Procedure Table 1 Required Tools Tool Part Number Part Description Qty A 9U-6210 Front Seal Installer 1 NOTICE Keep all parts clean from contaminants. Contaminants may cause rapid wear and shortened component life. Note: This procedure assumes that the housing (front) is still on the engine. Do not follow this procedure if the housing (front) has been removed from the engine. Refer to this Disassembly and Assembly Manual, "Housing (Front) - Install" if the housing (front) has been removed from the engine. 1. Clean the oil seal housing (8) and inspect the oil seal housing for damage. If necessary, replace the housing (front). Refer to this Disassembly and Assembly Manual, "Housing (Front) - Remove and Housing (Front) - Install". 2. Check the face on the pulley that contacts the crankshaft front seal for wear. If necessary, repair the crankshaft pulley. Refer to this Disassembly and Assembly Manual, "Crankshaft Wear Sleeve (Front) - Remove and Crankshaft Wear Sleeve (Front) - Install" for further details. https://127.0.0.1/sisweb/sisweb/techdoc/techdoc_print_page.jsp?returnurl=/sis... 2021/4/10
CP-533E Vibratory Compactor TLH00001-UP (MACHINE) POWERED BY 3054C E... 2/3 Note: A sleeve (5) is attached to the new crankshaft front seal (6). Do not remove the sleeve (5) at this time. Discard the new crankshaft front seal (6) if the sleeve (5) is not installed on the new crankshaft front seal. Illustration 1 g01148784 The Tooling (A) includes items 1, 2, 3, 4, 7 and 9. 3. Install the fastener plate (7) onto the front of the crankshaft. Install the nut (1) and the pressure plate (2) onto the threaded bar (3). Note: Do not lubricate the crankshaft front seal (6). Do not lubricate the oil seal housing (8). NOTICE Ensure that the lip of the crankshaft front seal that is spring loaded is facing toward the inside of the front housing and that it is square with the bore of the housing for the crankshaft front seal. 4. Align the assembly of the sleeve (5) and the crankshaft front seal (6) to the front of the oil seal housing (8). 5. Install the adapter (4) onto the sleeve (5). 6. Install the pressure plate (2) onto the adapter (4) and tighten the threaded bar (3) onto the fastener plate (7). Check the alignment of the assembly and the crankshaft front seal (6) to the oil seal housing (8). 7. Insert a suitable rod through the hole (9) in the threaded bar (3) in order to prevent the threaded rod from turning as the nut (1) is tightened. Tighten the nut (1) in order to push the https://127.0.0.1/sisweb/sisweb/techdoc/techdoc_print_page.jsp?returnurl=/sis... 2021/4/10
CP-533E Vibratory Compactor TLH00001-UP (MACHINE) POWERED BY 3054C E... 3/3 crankshaft front seal (6) into the oil seal housing (8). Continue to tighten the nut (1) until contact is made with the bottom face of the oil seal housing (8). 8. Turn the sleeve (5) counterclockwise and pull the sleeve at the same time in order to remove the sleeve from the oil seal housing (8). Remove the adapter (7). 9. Immediately install the crankshaft pulley. Refer to this Disassembly and Assembly Manual, "Crankshaft Pulley - Remove and Install". https://127.0.0.1/sisweb/sisweb/techdoc/techdoc_print_page.jsp?returnurl=/sis... 2021/4/10
https://www.ebooklibonline.com Hello dear friend! Thank you very much for reading. Enter the link into your browser. The full manual is available for immediate download. https://www.ebooklibonline.com
CP-533E Vibratory Compactor TLH00001-UP (MACHINE) POWERED BY 3054C E... 1/3 Product: VIBRATORY COMPACTOR Model: CP-533E VIBRATORY COMPACTOR TLH Configuration: CP-533E Vibratory Compactor TLH00001-UP (MACHINE) POWERED BY 3054C Engine Disassembly and Assembly 3054C Engines for Caterpillar Built Machines Media Number -SENR5069-18 Publication Date -01/05/2015 Date Updated -19/09/2018 i02294796 Front Cover - Remove and Install SMCS - 1166-010 Removal Procedure Start By: a. Remove the water pump. Refer to Disassembly and Assembly, "Water Pump - Remove and Install". Note: It is not necessary to remove the fan, the crankshaft pulley or the alternator in order to remove the front cover. The fan, the crankshaft pulley and the alternator have been removed for illustration purposes. Illustration 1 g00955548 https://127.0.0.1/sisweb/sisweb/techdoc/techdoc_print_page.jsp?returnurl=/sis... 2021/4/10
CP-533E Vibratory Compactor TLH00001-UP (MACHINE) POWERED BY 3054C E... 2/3 1. Remove the setscrews (3) and the setscrews (4). Remove the setscrew (5) from the front cover (1). 2. Remove the front cover from the front housing. 3. Remove the gasket (2) from the front cover and the front housing. Discard the gasket. Installation Procedure Table 1 Required Tools Tool Part Number Part Description Qty Guide Bolt (M8 x 1.25 x 70mm) A - 2 1. Clean all surfaces of the front housing and clean the front cover thoroughly. Note: Do not use sealant on the gasket for the front cover. Illustration 2 g00955554 2. Position the gasket (2) on the front cover (1). Note: The gasket is located by three locating dowels at Location (X) on the front cover. 3. Install the Tooling (A) in the front housing at Location (Z). 4. Position the front cover (1) and the gasket (2) on the front housing. Install the setscrews (3) in Location (Y). Install the setscrews (4) and the setscrew (5). Tighten the setscrews to a torque of 22 N m (16 lb ft). https://127.0.0.1/sisweb/sisweb/techdoc/techdoc_print_page.jsp?returnurl=/sis... 2021/4/10
CP-533E Vibratory Compactor TLH00001-UP (MACHINE) POWERED BY 3054C E... 3/3 End By: a. Install the water pump. Refer to Disassembly and Assembly, "Water Pump - Remove and Install". https://127.0.0.1/sisweb/sisweb/techdoc/techdoc_print_page.jsp?returnurl=/sis... 2021/4/10
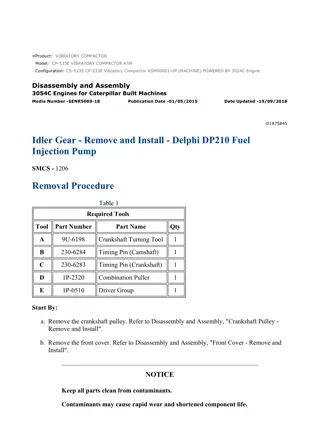
CP-533E Vibratory Compactor TLH00001-UP (MACHINE) POWERED BY 3054C E... 1/8 Product: VIBRATORY COMPACTOR Model: CP-533E VIBRATORY COMPACTOR TLH Configuration: CP-533E Vibratory Compactor TLH00001-UP (MACHINE) POWERED BY 3054C Engine Disassembly and Assembly 3054C Engines for Caterpillar Built Machines Media Number -SENR5069-18 Publication Date -01/05/2015 Date Updated -19/09/2018 i01875845 Idler Gear - Remove and Install - Delphi DP210 Fuel Injection Pump SMCS - 1206 Removal Procedure Table 1 Required Tools Tool Part Number Part Name Qty A 9U-6198 Crankshaft Turning Tool 1 B 230-6284 Timing Pin (Camshaft) 1 C 230-6283 Timing Pin (Crankshaft) 1 D 1P-2320 Combination Puller 1 E 1P-0510 Driver Group 1 Start By: a. Remove the crankshaft pulley. Refer to Disassembly and Assembly, "Crankshaft Pulley - Remove and Install". b. Remove the front cover. Refer to Disassembly and Assembly, "Front Cover - Remove and Install". NOTICE Keep all parts clean from contaminants. Contaminants may cause rapid wear and shortened component life. https://127.0.0.1/sisweb/sisweb/techdoc/techdoc_print_page.jsp?returnurl=/sis... 2021/4/10
CP-533E Vibratory Compactor TLH00001-UP (MACHINE) POWERED BY 3054C E... 2/8 NOTICE Care must be taken to ensure that fluids are contained during performance of inspection, maintenance, testing, adjusting, and repair of the product. Be prepared to collect the fluid with suitable containers before opening any compartment or disassembling any component containing fluids. Refer to Special Publication, NENG2500, "Dealer Service Tool Catalog" for tools and supplies suitable to collect and contain fluids on Cat products. Dispose of all fluids according to local regulations and mandates. 1. Use Tooling (A) to ensure that the No. 1 cylinder is at the top center compression stroke. Refer to Testing and Adjusting, "Finding Top Center Position for No. 1 Piston". Note: Install Tooling (B) through the camshaft gear. Install Tooling (C) into the crankshaft web. NOTICE The valve timing and the fuel injection pump timing will be lost if the crankshaft is rotated when the idler gear is removed. https://127.0.0.1/sisweb/sisweb/techdoc/techdoc_print_page.jsp?returnurl=/sis... 2021/4/10
CP-533E Vibratory Compactor TLH00001-UP (MACHINE) POWERED BY 3054C E... 3/8 Illustration 1 g00992803 2. Loosen bolt (1). Move spacer (2) in order to allow bolt (1) to tighten against the shaft of the fuel injection pump. Rotate and hold the fuel injection pump gear in a counterclockwise direction in order to remove the backlash. Tighten bolt (1) to a torque of 17 N m (13 lb ft). Note: Bolt (1) must be tightened in order to prevent the shaft of the fuel injection pump from rotating. Illustration 2 g00992812 3. Remove nut (3) and the washer from the shaft of the fuel injection pump. 4. Install Tooling (D) and remove fuel injection pump gear (4). Note: Do Not pry the fuel injection pump gear from the shaft of the fuel injection pump. 5. Remove bolts (7) and retaining plate (6). https://127.0.0.1/sisweb/sisweb/techdoc/techdoc_print_page.jsp?returnurl=/sis... 2021/4/10
CP-533E Vibratory Compactor TLH00001-UP (MACHINE) POWERED BY 3054C E... 4/8 Illustration 3 g00992822 6. Remove idler gear (5) and idler gear hub (9). 7. Use Tooling (E) and remove bushings (8) from each side of the idler gear. Installation Procedure Table 2 A 9U-6198 Crankshaft Turning Tool 1 B 230-6284 Timing Pin (Camshaft) 1 C 230-6283 Timing Pin (Crankshaft) 1 E 1P-0510 Driver Group 1 NOTICE Keep all parts clean from contaminants. Contaminants may cause rapid wear and shortened component life. 1. Use Tooling (A) to ensure that the No. 1 cylinder is at the top center compression stroke. Refer to Testing and Adjusting, "Finding Top Center Position for No. 1 Piston". Note: Install Tooling (B) through the camshaft gear. Install Tooling (C) into the crankshaft web. https://127.0.0.1/sisweb/sisweb/techdoc/techdoc_print_page.jsp?returnurl=/sis... 2021/4/10
CP-533E Vibratory Compactor TLH00001-UP (MACHINE) POWERED BY 3054C E... 5/8 NOTICE The valve timing and the fuel injection pump timing will be lost if the crankshaft is rotated when the idler gear is removed. Illustration 4 g00943872 2. Position idler gear hub (9) and install bolts (7) in order to locate the idler gear hub. Tighten the bolts in order to seat the idler gear hub. Note: The Lubrication Hole (X) of the idler gear hub must be positioned at the top of the idler gear hub. 3. Use a suitable press and Tooling (E) to install bushings (8) on each side of idler gear (5). 4. Remove bolts (7) from the idler gear hub. Install idler gear (5) on idler gear hub (9). Note: When you install the idler gear, ensure that the marked teeth are facing toward the front. 5. Install retainer plate (6) and bolts (7). Tighten the bolts to a torque of 44 N m (32 lb ft). https://127.0.0.1/sisweb/sisweb/techdoc/techdoc_print_page.jsp?returnurl=/sis... 2021/4/10
CP-533E Vibratory Compactor TLH00001-UP (MACHINE) POWERED BY 3054C E... 6/8 Illustration 5 g00944081 6. Check the end play for the idler gear. The end play for the idler gear is 0.10 to 0.20 mm (0.004 to 0.008 inch). Illustration 6 g00944084 7. Check the backlash between the idler gear and the camshaft gear. The backlash for the gears is 0.052 to 0.107 mm (0.0020 to 0.0042 inch). 8. Check the backlash between the idler gear and the crankshaft gear. The backlash for the gears is 0.064 to 0.124 mm (0.0025 to 0.0049 inch). https://127.0.0.1/sisweb/sisweb/techdoc/techdoc_print_page.jsp?returnurl=/sis... 2021/4/10
CP-533E Vibratory Compactor TLH00001-UP (MACHINE) POWERED BY 3054C E... 7/8 Illustration 7 g00992853 Note: Ensure that the mating surfaces of the fuel injection pump gear and the shaft of the fuel injection pump are clean. Lubricate the threads of the shaft for the fuel injection pump. The nut must turn freely until contact is made with the fuel injection pump gear. 9. Position fuel injection pump gear (4) on the shaft of the fuel injection pump. Rotate the fuel injection pump gear in a counterclockwise direction in order to remove the backlash. Install the washer and nut (3). Tighten the nut to a torque of 24 N m (17 lb ft). Illustration 8 g00992803 10. Loosen bolt (1). Move spacer (2) in order to prevent bolt (1) from tightening against the shaft of the fuel injection pump. Tighten bolt (1) to a torque of 12 N m (106 lb in). Note: Spacer (2) must be correctly positioned and bolt (1) must be tightened in order to prevent the bolt from contacting the shaft of the fuel injection pump. https://127.0.0.1/sisweb/sisweb/techdoc/techdoc_print_page.jsp?returnurl=/sis... 2021/4/10
CP-533E Vibratory Compactor TLH00001-UP (MACHINE) POWERED BY 3054C E... 8/8 Illustration 9 g00992883 11. Tighten nut (3) to a torque of 88 N m (65 lb ft). 12. Remove Tooling (B) and Tooling (C). End By: a. Install the front cover. Refer to Disassembly and Assembly, "Front Cover - Remove and Install". b. Install the crankshaft pulley. Refer to Disassembly and Assembly, "Crankshaft Pulley - Remove and Install". https://127.0.0.1/sisweb/sisweb/techdoc/techdoc_print_page.jsp?returnurl=/sis... 2021/4/10
CP-533E Vibratory Compactor TLH00001-UP (MACHINE) POWERED BY 3054C E... 1/4 Product: VIBRATORY COMPACTOR Model: CP-533E VIBRATORY COMPACTOR TLH Configuration: CP-533E Vibratory Compactor TLH00001-UP (MACHINE) POWERED BY 3054C Engine Disassembly and Assembly 3054C Engines for Caterpillar Built Machines Media Number -SENR5069-18 Publication Date -01/05/2015 Date Updated -19/09/2018 i05324845 Housing (Front) - Remove SMCS - 1151-011 Removal Procedure Start By: a. Remove the alternator. Refer to Disassembly and Assembly, "Alternator - Remove". b. Remove the crankshaft pulley. Refer to Disassembly and Assembly, "Crankshaft Pulley - Remove and Install". c. Remove the front cover. Refer to Disassembly and Assembly, "Front Cover - Remove and Install". d. Remove the engine oil pan. Refer to Disassembly and Assembly, "Engine Oil Pan - Remove and Install". e. Remove the idler gear. Refer to Disassembly and Assembly, "Idler Gear - Remove and Install". f. Remove the camshaft gear. Refer to Disassembly and Assembly, "Camshaft Gear - Remove and Install". g. Remove the air compressor, if equipped. Refer to Disassembly and Assembly, "Air Compressor - Remove and Install". NOTICE Keep all parts clean from contaminants. Contaminants may cause rapid wear and shortened component life. https://127.0.0.1/sisweb/sisweb/techdoc/techdoc_print_page.jsp?returnurl=/sis... 2021/4/10
CP-533E Vibratory Compactor TLH00001-UP (MACHINE) POWERED BY 3054C E... 2/4 NOTICE Care must be taken to ensure that fluids are contained during performance of inspection, maintenance, testing, adjusting, and repair of the product. Be prepared to collect the fluid with suitable containers before opening any compartment or disassembling any component containing fluids. Refer to Special Publication, NENG2500, "Dealer Service Tool Catalog" for tools and supplies suitable to collect and contain fluids on Cat products. Dispose of all fluids according to local regulations and mandates. Illustration 1 g03373179 Typical example 1. Remove bolts (1). Remove bypass tube (2) from the cylinder head. Remove the O-ring seals from the bypass tube. https://127.0.0.1/sisweb/sisweb/techdoc/techdoc_print_page.jsp?returnurl=/sis... 2021/4/10
CP-533E Vibratory Compactor TLH00001-UP (MACHINE) POWERED BY 3054C E... 3/4 Illustration 2 g00994883 Typical Example 2. Remove bolts (4) that fasten fuel injection pump (3) to the front housing. Illustration 3 g00985259 3. Remove bolts (7) and bolts (9) that fasten the front housing (5) to the cylinder block. 4. Remove front housing (5). Remove gasket (8) from the cylinder block and the front housing. 5. Remove gasket (6) from the back side of the front housing. 6. Remove the O-ring seal from the fuel injection pump housing. https://127.0.0.1/sisweb/sisweb/techdoc/techdoc_print_page.jsp?returnurl=/sis... 2021/4/10
CP-533E Vibratory Compactor TLH00001-UP (MACHINE) POWERED BY 3054C E... 4/4 Illustration 4 g00985261 7. Remove thrust washer (10) from camshaft (11). https://127.0.0.1/sisweb/sisweb/techdoc/techdoc_print_page.jsp?returnurl=/sis... 2021/4/10
CP-533E Vibratory Compactor TLH00001-UP (MACHINE) POWERED BY 3054C E... 1/5 Product: VIBRATORY COMPACTOR Model: CP-533E VIBRATORY COMPACTOR TLH Configuration: CP-533E Vibratory Compactor TLH00001-UP (MACHINE) POWERED BY 3054C Engine Disassembly and Assembly 3054C Engines for Caterpillar Built Machines Media Number -SENR5069-18 Publication Date -01/05/2015 Date Updated -19/09/2018 i05324846 Housing (Front) - Install SMCS - 1151-012 Installation Procedure Table 1 Tool Part Number Part Name Qty Guide Bolt (M8 X 1.25 by 70 mm) A - 2 B 5P-3975 Rubber Lubricant - NOTICE Keep all parts clean from contaminants. Contaminants may cause rapid wear and shortened component life. 1. Clean all mating surfaces thoroughly. https://127.0.0.1/sisweb/sisweb/techdoc/techdoc_print_page.jsp?returnurl=/sis... 2021/4/10
CP-533E Vibratory Compactor TLH00001-UP (MACHINE) POWERED BY 3054C E... 2/5 Illustration 1 g00954818 2. Ensure that thrust washer (10) is aligned with hollow dowel (12). Install the thrust washer on camshaft (11). 3. Install a new O-ring seal on the fuel injection pump housing. Illustration 2 g00995387 4. Install Tooling (A) in the cylinder block in Hole (Y). 5. Position gasket (8) on Tooling (A). Install gasket (6) on the back side of front housing (5). 6. Position front housing (5) on the cylinder block. Install bolts (7) and bolts (9). Remove Tooling (A) and install the remaining bolts in order to secure the front housing to the cylinder block. Tighten bolts (7) and bolts (9) finger tight at this time. https://127.0.0.1/sisweb/sisweb/techdoc/techdoc_print_page.jsp?returnurl=/sis... 2021/4/10
CP-533E Vibratory Compactor TLH00001-UP (MACHINE) POWERED BY 3054C E... 3/5 Illustration 3 g00954906 7. Align the front housing and the cylinder block. Note: Ensure that the bottom of the front cover is aligned with the bottom of the cylinder block before the bolts are tightened. The alignment of the bottom face of the front cover and the bottom of the cylinder block must not exceed 0.00 0.05 mm (0.000 0.002 inch). 8. Tighten bolts (7) and bolts (9) to a torque of 22 N m (16 lb ft). Illustration 4 g00994883 Typical Example 9. Install bolts (4) that fasten fuel injection pump (3) to the front housing. Tighten the bolts to a torque of 25 N m (18 lb ft). https://127.0.0.1/sisweb/sisweb/techdoc/techdoc_print_page.jsp?returnurl=/sis... 2021/4/10
CP-533E Vibratory Compactor TLH00001-UP (MACHINE) POWERED BY 3054C E... 4/5 Illustration 5 g03373179 Typical example 10. Install new O-ring seals on bypass tube (2). Apply Tooling (B) to the O-ring seals. Install the bypass tube in the cylinder head. Install bolts (1). End By: a. Install the camshaft gear. Refer to Disassembly and Assembly, "Camshaft Gear - Remove and Install". b. Install the idler gear. Refer to Disassembly and Assembly, "Idler Gear - Remove and Install". c. Install the engine oil pan. Refer to Disassembly and Assembly, "Engine Oil Pan - Remove and Install". d. Install the front cover. Refer to Disassembly and Assembly, "Front Cover - Remove and Install". e. Install the crankshaft pulley. Refer to Disassembly and Assembly, "Crankshaft Pulley - Remove and Install". f. Install the alternator. Refer to Disassembly and Assembly, "Alternator - Install". g. Install the air compressor, if equipped. Refer to Disassembly and Assembly, "Air Compressor - Remove and Install". https://127.0.0.1/sisweb/sisweb/techdoc/techdoc_print_page.jsp?returnurl=/sis... 2021/4/10
Suggest: For more complete manuals. Please go to the home page. https://www.ebooklibonline.com If the above button click is invalid. Please download this document first, and then click the above link to download the complete manual. Thank you so much for reading
CP-533E Vibratory Compactor TLH00001-UP (MACHINE) POWERED BY 3054C E... 1/4 Product: VIBRATORY COMPACTOR Model: CP-533E VIBRATORY COMPACTOR TLH Configuration: CP-533E Vibratory Compactor TLH00001-UP (MACHINE) POWERED BY 3054C Engine Disassembly and Assembly 3054C Engines for Caterpillar Built Machines Media Number -SENR5069-18 Publication Date -01/05/2015 Date Updated -19/09/2018 i02295086 Accessory Drive - Remove and Install SMCS - 1207-010 Removal Procedure Table 1 Required Tools Tool Part Number Part Description Qty 8H-0663 Bearing Puller Gp 1 5F-7345 Screw 1 A 126-7183 Crossblock 1 126-7181 Sliding Plate 1 126-7177 Puller Leg 2 NOTICE Keep all parts clean from contaminants. Contaminants may cause rapid wear and shortened component life. https://127.0.0.1/sisweb/sisweb/techdoc/techdoc_print_page.jsp?returnurl=/sis... 2021/4/10
CP-533E Vibratory Compactor TLH00001-UP (MACHINE) POWERED BY 3054C E... 2/4 Illustration 1 g00948832 1. Remove the front cover (7). Refer to this Disassembly and Assembly Manual, "Front Cover - Remove and Install". 2. Remove the Allen head screws (2) and (9). Remove the accessory drive assembly (8) from the rear face of the front housing (11). 3. Remove circlip (6) from housing (8). 4. Use the Tooling (A) in order to remove the bearings (3) and (4) from the gear and the housing. 5. Remove the O-ring (12) from the front housing (8) and discard the O-ring. Installation Procedure Table 2 Required Tools Tool Part Number Part Description Qty B 7M-7456 Bearing Mount Compound 1 NOTICE https://127.0.0.1/sisweb/sisweb/techdoc/techdoc_print_page.jsp?returnurl=/sis... 2021/4/10
https://www.ebooklibonline.com Hello dear friend! Thank you very much for reading. Enter the link into your browser. The full manual is available for immediate download. https://www.ebooklibonline.com

