Caterpillar Cat 972M XE Wheel Loader (Prefix EDW) Service Repair Manual Instant Download (EDW00001 and up)
Please open the website below to get the complete manualnn//
Download Presentation

Please find below an Image/Link to download the presentation.
The content on the website is provided AS IS for your information and personal use only. It may not be sold, licensed, or shared on other websites without obtaining consent from the author. Download presentation by click this link. If you encounter any issues during the download, it is possible that the publisher has removed the file from their server.
E N D
Presentation Transcript
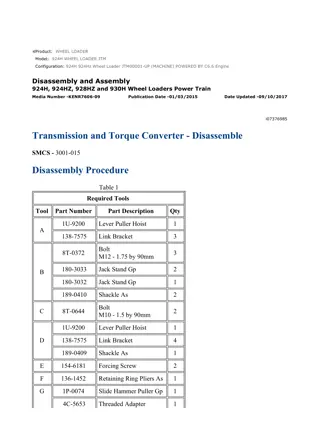
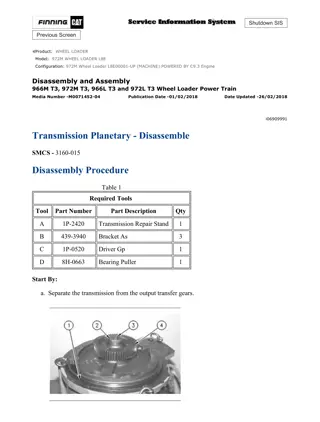
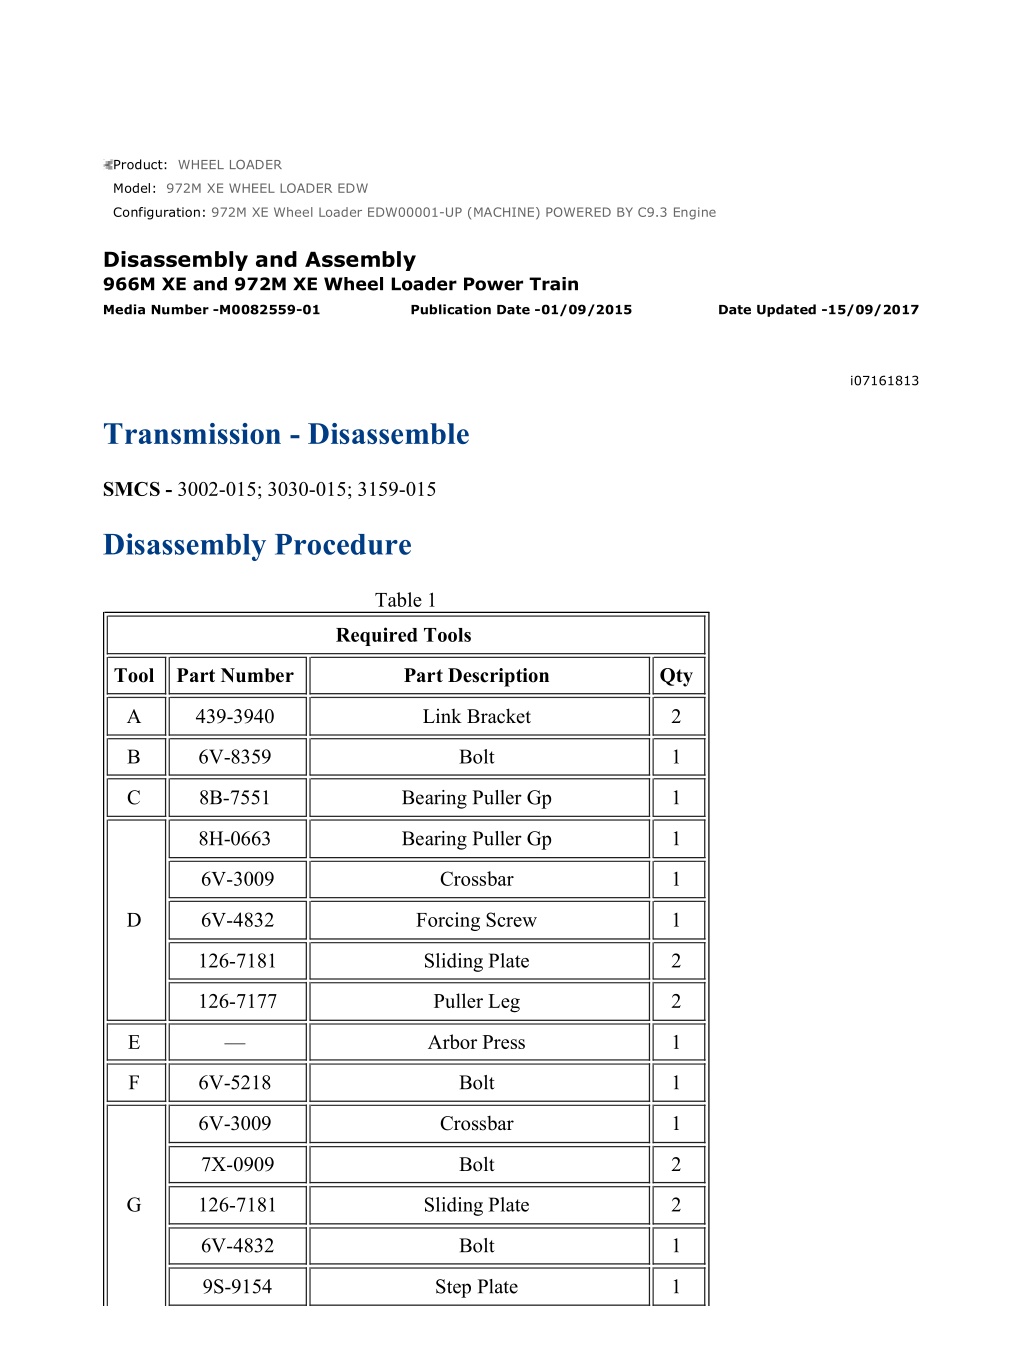
972M XE Wheel Loader EDW00001-UP (MACHINE) POWERED BY C9.3 Engine(... 1/58 Product: WHEEL LOADER Model: 972M XE WHEEL LOADER EDW Configuration: 972M XE Wheel Loader EDW00001-UP (MACHINE) POWERED BY C9.3 Engine Disassembly and Assembly 966M XE and 972M XE Wheel Loader Power Train Media Number -M0082559-01 Publication Date -01/09/2015 Date Updated -15/09/2017 i07161813 Transmission - Disassemble SMCS - 3002-015; 3030-015; 3159-015 Disassembly Procedure Table 1 Required Tools Tool Part Number Part Description Qty A 439-3940 Link Bracket 2 B 6V-8359 Bolt 1 C 8B-7551 Bearing Puller Gp 1 8H-0663 Bearing Puller Gp 1 6V-3009 Crossbar 1 D 6V-4832 Forcing Screw 1 126-7181 Sliding Plate 2 126-7177 Puller Leg 2 E Arbor Press 1 F 6V-5218 Bolt 1 6V-3009 Crossbar 1 7X-0909 Bolt 2 G 126-7181 Sliding Plate 2 6V-4832 Bolt 1 9S-9154 Step Plate 1 https://127.0.0.1/sisweb/sisweb/techdoc/techdoc_print_page.jsp?returnurl=/sis... 2022/1/23
972M XE Wheel Loader EDW00001-UP (MACHINE) POWERED BY C9.3 Engine(... 2/58 9U-7480 Compressing Tube 1 J 3E-3879 Eyebolt 1 K 5F-7343 Bearing Puller Gp 1 1P-0074 Slide Hammer Puller Gp 1 L 154-6183 Forcing Bolt 1 3E-3879 Eyebolt 2 M 368-8611 Adapter 2 - Threaded Rod M16 -2 by 70 mm Long 2 1U-9895 Crossblock 1 8T-0649 Bolt 2 N 3H-0465 Push-Puller Plate 2 5L-4544 Lifting Eye 1 6V-8182 Nut 1 6V-3009 Crossbar 1 6V-4832 Forcing Screw 1 126-7181 Sliding Plate 2 4C-5655 Threaded Adapter 2 P 9S-9152 Spacer 1 126-7177 Puller Leg 2 6B-6684 Full Nut 2 2M-0849 Hard Washer 2 6V-3009 Crossbar 1 126-7181 Sliding Plate 2 6V-4832 Forcing Screw 1 126-7177 Puller Leg 2 R 6B-6684 Full Nut 2 2M-0849 Hard Washer 2 4C-5652 Threaded Adapter 2 9S-9155 Spacer 1 S 156-7100 Slide Hammer Puller Gp 1 T 12mm bolt 1 https://127.0.0.1/sisweb/sisweb/techdoc/techdoc_print_page.jsp?returnurl=/sis... 2022/1/23
972M XE Wheel Loader EDW00001-UP (MACHINE) POWERED BY C9.3 Engine(... 3/58 U 1P-1861 Retaining Ring Pliers 1 1P-2420 Transmission Repair Stand 1 0S-1608 Bolts 4 AA 9S-8752 Full Nut 4 5M-2894 Hard Washer 8 370-0551 Adapter Plate 1 0T-0768 Bolts 4 BB 7X-0447 Nut 4 8T-5360 Washer 8 439-3938 Link Bracket 2 CC 1U-9200 Lever Puller Hoist Gp 1 386-6031(1) Lever Puller Hoist Gp 1 (1)This part number complies with European requirements. Illustration 1 g02323713 1. Drill a hole into each of the supports of Tooling (AA) so that each support may be bolted in the position shown in Illustration 1. Install bolts into each support. https://127.0.0.1/sisweb/sisweb/techdoc/techdoc_print_page.jsp?returnurl=/sis... 2022/1/23
https://www.ebooklibonline.com Hello dear friend! Thank you very much for reading. Enter the link into your browser. The full manual is available for immediate download. https://www.ebooklibonline.com
972M XE Wheel Loader EDW00001-UP (MACHINE) POWERED BY C9.3 Engine(... 4/58 Illustration 2 g02323714 2. Attach Tooling (BB) onto Tooling (AA) with the bolts, washers, and nuts. Illustration 3 g06060041 3. Attach Tooling (CC) and a suitable lifting device to the transmission. The weight of the transmission is approximately 1021 kg (2250 lb). https://127.0.0.1/sisweb/sisweb/techdoc/techdoc_print_page.jsp?returnurl=/sis... 2022/1/23
972M XE Wheel Loader EDW00001-UP (MACHINE) POWERED BY C9.3 Engine(... 5/58 Illustration 4 g06060045 4. Use the suitable lifting device to position the transmission onto Tooling (BB). Attach the transmission to Tooling (BB) with bolts and nuts. Illustration 5 g03142377 5. Disconnect harness assemblies (1) (2), and (4). Remove clips (3) from the transmission. Illustration 6 g06060299 6. Remove tube assembly (5). Remove bracket (6). https://127.0.0.1/sisweb/sisweb/techdoc/techdoc_print_page.jsp?returnurl=/sis... 2022/1/23
972M XE Wheel Loader EDW00001-UP (MACHINE) POWERED BY C9.3 Engine(... 6/58 Illustration 7 g06060752 7. Disconnect connectors (7), (8), and (9). Disconnect connectors (10). Remove bracket (11). Illustration 8 g06060770 8. Remove bracket assembly (12). Disconnect harness assemblies (13) and remove clips (14) and (15). Illustration 9 g06072740 9. Remove tubes (16). Remove manifold assembly (17). https://127.0.0.1/sisweb/sisweb/techdoc/techdoc_print_page.jsp?returnurl=/sis... 2022/1/23
972M XE Wheel Loader EDW00001-UP (MACHINE) POWERED BY C9.3 Engine(... 7/58 Illustration 10 g06083018 10. Remove O-ring seals (18) and 3 valves (19). Illustration 11 g06072765 11. Remove O-ring seals (20). Illustration 12 g06072801 12. Disconnect harness assemblies (21) and (22). Disconnect all clips (23). https://127.0.0.1/sisweb/sisweb/techdoc/techdoc_print_page.jsp?returnurl=/sis... 2022/1/23
972M XE Wheel Loader EDW00001-UP (MACHINE) POWERED BY C9.3 Engine(... 8/58 Illustration 13 g06060792 13. Disconnect hose assembly (24). Remove tube assembly (25). Remove bolts (26). Remove manifold assembly (27). Illustration 14 g06061192 14. Remove O-ring seals (28) from manifold assembly (27). Remove three valves (29). Illustration 15 g06061148 15. Remove O-rings (30), (31), and (32) from each valve. https://127.0.0.1/sisweb/sisweb/techdoc/techdoc_print_page.jsp?returnurl=/sis... 2022/1/23
972M XE Wheel Loader EDW00001-UP (MACHINE) POWERED BY C9.3 Engine(... 9/58 Illustration 16 g06061238 16. Remove bolt (33), retainer (34), and the O-ring seal from yoke (35). Remove yoke (35). Illustration 17 g06061245 17. Remove tube assembly (37). Remove bolts (36). Illustration 18 g06061272 https://127.0.0.1/sisweb/sisweb/techdoc/techdoc_print_page.jsp?returnurl=/sis... 2022/1/23
972M XE Wheel Loader EDW00001-UP (MACHINE) POWERED BY C9.3 Engin... 10/58 18. Remove bolts (41). Remove cover (39) and sensor assembly (40) as a unit. Remove plug (38). Illustration 19 g06061277 19. Remove target (42). Illustration 20 g06061294 Illustration 21 g06061308 20. Install Tooling (B) into rod (43). Turn rod (43) to the position shown in Illustration . Remove rod (43). https://127.0.0.1/sisweb/sisweb/techdoc/techdoc_print_page.jsp?returnurl=/sis... 2022/1/23
972M XE Wheel Loader EDW00001-UP (MACHINE) POWERED BY C9.3 Engin... 11/58 Illustration 22 g06072899 21. Attach a suitable lifting device and Tooling (A) to remove housing assembly (44). The weight of housing assembly (44) is approximately 113 kg (250 lb). Illustration 23 g06061381 22. Remove bolts (45). https://127.0.0.1/sisweb/sisweb/techdoc/techdoc_print_page.jsp?returnurl=/sis... 2022/1/23
972M XE Wheel Loader EDW00001-UP (MACHINE) POWERED BY C9.3 Engin... 12/58 Illustration 24 g06063210 23. Use two of bolts (45) to remove bearing cage (46). Illustration 25 g06063220 24. Remove shims (47). Illustration 26 g06063238 25. Remove O-ring seal (50), lip seal (49), and bearing cup (48) from bearing cage (46). Illustration 27 g06073095 https://127.0.0.1/sisweb/sisweb/techdoc/techdoc_print_page.jsp?returnurl=/sis... 2022/1/23
972M XE Wheel Loader EDW00001-UP (MACHINE) POWERED BY C9.3 Engin... 13/58 26. Remove cover (51). Illustration 28 g06063280 27. Remove O-ring seal (52). Remove suction screen (53) and tube (54). Illustration 29 g06063286 28. Remove seal rings (57). Remove roller bearings (55) and bearing cup (56). https://127.0.0.1/sisweb/sisweb/techdoc/techdoc_print_page.jsp?returnurl=/sis... 2022/1/23
972M XE Wheel Loader EDW00001-UP (MACHINE) POWERED BY C9.3 Engin... 14/58 Illustration 30 g06063293 29. Remove drain assembly (58). Illustration 31 g06092999 30. Remove bolt (59), retainer (60), and the O-ring seal from yoke (61). Remove yoke (61). Illustration 32 g06063318 31. Use Tooling (M) and a suitable lifting device to remove gear group (62). The weight of gear group (62) is approximately 36 kg (80 lb). https://127.0.0.1/sisweb/sisweb/techdoc/techdoc_print_page.jsp?returnurl=/sis... 2022/1/23
972M XE Wheel Loader EDW00001-UP (MACHINE) POWERED BY C9.3 Engin... 15/58 Illustration 33 g06063326 32. Use a suitable press to remove shaft (63) from gear (65) and bearing cone (64). Illustration 34 g06064876 33. Use Tooling (C) and a suitable press to remove bearing cone (66) from shaft (63). Illustration 35 g06090080 34. Remove shield assembly (67). Note the location of tab (68) for assembly purposes. https://127.0.0.1/sisweb/sisweb/techdoc/techdoc_print_page.jsp?returnurl=/sis... 2022/1/23
972M XE Wheel Loader EDW00001-UP (MACHINE) POWERED BY C9.3 Engin... 16/58 Illustration 36 g06090129 35. Back out detent pins (69) and (70). Illustration 37 g06073402 36. Remove sensor assembly (73). Remove bolts (72) from guide plate (71). Illustration 38 g06065000 37. Use one of bolts (72) to remove guide plate (71). https://127.0.0.1/sisweb/sisweb/techdoc/techdoc_print_page.jsp?returnurl=/sis... 2022/1/23
972M XE Wheel Loader EDW00001-UP (MACHINE) POWERED BY C9.3 Engin... 17/58 Illustration 39 g06065018 38. Remove sensor assembly (76). Remove bolts (75) from guide plate (74). If necessary, use one of bolts (75) to remove guide plate (74). Illustration 40 g06066714 39. Remove plug (77). Illustration 41 g06066718 https://127.0.0.1/sisweb/sisweb/techdoc/techdoc_print_page.jsp?returnurl=/sis... 2022/1/23
972M XE Wheel Loader EDW00001-UP (MACHINE) POWERED BY C9.3 Engin... 18/58 Illustration 42 g06066728 Illustration 43 g06067061 40. Remove retaining ring (78). Install Tooling (F), remove plug (79). 41. Remove bolt (80). Reinstall plug (79) and retaining ring (78). Illustration 44 g06067214 https://127.0.0.1/sisweb/sisweb/techdoc/techdoc_print_page.jsp?returnurl=/sis... 2022/1/23
972M XE Wheel Loader EDW00001-UP (MACHINE) POWERED BY C9.3 Engin... 19/58 Illustration 45 g06090408 Illustration 46 g06090453 42. Use Tooling (F) and a suitable pry bar to pull piston assembly (81) from the housing. 43. Remove O ring seals (82) from piston assembly (81). 44. Remove plug (79). Remove O-ring seals (83) from plug (79). 45. Repeat steps 42 for the opposite side. Illustration 47 g06067292 https://127.0.0.1/sisweb/sisweb/techdoc/techdoc_print_page.jsp?returnurl=/sis... 2022/1/23
Suggest: For more complete manuals. Please go to the home page. https://www.ebooklibonline.com If the above button click is invalid. Please download this document first, and then click the above link to download the complete manual. Thank you so much for reading
972M XE Wheel Loader EDW00001-UP (MACHINE) POWERED BY C9.3 Engin... 20/58 46. Use a brass punch to push guide sleeve (84) downward off shifting fork shaft (85), taking precautions not to damage the shaft. 47. Repeat step 46 for the opposite side. Illustration 48 g06091655 48. Use Tooling (D) to remove bearing assembly (86) from shaft assembly (87). Illustration 49 g06067616 49. Remove retaining clip (87) from shaft assembly (87) that secures synchronizer group (89). Illustration 50 g06067623 https://127.0.0.1/sisweb/sisweb/techdoc/techdoc_print_page.jsp?returnurl=/sis... 2022/1/23
972M XE Wheel Loader EDW00001-UP (MACHINE) POWERED BY C9.3 Engin... 21/58 50. Use two screwdrivers to help separate synchronizer group (89) from shaft assembly (87). Do not allow the parts of synchronizer group (89) to separate during the removal procedure. Illustration 51 g06067981 51. Remove blocker ring (90) and clutch body ring (91) from piston assembly (93). Illustration 52 g06091072 52. Remove retaining ring (92) from piston assembly (93). Illustration 53 g06068040 https://127.0.0.1/sisweb/sisweb/techdoc/techdoc_print_page.jsp?returnurl=/sis... 2022/1/23
https://www.ebooklibonline.com Hello dear friend! Thank you very much for reading. Enter the link into your browser. The full manual is available for immediate download. https://www.ebooklibonline.com

