Basic Moodle Course Creation Guide for Teachers
Learn how to create a course in Moodle, navigate the platform, enroll students, and set up basic course parameters effectively. The guide provides step-by-step instructions with accompanying visuals to help you get started quickly.

Download Presentation

Please find below an Image/Link to download the presentation.
The content on the website is provided AS IS for your information and personal use only. It may not be sold, licensed, or shared on other websites without obtaining consent from the author.If you encounter any issues during the download, it is possible that the publisher has removed the file from their server.
You are allowed to download the files provided on this website for personal or commercial use, subject to the condition that they are used lawfully. All files are the property of their respective owners.
The content on the website is provided AS IS for your information and personal use only. It may not be sold, licensed, or shared on other websites without obtaining consent from the author.
E N D
Presentation Transcript
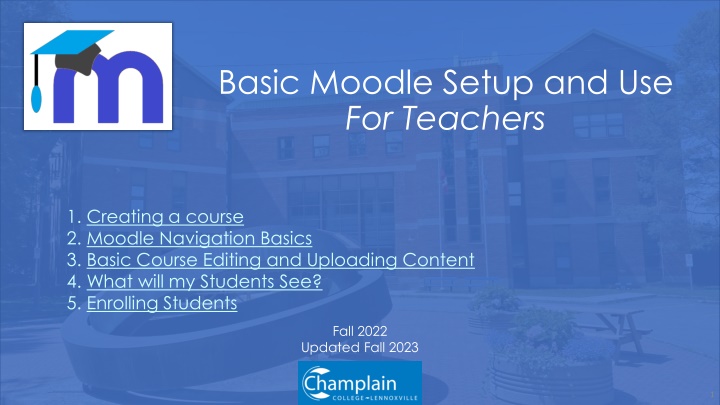
Basic Moodle Setup and Use For Teachers 1. Creating a course 2. Moodle Navigation Basics 3. Basic Course Editing and Uploading Content 4. What will my Students See? 5. Enrolling Students Fall 2022 Updated Fall 2023 1
1. Creating a Course To get started, navigate to the College homepage and select Moodle from the menu at the top. You can also use this link: <https://champlaincollege-lennoxville.moodle.decclic.qc.ca/> 2
This will bring you to the Champlain Moodle homepage. Click the Log in link in the top, right-hand corner. Your login information is the same as your Office 365 information (i.e., Jdoe@crc-lennox.qc.ca and your password.) 3
This will bring you to the Homepage. Click on Dashboard. 4
On the top, right-hand side of the page, you will see a small arrow allowing you to open a block drawer . Once opened, the Admin CEGEP block will display your classes for the semester. (Note that this data is manually imported from Clara by the College at the start of term when student schedules become available.) Select the present semester from the drop-down menu. Click Create to launch your class. 5
On the following page, find the Enrol coursegroup tab. Ensure that the box is checked and Save Changes to automatically enroll the students currently registered in the course. (Your course will remain invisible to students until you make it visible to them, so you still have time to construct your course.) 6
The new course will be blank. Click the gear wheel, and from the drop- down menu click Edit settings to set up the basic parameters of your course. 8
It is in the Settings tab that you will later be able to make your course visible to students. 9
Further down You can add an optional brief course summary. You can also upload a course image by clicking the page icon. Choosing a distinctive image is a handy way to help students visually keep track of where they need to go when navigating Moodle. 10
Course Format A little further down, set the Course format. This is the way that your Moodle course layout will appear. The most common settings are Topics format and Weekly format. The Topics format simply arranges the course landing page according to topics (or units, chapters, etc.), while the Weekly format sets the course up to follow a weekly schedule. Before the course is visible, you can experiment with these. You can try out the different formats and upload one or two items to see how things look. (This may get more difficult after you have uploaded extensive content to the course.) 11
You can browse the other settings. The default parameters will be suitable for most uses. When you are finished setting the course parameters, select Save and display at the bottom of the page. This will bring you to your new course. Note: If you kept your course hidden to allow you to set it up, you will have to later return to these settings to make it visible. 12
2. Moodle Navigation Basics In the default view, the Home Page shows your courses as well as a search bar through which you can look up other courses at the College. (Note that the search will only reveal visible courses; and only people with the needed permissions to enroll can access the courses.) Using the tabs in the top-left corner, you can jump to the Dashboard, which shows your recently accessed courses, as well as a calendar and a Timeline or list of upcoming deadlines. 13
On the My courses tab, you can see a more complete list of your courses and various options for displaying the list. 14
Once you navigate to a particular course, you need to turn on Editing mode in order to rearrange, add, or edit course items. You can do this by clicking the Edit mode switch in the top, right-hand corner. 15
On the top, left-hand side, you can open a little page navigation pane. This will open an automatically updated Index or table of items in your course, arranged by Weeks or Topics, and then by the smaller items falling within each of these sections. When Edit mode is enabled, you can drag and drop these items to reorder them. 16
3. Basic Course Editing and Uploading Content Back on your new course page To begin editing your course, you must again make sure that Editing mode is enabled on the top-right of the Moodle course page. 17
Various items will become visible depending on how you have set your course up to display. This example shows the default set up for the Weekly format. Having turned on the Editing mode, one can edit the content on the page, add new sections (in this case, additional weeks to the course), or add new activities. 18
The top of the course page is a great place to post the course outline or keep a link to forums that you expect students to continuously use throughout the semester. Other content to be used sequentially can be arranged in terms of weeks in the semester or topics in the course. These can be reordered and relabeled. You can add files, videos, quizzes, or other material that pertain to either a particular week or a particular topic. 19
To add content or an activity, click + Add an activity or resource. You can decide where in your course to add this by selecting the appropriate place here. You can also later decide to move the activity to another Weekly segment or to another Topic. 20
This will bring you to a window offering you many options. To try something simple, you could upload a File (a reading, lecture slides, etc). 21
Give your document a name. You can choose to add a description that will appear for students (in the link or on the homepage, as you choose). Finally, you can select a file from your computer, from among other recently used files on Moodle, from OneDrive, etc. You can also drag and drop items. 22
Further down You can also change how student engagement with the item is tracked. If it is optional (for only those who did not get the relevant information in class, for example), then you can keep this option off. Otherwise, you can require students to have consulted the item in order for the activity to be labeled as complete in the student s account. When you have adjusted all of the settings as you want them, click Save and return to course to go back to your course homepage, or Save and display to review the resource or activity. 23
In this case, I have just uploaded an image file. Back on the homepage (and still in Edit mode), you can use the pencil icon to edit the item name, and by clicking on the three dots you can Edit settings in order to change the photo, change the description of it, and so on. You can also hold and drag the item to a new location. (This can also be done by expanding the course index on the left-hand side of the page.) 24
4. What will my Students See? As you work on your course, you can switch your viewing mode to see how your course will look from your students perspective. In the upper-right corner, click on your user name. From the drop- down menu, select Switch role to 25
In most cases, you would likely want to see how the class appears to people registered as students; but you can pick whose view of the course you want to explore. 26
When you are finished, you can click on your profile icon again and select Return to my normal role from the drop- down menu. 27
5. Enrolling Students You should be able to automatically import your class list. For instructions, review slides 4-7. If you need to later manually enroll students, or if you want to allow students to enroll themselves, follow these instructions: From your course page, click Participants in the navigation pane at the top. 28
In the new window, select Enrolment methods from the drop-down menu. 29
In principle, you can click on the icon in the Manual enrolments row. However, it may be tedious to add individual students. Moreover, this method will only work if students have already logged into Moodle at some point. However, the best way to proceed is to allow students to enroll themselves. In the row of options labeled Self enrolment (Student), click on the gear icon. 30
Most importantly, here: Allow existing enrolments: This allows self- enrolled users to continue in the course. This should almost always be enabled. Allow new enrolments: This allows new users to self-enroll. You could, say, turn this setting off again after the add/drop deadline, but allow students who have already self-enrolled to remain in the course. Enrolment key: This is a password function. You can set a password and only allow students with the password to enroll. You can send the password to your class through a group MIO; or you can include the password on the course outline. 31
Default assigned role: In some cases, one might want to designate certain users for different roles; but usually it will be important to set the Default assigned role as Student. This will ensure that self- enrolled users cannot, for example, change course settings. Having enabled Allow new enrolments, you can always return here a few weeks into the semester to disable new enrolments. Instead, you can also set the Start date and End date here. These dates set the timeframe within which students can enroll themselves (say, within the first two weeks of the session). Simply check the Enable boxes and specify the dates when students should be allowed to self-enroll. 32
When are you happy with the settings, click Save changes at the bottom of the page. This will bring you back to the Enrolment methods page. Having enabled the Self- enrolment feature, you should see the visibility icon indicating that the course and its self-enrollment option are now visible to Champlain Moodle users. 33