DIY Easter Diorama Box Project: Step-by-Step Instructions
Dive into the world of creativity with this DIY Easter Diorama Box Project. Follow step-by-step instructions to create a stunning Easter-themed box with charming decorations like eggs, bunnies, and chicks. Let your imagination flourish as you craft this delightful project that will bring joy to your Easter celebrations. Remember, safety first, and enjoy the crafting process!

Download Presentation

Please find below an Image/Link to download the presentation.
The content on the website is provided AS IS for your information and personal use only. It may not be sold, licensed, or shared on other websites without obtaining consent from the author. Download presentation by click this link. If you encounter any issues during the download, it is possible that the publisher has removed the file from their server.
E N D
Presentation Transcript
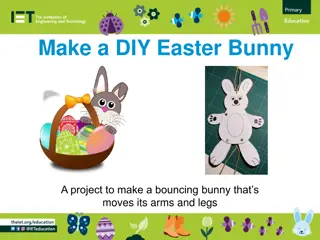
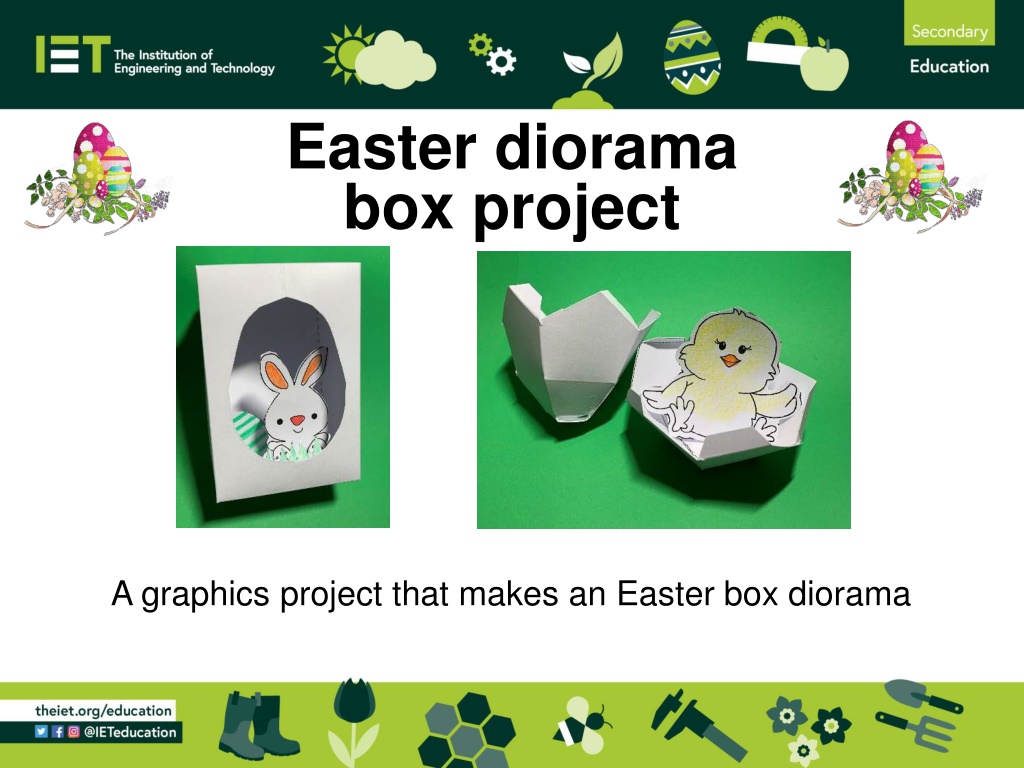
Easter diorama box project A graphics project that makes an Easter box diorama
Stay safe Whether you are a scientist researching a new medicine or an engineer solving climate change, safety always comes first. An adult must always be around and supervising when doing this activity. You are responsible for: ensuring that any equipment used for this activity is in good working condition behaving sensibly and following any safety instructions so as not to hurt or injure yourself or others Please note that in the absence of any negligence or other breach of duty by us, this activity is carried out at your own risk. It is important to take extra care at the stages marked with this symbol:
Step 1 Template sheet 1 - Easter Box Score and fold the dotted lines Cut out the solid lines Glue the tabs and make the box
Step 2 Template sheet 2 - Easter Box Lid Cut out the egg shape to create a viewing hole Fold in half Cut out the lid
Step 3 Template sheet 2 - Easter Box Lid Cut the tabs on the solid lines Score and fold the dotted lines Glue the tabs to make the lid Check the lid fits on the box
Step 4 Template sheet 2 - Easter Box Parts Cut out the solid lines Score and fold the dotted lines Glue the eggs, bunny and chick to the stands Add colour to the parts.
Step 5 Create the Scene Glue the parts into place to create a diorama Add the lid to complete the Easter box
Step 6 Template sheet 3 - Egg Base Glue the inner tabs and make the egg base Cut out the solid lines Score and fold the dotted lines
Step 7 Template sheet 3 - Egg Top Cut out the solid lines Score and fold the dotted lines Glue the smaller tabs at the top and join together
Step 8 Template sheet 3 - Egg Top 2 1 Glue the side tabs and join the egg top together. Glue the tabs on the top cover and close Assembled egg top
Step 9 Template sheet 3 - Egg Assembly The egg parts may be kept separate or the top placed on the base How the tabs join together
Step 10 Create the Scene Egg may be placed in the box open or closed