R1200-ES Installation Guide
The R1200-ES Installation Guide provides detailed instructions for attaching A2-BODY to the drainpipe, assembling clamps, installing ABS nipples, adjusting height, applying insulation membrane, securing clamps, attaching the dome, and setting up overflow. The guide includes images for reference at each step.
Download Presentation

Please find below an Image/Link to download the presentation.
The content on the website is provided AS IS for your information and personal use only. It may not be sold, licensed, or shared on other websites without obtaining consent from the author. Download presentation by click this link. If you encounter any issues during the download, it is possible that the publisher has removed the file from their server.
E N D
Presentation Transcript
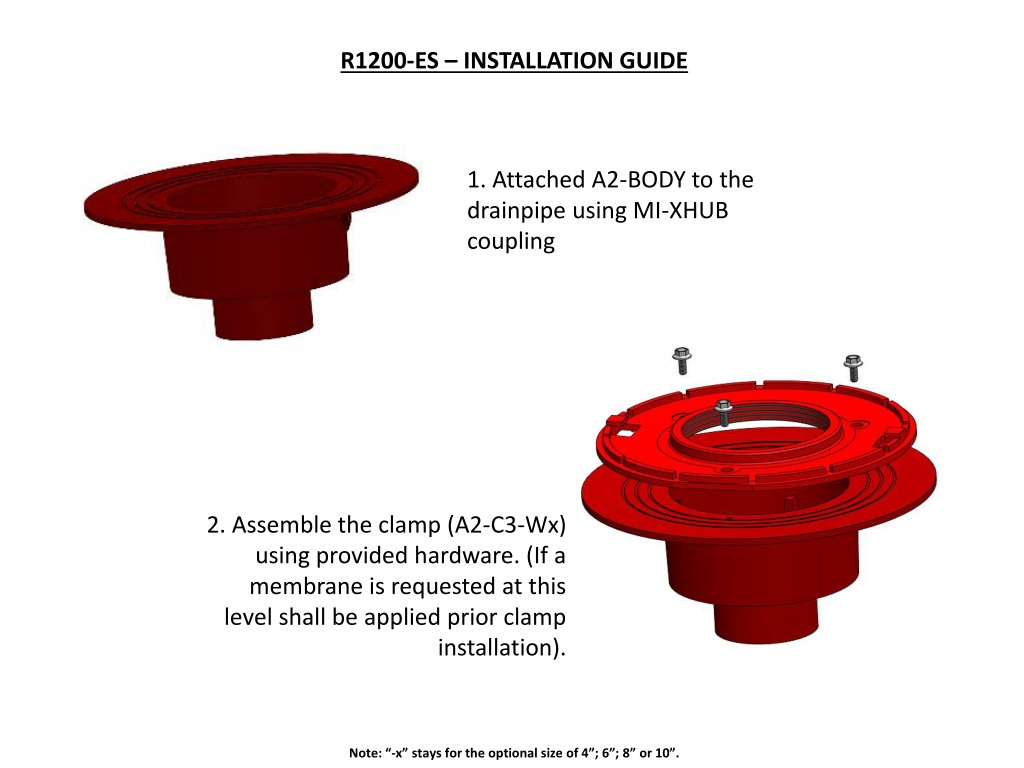
R1200-ES INSTALLATION GUIDE 1. Attached A2-BODY to the drainpipe using MI-XHUB coupling 2. Assemble the clamp (A2-C3-Wx) using provided hardware. (If a membrane is requested at this level shall be applied prior clamp installation). Note: -x stays for the optional size of 4 ; 6 ; 8 or 10 .
3. Install the ABS nipple (Wx-PN9R) by screw it into the threaded clamp 4. Install the top component (A2-ES-x) by thread it onto the nipple and adjust the height. Height can be adjusted by threading the nipple into the lower clamp, or even cut the nipple. Use silicone to water seal around top and bottom nipple connections after the height is set. Apply silicone Note: -x stays for the optional size of 4 ; 6 ; 8 or 10 .
5. Install the insolation membrane followed by the upper clamp (A2-C3) Secure the clamp with provided hardware. 6. Attached the dome (A2-MD) and rotate it clockwise to secure in place. Note: -x stays for the optional size of 4 ; 6 ; 8 or 10 .
Overflow 7. If an overflow is required, simply screw the top component (A2-ES-x) down on the nipple to obtain the dimension needed. Note: -x stays for the optional size of 4 ; 6 ; 8 or 10 .
