Understanding Utah's Student Information System - Aspire
Utah's Student Information System, Aspire, consists of various components like SIS, SSID, LEA, and UTREx for collecting and managing student data. Entry codes are utilized for different enrollment scenarios, and enrollment reminders ensure accurate data entry, including marking existing SSIDs and verifying student information. Learn more about Aspire and its significance in Utah's education system.
Download Presentation

Please find below an Image/Link to download the presentation.
The content on the website is provided AS IS for your information and personal use only. It may not be sold, licensed, or shared on other websites without obtaining consent from the author. Download presentation by click this link. If you encounter any issues during the download, it is possible that the publisher has removed the file from their server.
E N D
Presentation Transcript
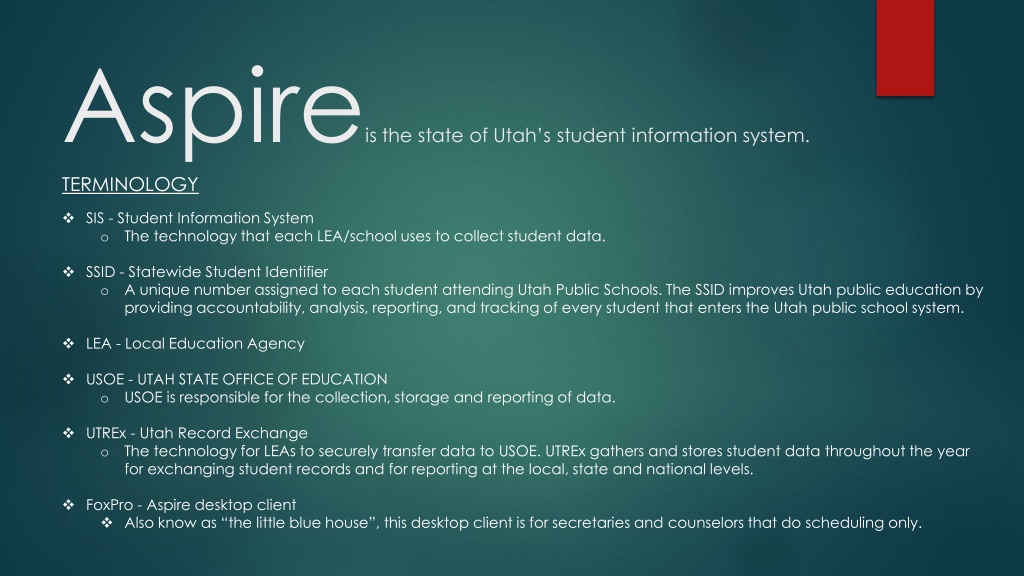
Aspireis the state of Utahs student information system. TERMINOLOGY SIS - Student Information System o The technology that each LEA/school uses to collect student data. SSID - Statewide Student Identifier o A unique number assigned to each student attending Utah Public Schools. The SSID improves Utah public education by providing accountability, analysis, reporting, and tracking of every student that enters the Utah public school system. LEA - Local Education Agency USOE - UTAH STATE OFFICE OF EDUCATION o USOE is responsible for the collection, storage and reporting of data. UTREx - Utah Record Exchange o The technology for LEAs to securely transfer data to USOE. UTREx gathers and stores student data throughout the year for exchanging student records and for reporting at the local, state and national levels. FoxPro - Aspire desktop client Also know as the little blue house , this desktop client is for secretaries and counselors that do scheduling only.
Entry Codes E1-First time enrollment this year. This code should ONLY be used on the first day of the school year and for 1st time kindergarten and preschool students that have not come from another district. o E2-First time enrollment from out of state This code should be use for students that enter our district for the first time from another state. Make a note in where the student came from in student notes. o RD Re-entry from within district This code should only be used if a student transferred within our district. It should always offset a TD (transfer within district code). There is no need to make student note entry for this. We can see this in the enrollment history. o RS Re-entry from within state Be sure to make a note where in the state this student came from. o RO Re-entry from out of state. This code should be used for students that were enrolled this year, moved out of state then re-enrolled with us again. This should only be used to offset a TO (transfer out of state) exit code. o RC Re-entry from Charter School This code should be used for students that were enrolled this year, transferred to a charter school then re-enrolled with Uintah again. This should only be used to offset a TR (transfer to charter school) exit code. o Part time codes are for students dual enrolled with other schools in the state. It is very important to make good student notes as to what other school the student is attending. We can only count a student for as many periods as we have them, for example if a student attends Uintah 2 periods and attends another school in the state at the same time, we enroll that student as a 2/5th time student, or whatever the case may be.
Enrollment reminders Before you enroll a new student, be sure to search Aspire to see if they have been enrolled in the past. When searching, enter only part of the first name, part of the last name and the birthday. Name, birth date and gender MUST be entered into Aspire EXACTLY as it appears on the student s birth certificate. It is VERY important to mark the box CURRENTLY HAS A UTAH SSID if the student has ever been enrolled anywhere in the state at any time. Marking this box will make it so the student does NOT receive a new SSID if one has already been issued to them. Do not mark this box if this is the first time a student has ever been enrolled in a Utah school. If you need to enroll a student before you have a birth certificate, please call me BEFORE you enroll them so I can check the SSID state site to see if they have a SSID number. Try not to enroll students when you are being interrupted. I know this is not easy, but it is extremely important that student information be entered correctly. If you are able, go into another room to do your enrolling, or have someone else double check NAME, BIRTHDAY and GENDER. I can t express how critical it is for this information to be exact.
Address and Naming Conventions Remember to spell out North, East, South and West for student s and contact s addresses. For apartments or trailer parks, use the number sign, #, do not type out Apt. 43 or Trailer 43 . You should just type 123 South 456 West #43 . Never use the second address line. Aspire data will be imported to the bussing program, VersaTrans, every night. If student addresses are not correct in Aspire, they will not be correct when a school bus is assigned to a student. PLEASE KEEP ADDRESSES UPDATED AND IN THE CORRECT FORMAT. Do not enter a mailing address if it is the same as the physical address. Post office boxes should be typed as PO Box 123 , no periods and no space between the P and O. Do not spell out Street, Avenue, Court, Circle, etc. For this you can type St, Ave, Ct or Cir. Never use periods in addresses or names. If you have a student that is a junior, just type JR after his last name. This applies to parent contacts and emergency contacts as well. It is important to be consistent and for everyone to be doing things the same way to ensure clean data.
Student Notes and Legal Bindings Aspire is the first place we go when we are trying to find information on a student. Student notes and legal bindings are more important now than never. A few categories for notes have been created to keep them organized. Reports can now be pulled and filtered to find exactly what you are looking for. Legal bindings should only be used for legal name changes, restraining orders, custody information or any other legal information. A check mark should be placed in the critical alert box for anything needing to be flagged. This alert will show up right under the student s photo on their summary page. Notes should be made when record requests come from other districts, when a student moves out of state or comes to us from out of state, for 10 day drops, for boundary exemptions and any other information that would be helpful. If you would like to see another category created, let me know. Be sure to date your notes and remove any old notes from previous years that are no longer relevant. You do not need to enter a note when students are transferred from one school to another within our district, we can see that information under enrollment history.
Exit Codes TD Transfer within LEA (district) This code should be used when a student transfers from one school to another within our district. You do not need to make a student note about this as it will be offset with an RD (Re-entry from within district) and that gives us all the information we need. o TS Transfer within State This code should be used for students moving out of our district. You should always make a student note as to where the student moved to and what day you received the records request from the other school. o TO Transfer out of State This code should be used when a student moves out of Utah. You should always make a student note as to where the student moved to and what day you received the records request from the other school. o DO Drop Out This code should be used only for 6th 12th grade students. It should only be used after 10 consecutive unexcused absences for these students. Make a note in the 10 day drop field under student notes with the date you dropped the student. o WD Withdraw This code should be used for student K 5th grade. It should be used after 10 consecutive unexcused absences for these students. Make a note in the 10 day drop field under student notes with the date you dropped the student. If you use this exit code for any other reason, be sure to make a note in student notes. o DE - Death This code is self explanatory. It is important to exit a deceased student immediately after hearing of the news so the student is not marked absent in her classes, prompting an automated attendance call. o TT Transfer Track This is an automatic code given by the Aspire system when the school year roll over takes place. This code should NEVER be used manually. o TR (Transfer to Charter), TP (Transfer to Private School), TC (Transfer out of Country), TH (Transfer to Home School, this is NOT the same as online school), WP (Withdraw from Pre School), as well as a few others are self explanatory. If you have any questions about any codes, please call me if you are unsure.
10 Day Drop On the 10th day of 10 consecutive UNEXCUSED absences, students must be exited. Elementary schools, K-5th grade, use the withdraw exit code, WD. Secondary schools, 6th 12th grade, use the dropout code, DO. Run the Consecutive Absences Report every couple weeks. If you enter 11 days, and select the EX code on this report, your results should come back showing no students found. ALWAYS make a note in the drop out field under Student Notes. For example, 10 day drop 9/2/15 . On a professional development day or SEOP day where all students in the district are marked present for that day falls in the middle of 10 consecutive unexcused absences, you need to include that day as part of your 10 days. It would be a good idea to make a calendar item for reports to help you remember to run them.
Data Quality Check Data Quality weekly. Every student must have at least one contact. A contact is who the student lives with. Every student must have at least one emergency contact. This can not be the same as the student s contact. Every birth certificate must be verified and then the birth certificate verified box checked during the enrollment process. Every student must have a phone number entered. You do not need to worry about the SSID, those are recently enrolled students that I have not yet retrieved an SSID number for yet. I do this process a couple times a week.
Attendance Codes *HOMEBOUND - Use the H code only when a student is away from school for an extended period of time due to a long term illness. Absence should be medically excused by a doctor and the doctor s note kept in the student s file. These students can be carried beyond 10 days as long as educational services are being provided for an equivalent of 2 hours, one-on-one instruction, per week and documented. Documentation must be on the Student Accountability Membership Log kept in the student s file. (Karine has a copy of the form that should be used for documentation.) . A B C D E F G H I J K L M N O P R S T U V X Y Z Present Activity School Excused Half Day Parent Check Out SEOP / SEP Day Excused Absence Ten Minute Plus Tardy Parent Excused Excess of 5 Excused *Homebound In School Suspension Ex. Absence-Flu Symptoms Excused Expanded Learning Time Suspension-Half Day *Medical Excused No School Admin Office Request Parent Excused Parent Check In Saturday School Attend Tardy *Elementary Early Checkout Excused - In Class *Suspended With Services Unexcused Absence *Safe School Violation *Assets Program Excused - In Class - Teacher - Present Code Excused - In Class Excused - In Class Excused Excused - In Class Excused Excused - In Class - Tardy - Teacher *MEDICAL EXCUSED - Use the M code only when a student is away from school due to an illness that a doctor has excused with a doctor s note . Keep the doctor s note in the students file as documentation for the auditor if he/she asks for it. Excused - In Class Excused - In Class *SUSPENDED WITH SERVICES - Use the V code for any type of school suspension that is not attached to a Safe School Violation. These students can be carried beyond 10 days as long as educational services are being provided for an equivalent of 2 hours, one-on-one instruction, per week and documented. Documentation must be on the Student Accountability Membership Log and kept in the student s file. (Karine has a copy of the form that should be used for documentation.) Excused - In Class Excused Excused Excused - In Class Excused - In Class Excused Excused - In Class - Tardy Excused - In Class Excused - In Class - Tardy - Teacher *SAFE SCHOOL VIOLATION - Use the Y code when a student is away from school due to a Safe School Violation. These students can be carried beyond 10 days as long as educational services are being provided for an equivalent of 2 hours, one-on-one instruction, per week and documented. Documentation must be on the Student Accountability Membership Log kept in the student s file. (Karine has a copy of the form that should be used for documentation.) Excused - In Class Teacher Excused Excused - In Class *ASSETS - When a student enters the YIC facility use the Z code for whatever period of time they are there. Documentation must be kept in the student s file (copy of an email or note of when a phone call was received from the student s mentor). Mentors are to contact the school once the student has been released from YIC back to the school. If the student does not return to school, they must be exited on the 10th consecutive unexcused absence. *Elementary Early Checkout - Use the U code when a student is checked out of school after 10AM. This code will not count the student as absent that day. If a student is checked out within the first 2 hours of school, you must use the Parent Check Out Code, C , and the student will be considered absent for the whole day. This code is for elementary schools only.
Summer Moves ONLY for the first day of school If you receive a record request for a student who has moved over the summer you need to do the following: If the student has already been assigned to a class you must DELETE the student s schedule, not just unscheduled the student. 1. Exit the student in Aspire using the first day of school s date. 2. Go to LAST YEAR S enrollment for the student and edit the exit code from TT to the code that reflects the student s reason for leaving, such as TO (transfer out of state), TS (transfer within state), TR (Transfer to Charter), etc. Do not forget this step, it is very important. 3. Email or call me and let me know what students have left so I can delete their 2015-2016 school year status. (This is were I hit the big red X). 4. If you do not delete the student schedule completely, that record of that class will be orphaned after I delete the 2015-2016 status and this causes problems at the end of the school year in UTREx. Please remember this is only for the first day of school. This will make is so teachers do not have a student on their roster for the whole term, or year in elementary schools.
Things to remember When you exit a student, the student is exited from their course or courses with the same date. IF you edit the exit date, you must manually go edit the schedule exit date to match. ENROLLMENT and SCHEDULE entry and exit dates must ALWAYS match or it will cause a fatal error in UTREx. If you do not assign a teacher to a class when setting up their courses, they will not be able to make a seating chart for their classes.
Student Passwords for Aspire Student passwords are imported into Aspire at the beginning of the school year in bulk. Once this has been done, any students enrolled after the import will need to have their passwords created manually by you. Passwords will stay with the students until they graduate. Students long into Aspire to check their grades starting in 6th grade, but younger students are starting to use Aspire as well. Format for creating a student password: First 3 letter of last name + first letter of first name + last 4 digits of Aspire number. For example Michelle Smith with Aspire number 42685 would be given the password smim2685 . o You should assign passwords during the enrollment process.
Faculty Lists In FoxPro (the little blue house) you can run a report to get faculty Aspire numbers. When a teacher account is created in Aspire, they are given the same password as their username. They will be prompted to change their password on their first log in. We do not store passwords so if they forget it, they will need to click the forgot your password? link on the Aspire login page. They can use their same password as they use for email/computer log in if they would like. Check this list to be sure there are no teachers or staff listed that no longer need access to your school s students. Secretaries from foods and transportation will be listed here, as well as several District Office employees and nurses. If you see a name you don t know, give me a call and I will help you figure it out.
Yearend backup location for Aspire reports Please place a copy of your year end backup reports in your school s folder that you will find under NETWORK LOCATIONS. Let you school tech know if you do not see this mapped drive. Principals and school secretaries will have access to this share so previous year s information can be easily accessed by those who need it. Use this filing structure to store your reports. This is new this year, so please go back as far as you have yearend reports and put a copy in this location. It is important that we are all doing the same consistent from school to school.
Reports to run often 10 Consecutive Absence Report Enrollment Entry Code Membership and the Withdrawn Students reports every month to double check your enrollment codes and exit codes are correct. Check faculty list in FoxPro at the beginning of the year, and again mid year to be sure it is current. Let me know if it is not.
Resources On our district webpage, on the links along the top of the page click on the EMPLOYEES link. On the left side of the page near the bottom you will see ASPIRE HOW TO info . There are several things there that you can find how-to documentation for. I will be adding this PowerPoint to this section as well. If you click the Parent/Student link, then go to ASPIRE INSTRUCTION DOCS on the left, you will helpful documentation to direct parents to for creating their own parent accounts so they link all of their children together. They can check grades, attendance, lunch balance and edit emergency contacts. The instructions for parents to subscribe to email notifications on a daily or weekly basis is there as well.
