Understanding Cyclic Voltammetry in Electrochemical Methods
Electrochemical methods, such as cyclic voltammetry, are crucial for studying electron transfer processes, redox reactions, and adsorption on surfaces. Cyclic voltammetry involves varying the applied potential at a working electrode to monitor electron flow and chemical reactions. Peaks in the current signal indicate the initiation of reactions. The technique provides insights into reaction mechanisms and thermodynamic properties of solvated species. Reversible reactions can be analyzed using the Randles-Sevcik expression, relating peak current to analyte concentration, sweep rate, and electrode area.
Download Presentation

Please find below an Image/Link to download the presentation.
The content on the website is provided AS IS for your information and personal use only. It may not be sold, licensed, or shared on other websites without obtaining consent from the author. Download presentation by click this link. If you encounter any issues during the download, it is possible that the publisher has removed the file from their server.
E N D
Presentation Transcript
Lecture 6a Cyclic Voltammetry
Introduction I Electrochemical methods are used To investigate electron transfer processes and kinetics To study redox processes in organic and organometallic chemistry To investigate multi-electron transfer processes in biochemistry and macromolecular chemistry To determine adsorption processes on surfaces To determine electron transfer and reaction mechanisms To determine of thermodynamic properties of solvated species
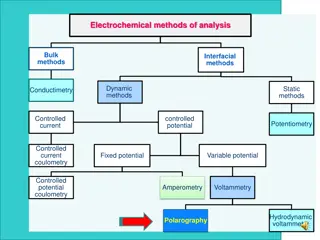
Introduction II Methods Polarography: Often used mercury dropping electrodes because the drop is only used for one measurement and then discarded Linear sweep voltammetry (LSV): the current at a working electrode is measured while the potential between the working electrode and a reference is swept linearly in time Cyclic voltammetry: the same as LSV but the potential is swept in a way that the experiment ends where it started
Cyclic Voltammetry I This technique is based on varying the applied potential at a working electrode (compared to the reference electrode) in both forward and reverse directions while monitoring the current between the auxiliary electrode and reference electrode Peaks will be observed at potentials that initiate a chemical reaction in the solution (reduction or oxidation) because they involve a flow of electrons
Cyclic Voltammetry II For a reversible reaction, the peak current for the forward sweep of the first cycle is proportional to the concentration of the analyte and the square root of the sweep rate (Randles Sevcik expression): I = 5 / 3 2 / 1 2 / 1 2 . 2 ( 69 * 10 ) * * * * * n A C D v n is the number of electrons in the half-reaction A is the area of the electrode (cm2) C is the concentration of the analyte (mol/L) D is the diffusion coefficient of the analyte (cm2/s) is the sweep rate (V/s) From this equation, it can be concluded that the peak current increases with the sweep rate, with the concentration and the area of the electrode as long as the reaction is reversible
Cyclic Voltammetry III What is needed to run the experiment? Glass cell with the three electrodes Working electrode (left, glassy carbon in this course) Reference electrode (middle, Ag/AgCl/0.1 M LiCl in dry acetone) Auxiliary electrode (right, Pt-disk electrode) Three electrodes are needed because the measurement of the potential and the current have to be performed in different cycles because they interfere with each other A gas line for ebulliating the solution with nitrogen is also evident on the upper right hand A potentiostat that allows for the control of the potential and the measurement of a current Computer system for control and recording
Cyclic Voltammetry IV Dry solvent To prevent or reduce side reactions Dry dichloromethane from solvent still (Be careful!) Electrolyte Organic solvents exhibit a very low electrical conductivity Tetraalkylammonium salt with an inert anion i.e., BF4-, ClO4-, PF6-, etc. (NEt4BF4) Typically about 0.1 M solution Analytes Ferrocene: to check setup and figure out appropriate adjustment in redox potentials as needed Mdtc3: analytes, 0.005-0.01 M
Cyclic Voltammetry V Data analysis The cathodic Epcand anodic Epapeak potentials The cathodic half peak potential Ep/2and the half way potential E The cathodic (ipc) and anodic (ipa) peak currents The formal reduction potential is obtained by E0= (Epa+Epc)/2 The half peak potential E1/2can be described by the Nernst Equation E1/2=Eo+ DO, DR = diffusion coefficient of oxidized or reduced species (DO~DR)
Cyclic Voltammetry VI Reversible process Condition 1: Ep= Epa Epc = 57/n (mV) (theoretically) n=number of electrons transferred in the process Usually more like 70 mV/n because of cell resistance Condition 2: The ratio of the anodic and cationic peak (ipa/ipc) should be close to one and independent from the scan rate
Experiment I After placing a given amount of the solvent with the electrolyte on the cell, a certain amount of the analyte is dissolved (~0.005 M -0.01 M) The electrodes are placed in the solution and connected to their respective cables Make sure that the alligator clamps do not touch Make sure to check if the reference electrode contains sufficient liquid that the silver wire is not just hanging in the glass tube Make sure that the instrument and the electrode are set properly (Experiment Properties/Cell Definitions) Initially, the potentials are set to initial and final potential V=-1.5 V while the vertex potential is V=1.5 V with a scan rate of 200 mV (Experiment Properties/Scan Definitions) and a purge and equilibration time of 30 seconds each
Experiment II Next, the run is started The nitrogen flow is started at a rate that the nitrogen bubbles slowly through the solution while the solution is stirred Once the purge time is completed, the stirred and the nitrogen flow are discontinued After the equilibrium time, the actual sweep starts as indicated in the status window An overflow error usually indicates a short circuit or poor contact somewhere The graph that appears should look like the one to the right, but with two peaks because the oxidation step and the reduction step are recorded in the same scan After the run is completed, the data is printed, saved and then erased on the screen (Edit-Select all and Delete points) Next, the window for the sweep is narrowed (focus on each peak separately ( 0.3 V from maximum, (Experiment Properties/Scan Definitions)) and the sweep rate reduced (20-30 mV/s) It is highly advisable to bring a flash drive with you to store the data (as ASC file)
