Understanding Chromatography Methods and Solutions
Learn about chromatography techniques, including liquid, gas, and paper chromatography. Explore the concept of solutions and the process of separating mixtures using chromatography. Engage in a chromatography challenge to discover the colors used to make black ink.

Download Presentation

Please find below an Image/Link to download the presentation.
The content on the website is provided AS IS for your information and personal use only. It may not be sold, licensed, or shared on other websites without obtaining consent from the author. If you encounter any issues during the download, it is possible that the publisher has removed the file from their server.
You are allowed to download the files provided on this website for personal or commercial use, subject to the condition that they are used lawfully. All files are the property of their respective owners.
The content on the website is provided AS IS for your information and personal use only. It may not be sold, licensed, or shared on other websites without obtaining consent from the author.
E N D
Presentation Transcript
Science of Chromatography Presentation by T. Tomm 2019 sciencespot.net Logo: https://thayermemoriallibrary.org/steam-logo-1/
What is chromatography? From Wikipedia ... Chromatography (from Greek word for chromos (or chroma)for color) is the collective term for a family of laboratory techniques for the separation of mixtures. It involves passing a mixture which contains the analyte through a stationary phase, which separates it from other molecules in the mixture and allows it to be isolated. Which means ... Chromatography is the physical separationof a mixture into its individual components. We can use chromatography to separate the components of inks and dyes, such as those found in pens, markers, clothing, and even candy shells. Chromatography can also be used to separate the colored pigments in plants or used to determine the chemicalcomposition of many substances. http://members.shaw.ca/vict/chemistry_test3.htm
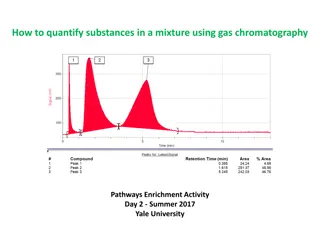
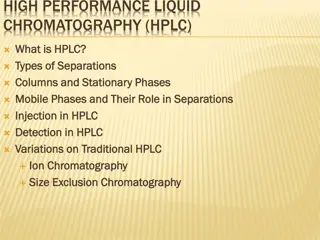
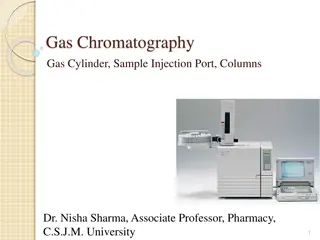
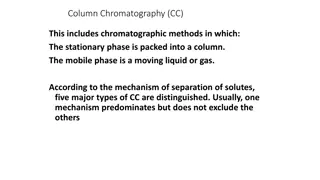
Examples of Chromatography Liquid Chromatography Plant Extracts Thin-Layer Chromatography (Thin plastic or glass trays) Unknown Substances Gas Chromatography Each peak represents a different compound in gasoline. Paper Chromatography Example of Chlorophyll Chromatography = Separating mixtures into individual components
Solutions SOLUTIONS are mixtures in which one substance is dissolved in another and have two parts: SOLUTE and SOLVENT. The substance that is DISSOLVED The substance that DOES THE DISSOLVING 5. What substance is known as the universal solvent ? Water Identify the solute and solvent in each solution ... Solution Solute Solvent 6. Which would have more solute: a glass of very sweet Kool-Aid or barely sweet Kool-Aid? Explain. Very sweet Has more sugar, which is the solute Powder & Sugar Water Kool-Aid Syrup & CO2 Water Soda pop Salt Water Ocean water 7. A substance that does not dissolve in water is called INSOLUBLE. A substance that does dissolve in water is called SOLUBLE.
Part B: Chromatography Challenge What colors can be used to make black ink? Create chromatograms for black markers to answer this question. Each team will need: 2 large plastic cups 1 small cup filled with water 4 strips of filter paper Masking tape 2 pencils 1 bag of markers 4 for testing + 1 for labeling Timer (clock, watch, or laptop)
For EACH marker in your kit Tape Label with marker # 1st Put a piece of tape at the top of the strip and label strip with the marker #. Pencil Filter Paper Ink 2nd Draw a thick line near the bottom of the filter paper - about inch from the bottom. Water Don t let the ink touch the water! 3rd Pour a small amount of water into the large cup and then hang the paper strip in the cup. 4th Allow the water to move up the paper for 5 minutes and then remove the strip from the water. 5th Tape to the side of the table to dry. End of class your teacher! Hang all your chromatograms in the area selected by
1. Complete the chart on your worksheet and then answer the questions on your worksheet. 2. Analysis Answer these questions based on the results. A. Do all the samples look the same? Why or why not? B. Identify each of these: Solvent = ___________________ Solute = ___________________
Going Further Fall Colors Watch the video to answer these questions. 1. What type of trees have leaves that change colors? 2. Why are the leaves on most trees green? 3. How are these green structures used in trees? 4. What color of pigments are found in leaves? 5. Why can t we see these pigments except in the fall? C:\Users\Tracy\AppData\Local\Microsoft\Windows\Temporary Internet Files\Content.IE5\7MESSNV1\MC900432653[1].png
Scientific Tie Dye Shirts For this activity we will be using round filter paper, permanent markers, and rubbing alcohol. Unlike the markers from the first activity, permanent markers do not dissolve in water. What is our solute and solvent? Solute = _____________ Solvent = ______________ Before we begin 1) You must wear goggles (or glasses). 2) You might want to wear an apron. 3) Do not sniff directly from the cup or shirt!
Things to decide BEFORE you start: Where are you going to put the circles special pattern, initials, only in certain areas? What pattern do you want to use? See the sample shirt for ideas. What colors are you going to use same colors or mixture of colors? What else are you going to add name, designs, etc.? Must be appropriate for school! It helps to leave an open spot in the middle of your design!
Directions 1) Pick a spot on your t-shirt. Use one rubberband and cup to set up the area watch your teacher demonstrate the process! 2) Draw a design in the center of the area using permanent markers. 3) Use a dropper bottle to SLOWLY add drops of rubbing alcohol to the white spot in the middle of your design. SLOWLY! 4) Add drops one-at-a-time until the design has spread almost to the edge of the cup. Do not add them too quickly or it will just soak through and not spread. Work your way out from the center SLOWLY. 5) Repeat Steps 1-4 to add more circles to your shirt. You can do up to 4 circles at one time! Make sure the shirt is dry before you remove the cup.