TOYOTA 7FDFFGF 15-35 Forklift Service Repair Manual Instant Download
Please open the website below to get the complete manualnn//
Download Presentation

Please find below an Image/Link to download the presentation.
The content on the website is provided AS IS for your information and personal use only. It may not be sold, licensed, or shared on other websites without obtaining consent from the author. Download presentation by click this link. If you encounter any issues during the download, it is possible that the publisher has removed the file from their server.
E N D
Presentation Transcript
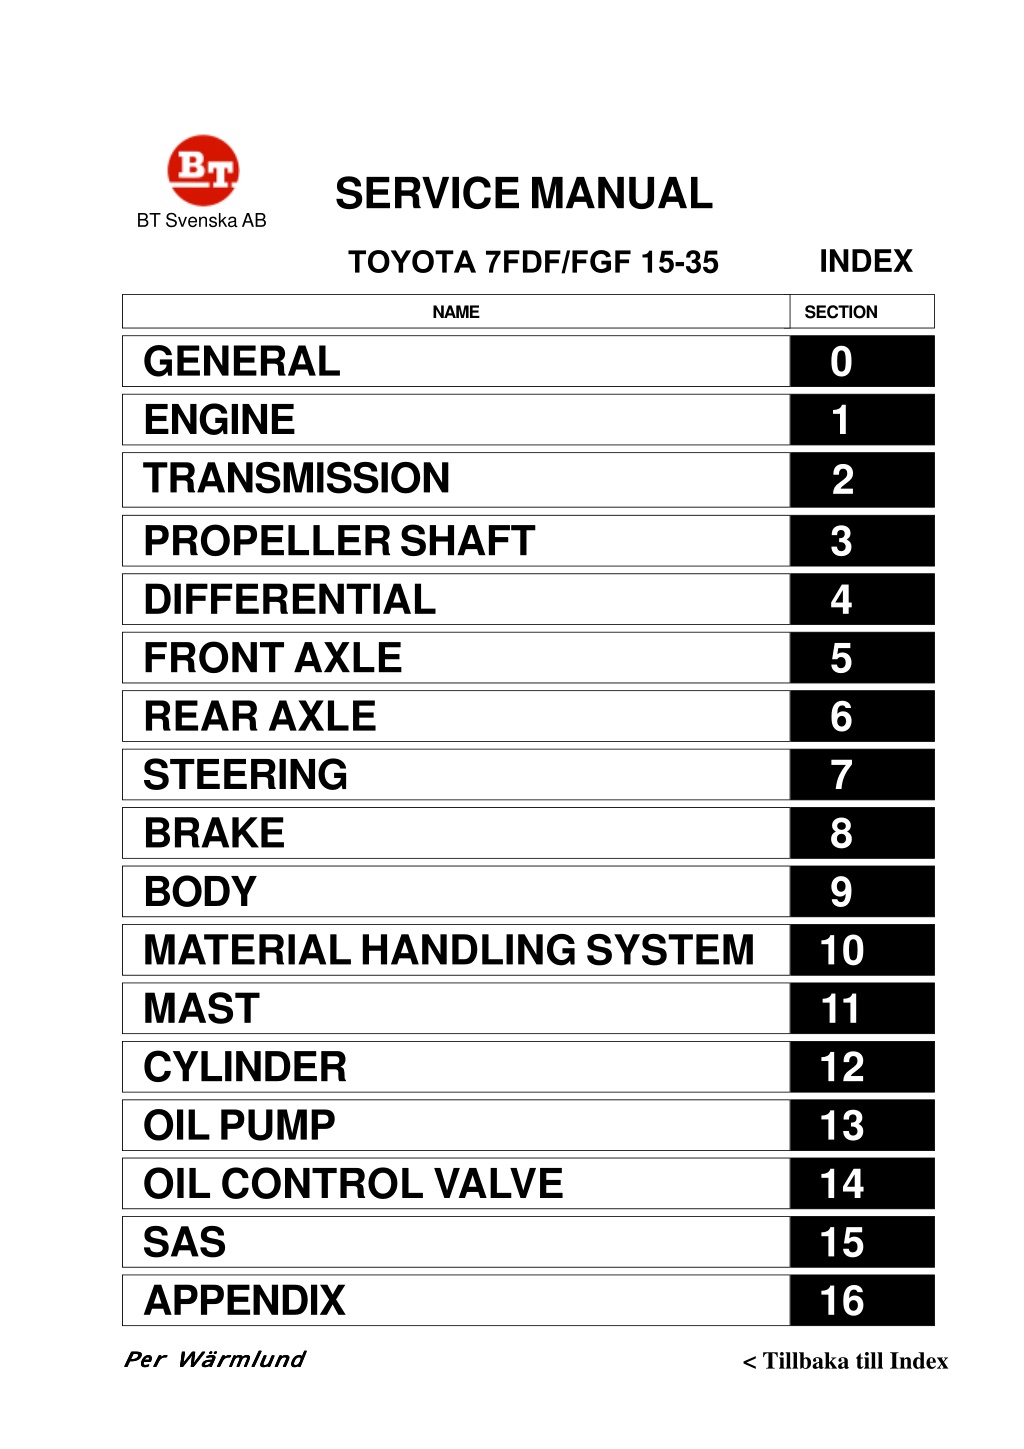
SERVICE MANUAL BT Svenska AB INDEX TOYOTA 7FDF/FGF 15-35 NAME SECTION 0 1 2 3 4 5 6 7 8 9 10 11 12 13 14 15 16 GENERAL ENGINE TRANSMISSION PROPELLER SHAFT DIFFERENTIAL FRONT AXLE REAR AXLE STEERING BRAKE BODY MATERIAL HANDLING SYSTEM MAST CYLINDER OIL PUMP OIL CONTROL VALVE SAS APPENDIX < Tillbaka till Index P er W r mlund P er W r mlund P er W r mlund P er W r mlund P er W r mlund
0-1 0 GENERAL Page EXTERIOR VIEWS......................................................... 0-2 VEHICLE MODEL .......................................................... 0-3 FRAME NUMBER........................................................... 0-4 HOW TO USE THIS MANUAL .................................... 0-5 EXPLANATION METHOD ................................................. 0-5 TERMINOLOGY................................................................ 0-6 ABBREVIATIONS ............................................................. 0-6 OPERATIONAL TIPS .................................................... 0-7 HOISTING THE VEHICLE............................................ 0-8 CIRCUIT TESTER.................................................. 0-9 STANDARD BOLT & NUT TIGHTENING TORQUE ....................................................................... 0-11 BOLT STRENGTH TYPE IDENTIFICATION METHOD ...... 0-11 TIGHTENING TORQUE TABLE ........................................ 0-12 PRECOAT BOLTS ......................................................... 0-13 HIGH PRESSURE HOSE FITTING TIGHTENING TORQUE ............................................ 0-13 WIRE ROPE SUSPENSION ANGLE LIST ............... 0-14 SAFE LOAD FOR EACH WIRE ROPE SUSPENSION ANGLE............................................... 0-14 COMPONENTS WEIGHT............................................. 0-15 RECOMMENDED LUBRICANT QUANTITY & TYPES................................................. 0-16 SM RJSCHEMA ........................................................... 0-18 PERIODISKT UNDERH LL ........................................ 0-19 UTBYTE AV SM RJMEDEL OCH DELAR ................................................................. 0-25
0-2 EXTERIOR VIEWS
https://www.ebooklibonline.com Hello dear friend! Thank you very much for reading. Enter the link into your browser. The full manual is available for immediate download. https://www.ebooklibonline.com
0-3 VEHICLE MODEL Classification Vehicle Model Transmission Type Engine Series Model 42-7FGF15 T/C 4Y Gasoline 1.5 ton model 02-7FDF15 T/C 1DZ-II Diesel 1 ton series 42-7FGF18 T/C 4Y Gasoline 1.75 ton model 02-7FDF18 T/C 1DZ-II Diesel 42-7FGF20 T/C 4Y Gasoline 2.0 ton model 62-7FDF20 T/C 1DZ-II Diesel 02-7FDF20 T/C 2Z 2 ton series 42-7FGF25 T/C 4Y Gasoline 2.5 ton model 62-7FDF25 T/C 1DZ-II Diesel 02-7FDF25 T/C 2Z 02-7FGF30 T/C 4Y Gasoline 3 ton series 3.0 ton model 62-7FDF30 T/C 1DZ-II Diesel 02-7FDF30 T/C 2Z 02-7FGJF35 T/C 4Y Gasoline J3.5 ton series J3.5 ton model 02-7FDJF35 T/C 2Z Diesel
0-4 FRAME NUMBER Frame No. Punching Position Punching position Series Engine Vehicle model Punching format 42-7FGF15 4Y 407FGF18 10011 42-7FGF18 1 ton series 02-7FDF15 1DZ-II 7FDF18 10011 02-7FDF18 42-7FGF20 4Y 407FGF25 10011 42-7FGF25 02-7FDF20 2 ton series 2Z 7FDF25 10011 02-7FDF25 62-7FDF20 1DZ-II 607FDF25 10011 62-7FDF25 02-7FGF30 4Y 7FGJF35 10011 02-7FGJF35 02-7FDF30 3 ton, J3.5 ton series 2Z 7FDJF35 10011 02-7FDJF35 1DZ-II 62-7FDF30 607FDF30 10011
0-5 HOW TO USE THIS MANUAL EXPLANATION METHOD 1. Operation procedure (1) The operation procedure is described in either pattern A or pattern B below. Pattern A: Explanation of each operation step with illustration. Pattern B: Explanation of operation procedure by indicating step numbers in one illustration, fol- lowed by explanation of cautions and notes summarized as point operations. Example of description in pattern B DISASSEMBLY INSPECTION REASSEMBLY Tightening torque unit T = N m (kgf-cm) [ft-lbf] Step Nos. are partially sometimes omitted in illustrations. When a part requiring tightening torque instruction is not indicated in the illustration, the part name is de- scribed in the illustration frame. T = 46.1 ~ 48.1 (470 ~ 490) [34.0 ~ 35.5] Disassembly Procedure 1 Remove the cover. [Point 1] 2 Remove the bushing [Point 2]? Operation explained later 3 Remove the gear. Point Operations Explanation of key point for operation with an illustration ? [Point 1] Disassembly: Put a match mark when removing the pump cover. [Point 2] Inspection: Measure the bush inside diameter. Limit: 19.12 mm (0.7528 in)
0-6 - 2. How to read components figures (1) The components figure uses the illustration in the parts catalog for the vehicle model. Please refer to the catalog for checking the part name. The number at the right shoulder of each components figure indicates the Fig. num- ber in the parts catalog. (Example) 3201 FIG number in parts catalog 3. Matters omitted in this manual (1) This manual omits description of the following jobs, but perform them in actual operation: Cleaning and washing of removed parts as required Visual inspection (partially described) TERMINOLOGY Caution: Important matters of which negligence may cause accidents. Be sure to observe them. Note: Important items of which negligence may cause accidents, or matters in operation procedure requiring special attention. Standard: Values showing allowable range in inspection and adjustment. Limit: Maximum or minimum allowable value in inspection or adjustment. ABBREVIATIONS Abbreviation (code) Meaning Abbreviation (code) Meaning ASSY Assembly SAS System of active stability LH Left hand SST Special service tool LLC Long life coolant STD Standard M/T Manual transmission T = Tightening torque No-load maximum speed Torque converter & transmission NMR T/C T Number of teeth ( ) OPT Option U/S Undersize O/S Oversize W/ With PS Power steering L/ Less RH Right hand Society of Automotive Engineers (USA) SAE
1-8 ENGINE ASSY REMOVAL INSTALLATION T = N m (kgf-cm) [ft-lbf] Engine mounting nut T = 53.9 ~ 99.0 (550 ~ 1010) [39.8 ~ 73.1] End plate set bolt T = 49.0 ~ 78.5 (500 ~ 800) [36.2 ~ 57.9] 4Y: T = 56.9 ~ 64.7 (580 ~ 660) [42.0 ~ 47.7] 1DZ-II 2Z: T = 76.5 ~ 93.2 (780 ~ 950) [56.4 ~ 68.7] Drive plate set bolt (for connecting engine crankshaft) Drive plate set bolt (for connecting torque converter) T = 14.7 ~ 21.6 (150 ~ 220) [10.9 ~ 15.9] Torque converter housing set bolt T = 29.4 ~ 44.1 (300 ~ 450) [21.7 ~ 32.6]
1-9 Removal Procedure 1 Remove the engine hood. (See p. 9-5.) 2 Remove the toe board. 3 Drain coolant. 4 Remove the battery and battery tray. 5 Remove the relay block and electrical parts plate set bolts to free them. 6 Disconnect the accelerator wire and fuel hose. [Point 1] 7 Diesel Vehicle: Remove the sedimenter bracket set bolt to free the bracket. 8 Disconnect connectors and wiring harness clamps around the engine. 9 Disconnect the torque converter cooler hose. [Point 2] 10 Remove the radiator. 11 Disconnect the air cleaner hose. 12 Remove the oil pump set bolts to free the pump. 13 Disconnect the exhaust pipe. 14 Disconnect the wiring from the starting motor. 15 Remove the under cover. 16 Remove the cover plate. 17 Remove 6 drive plate set bolts. 18 Remove the engine ASSY mounting nuts. 19 Slightly hoist the engine. [Point 3] 20 Support the torque converter housing with wooden blocks. 21 Separate the torque converter housing and engine. [Point 4] 22 Remove the engine ASSY with drive plate and torque converter end plate. 23 Remove the drive plate. 24 Remove the torque converter end plate. 25 Remove the starting motor. Installation Procedure The installation procedure is the reverse of the removal procedure. Note: Apply sealant (08833-00080) before tightening the drive plate set bolt (for connecting engine crankshaft). Bleed air from the fuel system after installation of the engine ASSY. (For diesel vehicle) (See p. 1-11.)
1-10 Point Operations [Point 1] Removal: Put a match marks on the fuel hose and the coupler. [Point 2] Removal: Put a match mark on the radiator and torque converter cooler hose. SST [Point 3] Removal Installation: SST 09010-20111-71 --- 09010-23320-71 --- SST Removal: Tentatively hoist up until the mounting bolt completely comes out from the hole in the frame. [Point 4] Removal: Use a straight-edge screwdriver for separation. If the fit- ting is too tight, change the SST hook position and adjust the engine angle for easier separation.
1-11 AIR BLEEDING FROM FUEL SYSTEM (DIESEL VEHICLE) 1. Operate the hand pump of the fuel filter until the pump operating force becomes heavy. ENGINE SPEED INSPECTION AND ADJUSTMENT Note: Warm up the engine, set the vehicle to the following conditions, and conduct inspection and ad- justment. Coolant temperature: 80 C (176 F) or more, engine oil: 70 C (158 F) or more, operating oil tem- perature: 50 C (122 F) or more, auto choke in release state (4Y engine) 4Y ENGINE Idling speed and idle up speed inspection and adjust- ment <Gasoline Vehicle> 1. Install the engine speedometer. 2. Disconnect the idle up actuator and inspect the idle up speed. B Standard: 1000 30 rpm 3. If the measured value is out of the specified range, ad- just by turning adjusting screw B. Connect the idle up actuator. Actuator hose 4. 5. Check the idling speed. + 50 Standard: 750 rpm -0 6. If the measured value is out of the specified range, ad- just by adjusting screw A. If the speed is still higher after adjustment in 3 above, adjust using the following procedure: 7. A
1-12 (1) If the auto choke cam is contacting although the cool- ant temperature is as specified above, replace the auto choke. If the idle up actuator rod and adjusting screw B are in contact with each other, turn adjusting screw B coun- terclockwise. B (2) <LPG/Gasoline or LPG> 1. Install the engine speedometer. 2. Disconnect the idle up actuator and inspect the idle up speed. Standard: LPG/Gasoline:1000 30 rpm B Actuator hose LPG/Gasoline LPG:1400 30 rpm Actuator hose B LPG LPG (France spec.):1400 30 rpm 3. If the measured value is out of the specified range, adjust by turning adjusting screw B. Loosen the lock nut before adjustment in case of the LPG engine vehicle (France spec.). Connect the idle up actuator. Actuator hose B 4. Lock nut LPG (France spec.) 5. Check the idling speed. Standard: LPG/Gasoline: 750 rpm LPG: 800 rpm LPG (France spec.) : 750 rpm + 50 - 0 + 50 - 0 + 50 - 0
1-13 6. If the measured value is out of the specified range, make adjustment according to the following procedure: (1) Make adjustment by turning adjusting screw B (LPG vehicle) or C (LPG/gasoline vehicle). (If less than the standard, turn adjusting screw A coun- terclockwise beforehand.) (2) Slowly turn adjusting screw A clockwise or counter- clockwise until the maximum speed is obtained. (3) Determine the positions of adjusting screws B and C by repeating steps (1) and (2) until the value obtained in step (2) satisfies the standard. (4) Slowly turn adjusting screw A clockwise until the CO concentration becomes 2 to 3%, and then turn it 45 degrees counterclockwise from the position where the speed begins to drop. A B LPG carburetor Regulator C LPG (France spec.) (1) Make adjustment by turning adjusting screw D (LPG vehicle). (If less than the standard, turn adjusting screw E clock- wise beforehand.) (2) Determine the position of adjusting screw D by re- peating step (1) until the value obtained in step (1) sat- isfies the standard. (3) Slowly turn adjusting screw E counter-clockwise until the CO concentration becomes 2 to 3%, and then turn it 45 degrees counterclockwise from the position where the speed begins to drop. E D No-load Maximum Speed Inspection Adjustment <Gasoline, LPG or LPG/Gasoline Vehicle> 1. Install the engine speedometer. 2. Inspect and adjust the no-load static maximum speed. (1) Measure the speed when the accelerator pedal is fully depressed. Standard: 4Y engine: 1 2 ton series:...................... 2600 50 rpm 3 J3.5 ton series:................. 2800 50 rpm Lock bolt (2) If the measured value does not satisfy the standard, make adjustment as follows: Remove the seal and loosen the lock bolt. Fully depress the accelerator pedal. Turn the bushing for adjustment, while holding the adjusting screw of the air governor immovable with a straight-edge screwdriver. Bushing Fix. Adjusting screw
1-14 3. Check and adjust relief down. (1) Operate the tilt lever fully backward with the engine running at the maximum speed, and measure the de- crease in speed (relief down) upon full relief. Tilt lever Standard: Within 300 rpm (2) If the measured value is out of the standard range, make adjustment according to the following proce- dure: Turn the adjusting screw counterclockwise to de- crease relief down. Return the screw by 1/10 of a turn to eliminate twist- ing of the spring in the air governor. Adjust the no-load maximum speed. Repeat steps , and until the measured value satisfies the standard. 4. Check and adjust hunting. (1) Check for hunting upon tilt relief at the no-load maxi- mum speed. (2) If hunting occurs a few times or more, make adjust- ment according to the following procedure: Turn the adjusting screw clockwise by 1/2 of a turn or more. Return the screw counterclockwise by 1/4 of a turn. Finally, turn it by 1/10 of a turn to eliminate twisting of the spring in the air governor. Adjust the no-load maximum speed. Repeat steps through more. Repeat adjustments in steps 2 to 4 until respective stan- dards are satisfied. Seal the lock bolt. until hunting occurs no 5. 6.
1-15 1DZ-II 2Z ENGINE Idle Speed Inspection Adjustment 1. Install the engine speedometer. 2. Check the idle speed. A Standard: 750 25 rpm 3. If the measured value is out of the standard, loosen the lock nut and make adjustment by turning adjusting screw A. No-load Maximum Speed Inspection Adjustment 1. Install the engine speedometer. 2. Inspect and adjust the no-load maximum speed. (1) Measure the speed when the accelerator pedal is fully depressed. Standard: 1DZ-II engine: 1 ton series: .................... 2600 50 rpm Vehicle speed control system spec.:.............. 2600 50 rpm 2 3 ton series: ................. 2800 50 rpm 2Z engine: ........................... 2400 50 rpm B If the measured value does not satisfy the standard , make adjustment as follows: Remove the seal and loosen the lock nut. Make adjustment by turning adjusting screw B. Check and adjust relief down. (1) Operate the tilt lever fully backward with the engine running at the maximum speed and measure the de- crease in speed (relief down) upon full relief. (2) Tilt lever 3. Standard: Within 200 rpm 4. Seal the adjusting screws after the end of adjustment.
1-16 AIR CLEANER SPECIFICATIONS Single (STD) Double (OPT) Type Cyclone type Size 7-inch Intake type Fresh air introduction type Outer: 18600 (2883) Filtering area cm2 (in2) 14600 (2263) Inner: 510 (79.1) Others With evacuator valve COMPONENTS 1703
1-17 AIR CLEANER CLEANING INSPECTION 1. 2. Open the engine hood. Remove the element. Note: In case of the double element type (OPT), do not remove the inner element for other than replacement. 3. Clean the element. (1) For ordinary cleaning, blow with compressed air [690 kPa (7kgf/cm2) [100 psi] or less] vertically along the pleats from the inside of the element. If heavily contaminated, washing is possible. (2) Element washing method Dissolve neutral detergent in tepid water (approx. 40 C (104 F)) and immerse the element in it for about 30 minutes. Then, rinse the element well with clear wa- ter. [Water pressure: 275 kPa (2.8 kgf/cm2) [40 psi] or less] After washing, naturally dry the element or dry the element with a dryer (cold air). Note: Do not damage the element during washing. Never use compressed air or hot air for drying. 4. Clean the evacuator valve (dust discharge valve). (1) Hold the tip end of the evacuator valve and discharge dust and dirt from the inside of the valve. 5. Inspect the element. (1) After cleaning, place an electric bulb in the element to inspect any damage in the element. If any pinhole, tear or damage is found, replace it with a new ele- ment. Element replacement Replace the element after it is washed six times or gen- erally at intervals of 12 months. 6. 7. Install the element. (1) Install the evacuator valve in the illustrated direction. Vehicle with vehicle speed control system Vehicle without vehicle speed control system 25 60
1-18 CLOGGING WARNING SYSTEM INSPECTION 1. Warning lamp inspection (1) See that the air cleaner warning lamp comes on when the ignition switch is turned ON and goes out when the engine starts. 2. Individual inspection (1) Use a mity vac to apply a negative pressure to the vacuum switch, and inspect conduction. Standard Gasoline models: 2942 294 Pa (300 30 mm H2O) (22.1 2.2 mmHg) [11.81 1.18 in H2O] [0.870 0.087 in Hg]: Conduction Diesel models: 7473 569 Pa (762 58 mm H2O) (56.0 4.3 mmHg) [30.00 2.28 in H2O] [2.205 0.169 in Hg]: Conduction RADIATOR COMPONENTS 1603
1-19 SPECIFICATIONS Type Crossflow Fin type Corrugated fin Coolant capacity (in radiator) See the table below Cap opening pressure kPa (kgf/cm2) [psi] 88 14.7 (0.9 0.15) [13 2.1] Others Built in torque converter cooler (torque converter model) COOLANT CAPACITY AND ANTIFREEZE TABLE Unit: (US gal) LLC mixing ratio at 30% (to - 15 C (5 F)) LLC mixing ratio at 50% (to - 35 C (- 31 F)) Total Antirust mixing at 5% Radiator capacity amount of coolant 4Y 2.5 (0.66) 7.4 (1.95) 2.2 (0.58) 3.7 (0.98) 0.4 (0.11) 1 ton series 1DZ-II 2.5 (0.66) 5.9 (1.56) 1.8 (0.48) 3.0 (0.79) 0.3 (0.08) 4Y 3.7 (0.98) 9.3 (2.46) 2.8 (0.74) 4.7 (1.24) 0.5 (0.13) 2 ton series 1DZ-II 3.7 (0.98) 8.3 (2.19) 2.5 (0.66) 4.2 (1.11) 0.4 (0.11) 2Z 3.7 (0.98) 9.0 (2.37) 2.7 (0.71) 4.5 (1.19) 0.5 (0.13) 4Y 3.7 (0.98) 9.5 (2.51) 2.9 (0.77) 4.8 (1.27) 0.5 (0.13) 3 ton series 1DZ-II 3.7 (0.98) 8.2 (2.16) 2.5 (0.66) 4.1 (1.08) 0.4 (0.11) 2Z 3.7 (0.98) 8.8 (2.32) 2.6 (0.69) 4.4 (1.16) 0.4 (0.11) 4Y 3.7 (0.98) 9.5 (2.51) 2.9 (0.77) 4.8 (1.27) 0.5 (0.13) J3.5 ton series 2Z 3.7 (0.98) 8.8 (2.32) 2.6 (0.69) 4.4 (1.16) 0.4 (0.11) Note: The total amount of coolant does not include the capacity of the reservoir tank. Reservoir tank capacity: 0.6 (0.16 US gal) (at FULL mark position)
Suggest: For more complete manuals. Please go to the home page. https://www.ebooklibonline.com If the above button click is invalid. Please download this document first, and then click the above link to download the complete manual. Thank you so much for reading
1-20 MUFFLER & EXHAUST PIPE COMPONENTS 1702 Gasoline model Diesel model
1-21 REMOVAL INSTALLATION Note: The muffler can be removed by either of the two methods shown below. Remove the muffler after removing the counterweight. Remove the muffler after removing the radiator W/counterweight. Here, method is explained. 3 2 Removal Procedure 1 Remove the counterweight. (See p. 9-6.) 2 Disconnect the exhaust pipe. 3 Remove the muffler W/tail pipe. 4 Disconnect the tail pipe from the muffler. Installation Procedure The installation procedure is the reverse of the removal procedure. CATALYTIC MUFFLER MAINTENANCE Replace the muffler ASSY every year (2000 hours) on either the gasoline or diesel engine vehicle.
https://www.ebooklibonline.com Hello dear friend! Thank you very much for reading. Enter the link into your browser. The full manual is available for immediate download. https://www.ebooklibonline.com

