Streamlining Visitor and Employee Management Processes
Explore how FM Systems' sophisticated solutions enhance workplace efficiency by optimizing visitor check-in procedures and employee workspace reservations. From pre-arrival notifications to desk booking features, these systems offer a seamless experience for hosts, visitors, and employees alike.
Download Presentation

Please find below an Image/Link to download the presentation.
The content on the website is provided AS IS for your information and personal use only. It may not be sold, licensed, or shared on other websites without obtaining consent from the author.If you encounter any issues during the download, it is possible that the publisher has removed the file from their server.
You are allowed to download the files provided on this website for personal or commercial use, subject to the condition that they are used lawfully. All files are the property of their respective owners.
The content on the website is provided AS IS for your information and personal use only. It may not be sold, licensed, or shared on other websites without obtaining consent from the author.
E N D
Presentation Transcript
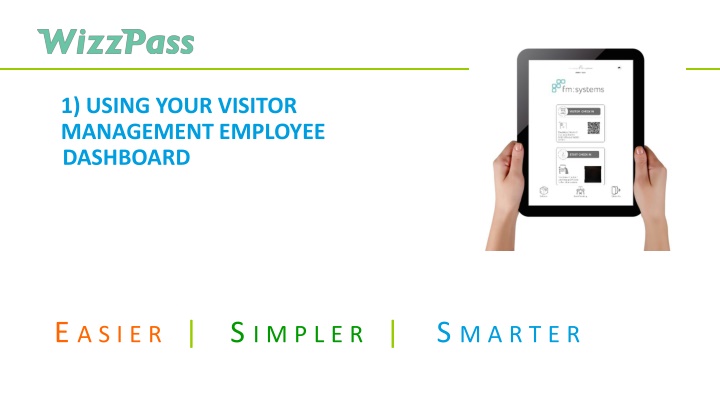
1) 1) USING YOUR VISITOR 2) MANAGEMENT EMPLOYEE DASHBOARD E A S I E R | S I M P L E R | S M A R T E R
HOW THE FM:SYSTEMS VISITOR MANAGEMENT WORKS Hosts pre-book their visitors via their calendar invite or via the Employee online portal. The visitor automatically receives a pre-arrival email with visitor instructions and directions, as well as a link to do their online pre-registration prior to their arrival. On the day of their meeting, the visitor uses the Self-Service kiosk at reception to check-in. If they did not complete the pre-registration before their arrival, then they will have to do so at the reception area. Once the visitor has checked in, then the host gets an email or SMS notification notifying them that their visitor has arrived. The receptionist can also immediately see which visitors have checked in and who their host is, and then asks the visitor to wait to be collected by their host.
HOW THE FM SYSTEMS OFFICE RESERVATION SYSTEM WORKS Prior to arrival, staff members will be required to book their visit to the premises for the day they need to be on site On arrival, if the reservation is complete, the employee s name will be picked up on the security scanner/ Kiosk. The employee s unique QR code Access Card can also be used to enter the premises when scanned If the employee has not reserved office space for the day, their name will not appear on the scanner, and the QR code Access Card will not work Employees will be unable to book on days where the maximum capacity has been reached this will be indicated on the calendar
HOW TO ACCESS THE HOST DASHBOARD 1. The staff reservation option is accessible under the Workspace Reservations tab 2. Employees can select which tenant they would like access to, and then select the days on the calendar that they would like to reserve space for 3. Employees will be able to book a desk and meeting room for specific days 4. Visitors and colleagues can be added via email to meeting room reservations. This triggers a notification and welcome mail to the visitor or colleague 5. Reservations can also be cancelled in the menu to the right
FM:EMPLOYEE DASHBOARD Employees can select which tenant they would like to reserve space at, as well as whether they want to book a desk or meeting room A pop up with the map layout appears when a date is selected on the calendar Desk Booking can be found in the menu of the left hand side The colour of the pins indicates availability of the desk Each desk has a description to indicate what s available (i.e. telephone line) The selected desk pin turns blue when booked Booked days will show Confirmed
FM: SYSTEMS MEETING ROOM RESERVATIONS HOST DASHBOARD Employee selects Meeting Room Booking on the drop down The meeting times can be updated on the top right of the map pop up Additional invitees can be added via email to the meeting room The meeting room pin will change colour when the time its booked is selected The calendar view can be changed to a day view. Employees can select the time they d like to book the meeting room for, and the map will open up
SANLAM OFFICE RESERVATIONS HOST DASHBOARD Bookings can be cancelled, with the status indicated Planned visits are displayed on the right hand side of the screen once booked Upcoming invites to meeting rooms by colleagues are also available on the right hand side The access card becomes active on the days with active office reservations
FM:EMPLOYEE DASHBOARD To book visitors onto site, go to visitor bookings, enter the persons email address or cell phone number, as well as the date of their visit. Thereafter they shall receive a link asking them to pre-register their information prior to their visit. Enter your guest s Particulars Click to add more guests Add the date of the visit and the end date, if appropriate Click Submit to add the guest. They will automatically be sent the pre- registration email
FM:EMPLOYEE DASHBOARD View all currently booked visits you ve added You can export your visitor bookings to either PDF or CSV Search for a visitor already booked View visit details Edit visit details Cancel visit
FM:SYSTEMS EMPLOYEE DASHBOARD Digital Access card is shown to the kiosk at reception, this allows for a quicker check in process
FM:SYSTEMS EMPLOYEE DASHBOARD Under deliveries, you are able to view all of the deliveries assigned to as well as the status.
1) USING THE FM:SYSTEMS VACCINATION 2) CONFIRMATION SYSTEM E A S I E R | S I M P L E R | S M A R T E R
HOW THE FM: SYSTEMS VACCINATION CONFIRMATION SYSTEM WORKS Employees will be requested to provide proof of vaccination status or negative PCR test to be granted access to the building. Administrators will be able to approve or deny the proof provided, along with a reason Employees at specific locations will be redirected to the vaccination page via a pop up reminder Employees will select their vaccination status from a pre-populated list, and follow the prompts thereafter
EMPLOYEE DASHBOARD LANDING PAGE Once employees login to their dashboard a pop up will appear requesting they submit their vaccination status answer. Employees will be able to select their answer rom the drop down available. Additional steps will be required depending on the employee s selection Employees will be automatically redirected to the Vaccine Questionnaire tab
ANSWER SELECTION AND UPLOAD If a vaccination card is required as proof, employees will be required to either upload or take a photo Employees can review their upload or captured photo before recapturing or submitting
ANSWER SELECTION AND UPLOAD If a negative PCR report is required as proof, employees will be required to either upload or take a photo Employees can review their upload or captured photo before recapturing or submitting. For PCR test submissions, the date of the test will need to be selected. Once the validity of the PCR test has expired, employees will be required to update their answer and proof.
STATUS AND VALIDITY Once the uploaded document is submitted, employees will proceed with their daily COVID-19 screening questionnaire (If required) Employees will be able to check the status of their submission on the Vaccination Questionnaire tab If a submission is denied, the employee will be required to start the process again. A reason for denial will be provided.
ADMINISTRATION DASHBOARD Once the proof is inspected, the administrator can approve or deny, and provide a reason All vaccine and PCR test submissions are listed in the Vaccine Results tab Admins will select Review to view the photographic submission
ADMINISTRATION DASHBOARD Once the proof is inspected, the administrator can approve or deny, and provide a reason All vaccine and PCR test submissions are listed in the Vaccine Results tab Admins will select Review to view the photographic submission
HOW THE FM: SYSTEMS ASSISTANT SETUP WORKS Assistants can assign themselves to do the following: Receive visitor arrival notifications on behalf of a colleague Make online visitors' bookings on behalf of a colleague To setup these permission options, the assistant should first make sure your companies administrator has enabled them as an assistant. If your company has enabled the ability to add yourself as an assistant, you shall be able to do this on the employee dashboard. Once an assistant has been created the nominated colleague shall receive an email confirmation. The colleague then clicks on the Manage permissions link, which will ask them to login, and they can then select Assistants and select which permission(s) to give to the assistant: Receive visitor arrival notifications on their behalf, and/or Make online visitors' bookings on their behalf.
CREATING AN ASSISTANT- EMPLOYEE DASHBOARD You shall select the add assistant. To make yourself an assistant you shall go to Assistants under the settings tab. Enter in your assistants email address, select the rights and submit.
CREATING AN ASSISTANT- EMPLOYEE DASHBOARD The assistant shall now receive a mail confirming their assistant status.
HOW ASSISTANTS CAN PRE-BOOK VISITORS ON BEHALF OF A COLLEAGUE: OUTLOOK To pre-book a visitor on behalf of a colleague via a calendar invite, the assistant must use that colleague s own calendar to send the calendar invite the calendar invite must come from the colleague s own email address. The normal process for booking visitors via a calendar invite is followed depending on where the meeting is taking place, employees can add either emailsetupbyfmsystems@fmsystems.com or emailsetupbyfmsystems@fmsystems.com in the To field of their calendar invite to automatically book all the external visitors included in that calendar invite. If new attendees are added, or the meeting details are updated after the initial invite has already been sent out if asked, please select the option to send update to all invitees . After booking a visitor, the host (from whom the calendar invite was sent) will receive a confirmation email showing which visitors have been added to the system and have been successfully booked. Once a visitor has been booked, the visitor will receive an email confirmation with their visit details, parking instructions, map link to the building and instructions on how they can pre-register their details before their arrival.
HOW ASSISTANTS CAN PRE-BOOK VISITORS ON BEHALF OF A COLLEAGUE: EMPLOYEE DASH Assistants will be able to use their Visitor Dashboard to view, make, edit and manage visitor bookings on behalf of a colleague, as well as their own visitors. Once logged in, the assistant will be able to book visitors by selecting the host, entering their visitor(s) email addresses and the date(s) of the visitors upcoming visit. Assistants will be able to view all upcoming visits that have been booked (and for which host) and also search for individual bookings using the search function. Assistants will also be able to edit or delete any upcoming bookings. If a visit is edited or deleted, an email is sent to the host confirming the changes they have made. Assistants will also be able to view the history of all their visits from the dashboard. This list can be exported to PDF, specific visitors can be searched for and you can also search the Visit History by date.
HOW ASSISTANTS WILL RECEIVE VISITOR-ARRIVAL NOTIFICATIONS ON BEHALF OF A COLLEAGUE As visitors arrive at Webber Wentzel, the assistant (instead of the host) will receive an email/SMS notification notifying the assistant that the visitor for their colleague has arrived.
2) USING YOUR VISITOR MANAGEMENT SYSTEM E A S I E R | S I M P L E R | S M A R T E R
ON SITE CHECK-IN: EMPLOYEES You shall select check-in on the FM:Systems Tablet and select Staff Check in. You can select your preferred way of checking into the building. Either with your Digital Access card or by Typing in your name Once completed the staff member shall be checked in.
ON SITE CHECK-IN: VISITORS For Visitors, select visitor check in, alternatively ask the Visitor to scan the QR code and check in on their own device. The Visitor needs to Select their visitor category and then select their host. (If they had been pre- booked they will not be required to complete this step) The Visitor then needs to enter in either their mobile or identity number (Dependant on your setup). The Visitor shall select their preferred way of checking in.
ON SITE CHECK-IN: VISITORS CONTINUED The visitor shall then be asked to enter in their particulars. These fields are fully customizable to your needs. If you have selected to have terms and conditions listed the visitor shall need to acknowledge them prior to proceeding. If you require your guests to watch and induction video you are able to do so here, this may be preceded with a questionnaire should you wish. In turn this shall record the date of completion as well as the lapse date on the admin dashboard. If you would like terms and conditions that require a signature and can be mailed to the client, this will be on the next page. Once all of the relevant fields have been completed the guest has an opportunity to review their information prior to checking in.
DELIVERIES Select the Host to whom the delivery belongs, take a picture and submit. An email or SMS shall now be sent to the host notifying them of their delivery. For deliveries, select the delivery icon. Select the deliver tab Select the delivery company
DELIVERIES: COLLECTION You will then be presented with all deliveries for the recipient. Click on the parcel and click the collect tab. Type in the name of the recipient. To collect a delivery, select the delivery icon Select the collect delivery tab.
DELIVERIES: COLLECTION CONTINUED The recipient will then be asked to take a picture with the parcel. Once the image has been captured the recipient is required to sign confirmation. The recipient has now successfully collected their parcel.
CHECKING OUT For visitors they shall need to enter their ID number/ Cell hone number. For staff they shall need to enter their name. To check out staff and visitors select the check out icon Once submitted the individual has successfully checked out.
