Make a flapping bat
Making a flapping bat for a Halloween decoration
Make a flapping bat
Stay safe
Whether you are a scientist researching a new medicine or
an engineer solving climate change, safety always comes first. An
adult must always be around and supervising when doing this
activity. You are responsible for:
ensuring that any equipment used for this activity is in good
working condition
behaving sensibly and following any safety instructions so as not
to hurt or injure yourself or others
Please note that in the absence of any negligence or other breach of
duty by us, this activity is carried out at your own risk. It is important
to take extra care at the stages marked with this symbol: ⚠
Where does Halloween come from?
•
Halloween is an old festival that dates back many centuries
•
First observed by the Scottish and Irish as ‘All Hallows Eve’,
when it was believed the souls of the dead returned home
•
All Hallows Day is the 1
st
of November - it is a date that the
Christian church uses to celebrate and honour the Saints of the
church
•
So, All Hallows Eve is the 31
st
October, Halloween
Halloween today
•
Halloween was taken to the United States of
America when many families moved there in
the 19
th
Century
•
It was then expanded to include ‘Trick or Treat’
and dressing up
•
Across the world, people now decorate their
houses with Halloween decorations such as
pumpkin lanterns, witches’ cauldrons, bats and
spiders’ webs
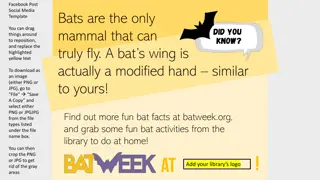
Why bats?
•
Halloween is a time to pretend to be scared
•
Bats flap and fly fast
•
People used to think they were evil because they could
‘see’ in the dark
•
Now we know different - bats use a clever echo sounding
system to tell them where objects are, and stop them flying
into things
•
Printed template
•
Good quality card (corrugated or grey card)
•
String
•
Small change, 1p or 2p pieces, washers or small weights
•
Scissors
•
Sticky tape
•
A stick to hold the bat
•
Black paint
•
Pencil
•
Googly eyes (optional)
•
Craft knife
Equipment and Resources
⚠
•
Cut the shapes out
of the template
•
Don’t forget that
you will need two
wings
Step 1
⚠
•
Holding the templates
still, draw round them
onto the card or
cardboard
Step 2
•
Cut out your shapes, taking care to follow the line
•
If you are using a craft knife, be
very
careful and do your cutting
on a tough surface, like an old chopping board
Step 3
⚠
•
Paint your shapes
•
Let the shapes dry before
you put them together
Step 4
⚠
•
Stick the wings onto the body, making sure they line up
•
The bases of the wings should follow a line like the one marked
as dotted on the template
•
Fold the wings in the opposite direction and attach another
piece of tape
Step 5
•
Make a hole in the ‘chest’ of
your bat
•
Use about 600 mm of string to
loop through the hole
•
Tie at the top and make a loop
at the bottom
Step 6
⚠
•
Using the rest of the string, make
two big loops (500 mm of string
each) and loop them through the
notches in the wings
Step 7
⚠
•
Thread the two loops onto a
stick or tree branch
•
It will probably hang a little like
this with its wings up and body
hanging down
•
Gently pull and release the
string attached to the body to
make it flap the wings
•
It needs some weights to make
it hang better and work more
like a bat
Testing 1
•
There are two places to add
weight:
•
the tips of the wings
•
and the end of the hanging
loop
•
Use some sticky tape so you can
move the weights around
•
Use pennies and 2p pieces or
similar
•
Experiment as your bat might not
be the same as everyone else’s
Step 8
•
This bat needed a
penny on each wing,
quite close to the ends,
and a 2p at the end of
the loop hanging down
Step 8
•
Try the flapping bat again
•
You might have to adjust the weights by using 2p pieces
instead of 1p pieces
•
You might have to move the weights on the wings further out
or in
•
You might have to move the weights backwards or forwards
•
This sort of testing is used in industry all the time
•
It is called
iterative testing
, where you test, improve and
retest several times
Testing 2
Finished Flapping bat
•
Add googly eyes or stickers to make your
bat look special
Extension
•
Make another bat from thin painted plywood to make it
more weatherproof
•
Cut out shapes to make another type of animal - for
example, birds or pterodactyls
•
Research more about bats and how they act
Learn how to make a flapping bat for Halloween decor with this step-by-step guide. Discover the origins and significance of bats in Halloween festivities. Follow instructions, safety precautions, and gather the necessary equipment and resources for this fun project.

Download Presentation

Please find below an Image/Link to download the presentation.
The content on the website is provided AS IS for your information and personal use only. It may not be sold, licensed, or shared on other websites without obtaining consent from the author.If you encounter any issues during the download, it is possible that the publisher has removed the file from their server.
You are allowed to download the files provided on this website for personal or commercial use, subject to the condition that they are used lawfully. All files are the property of their respective owners.
The content on the website is provided AS IS for your information and personal use only. It may not be sold, licensed, or shared on other websites without obtaining consent from the author.
E N D
Presentation Transcript
Make a flapping bat Making a flapping bat for a Halloween decoration
Stay safe Whether you are a scientist researching a new medicine or an engineer solving climate change, safety always comes first. An adult must always be around and supervising when doing this activity. You are responsible for: ensuring that any equipment used for this activity is in good working condition behaving sensibly and following any safety instructions so as not to hurt or injure yourself or others Please note that in the absence of any negligence or other breach of duty by us, this activity is carried out at your own risk. It is important to take extra care at the stages marked with this symbol:
Where does Halloween come from? Halloween is an old festival that dates back many centuries First observed by the Scottish and Irish as All Hallows Eve , when it was believed the souls of the dead returned home All Hallows Day is the 1st of November - it is a date that the Christian church uses to celebrate and honour the Saints of the church So, All Hallows Eve is the 31st October, Halloween
Halloween today Halloween was taken to the United States of America when many families moved there in the 19th Century It was then expanded to include Trick or Treat and dressing up Across the world, people now decorate their houses with Halloween decorations such as pumpkin lanterns, witches cauldrons, bats and spiders webs
Why bats? Halloween is a time to pretend to be scared Bats flap and fly fast People used to think they were evil because they could see in the dark Now we know different - bats use a clever echo sounding system to tell them where objects are, and stop them flying into things
Equipment and Resources Printed template Good quality card (corrugated or grey card) String Small change, 1p or 2p pieces, washers or small weights Scissors Sticky tape A stick to hold the bat Black paint Pencil Googly eyes (optional) Craft knife
Step 1 Cut the shapes out of the template Don t forget that you will need two wings
Step 2 Holding the templates still, draw round them onto the card or cardboard
Step 3 Cut out your shapes, taking care to follow the line If you are using a craft knife, be very careful and do your cutting on a tough surface, like an old chopping board
Step 4 Paint your shapes Let the shapes dry before you put them together
Step 5 Stick the wings onto the body, making sure they line up The bases of the wings should follow a line like the one marked as dotted on the template Fold the wings in the opposite direction and attach another piece of tape
Step 6 Make a hole in the chest of your bat Use about 600 mm of string to loop through the hole Tie at the top and make a loop at the bottom
Step 7 Using the rest of the string, make two big loops (500 mm of string each) and loop them through the notches in the wings
Testing 1 Thread the two loops onto a stick or tree branch It will probably hang a little like this with its wings up and body hanging down Gently pull and release the string attached to the body to make it flap the wings It needs some weights to make it hang better and work more like a bat
Step 8 There are two places to add weight: the tips of the wings and the end of the hanging loop Use some sticky tape so you can move the weights around Use pennies and 2p pieces or similar Experiment as your bat might not be the same as everyone else s
Step 8 This bat needed a penny on each wing, quite close to the ends, and a 2p at the end of the loop hanging down
Testing 2 Try the flapping bat again You might have to adjust the weights by using 2p pieces instead of 1p pieces You might have to move the weights on the wings further out or in You might have to move the weights backwards or forwards This sort of testing is used in industry all the time It is called iterative testing, where you test, improve and retest several times
Finished Flapping bat Add googly eyes or stickers to make your bat look special
Extension Make another bat from thin painted plywood to make it more weatherproof Cut out shapes to make another type of animal - for example, birds or pterodactyls Research more about bats and how they act