Geometric Constructions: Mastering Compass and Straight Edge Techniques
Explore the art of geometric constructions using only a compass and straight edge. Learn to bisect angles, construct perpendicular bisectors, draw lines perpendicular to given lines, create parallel lines, divide line segments equally, and more. Equip yourself with the necessary skills and techniques to master the world of geometric constructions with precision and accuracy.
Download Presentation

Please find below an Image/Link to download the presentation.
The content on the website is provided AS IS for your information and personal use only. It may not be sold, licensed, or shared on other websites without obtaining consent from the author.If you encounter any issues during the download, it is possible that the publisher has removed the file from their server.
You are allowed to download the files provided on this website for personal or commercial use, subject to the condition that they are used lawfully. All files are the property of their respective owners.
The content on the website is provided AS IS for your information and personal use only. It may not be sold, licensed, or shared on other websites without obtaining consent from the author.
E N D
Presentation Transcript
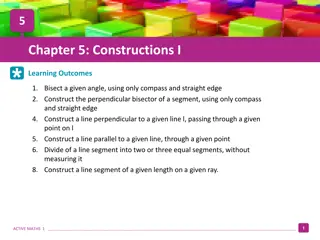
5 Chapter 5: Constructions I Learning Outcomes 1. Bisect a given angle, using only compass and straight edge 2. Construct the perpendicular bisector of a segment, using only compass and straight edge 4. Construct a line perpendicular to a given line l, passing through a given point on l 5. Construct a line parallel to a given line, through a given point 6. Divide of a line segment into two or three equal segments, without measuring it 8. Construct a line segment of a given length on a given ray. 1 ACTIVE MATHS 1
5 Construction Equipment 45o Set Square Compass 30o or 60o Set Square Protractor Straight Edge Pencil 2 ACTIVE MATHS 1
5 Construction List Make sure you understand what equipment can or cannot be used for your construction. Lines, rays, and line segments must be drawn using a straight-edge or ruler. Circles and arcs must be drawn using a compass Remember NEVER to rub out any lines, arcs, etc. that you have used in your constructions. These construction lines are very important, as they show that you have followed the correct method. Make sure when your construction is finished that: o All points, lines, rays etc. that were used in your construction have been labelled. o You have checked the accuracy of your construction. Depending on the construction, this can be done using a ruler and/or a protractor. 3 ACTIVE MATHS 1
5 Construction 1 Bisector of A Given Angle, Using Only Compass and Straight Edge Place the compass needle point on the point B. Draw an arc of the same width across each arm of the angle. Label the points of intersection of the arcs and the arms of the angle as X and Y. Place the compass needle point on the point X and draw an arc. Make sure the compass width is more than half the length from X to Y. Without changing the compass width, place the compass needle point on the point Y and draw an overlapping arc. Mark the point where the arcs meet. Using a straight edge, draw a ray from the vertex B through this point. This ray is the bisector of the ABC. A Y B X C 4 ACTIVE MATHS 1
5 Construction 2 Perpendicular Bisector of a Segment, Using Only Compass and Straight Edge Draw a line segment [CD]. Place the compass needle point on C. Set the compass width to more than half the length of [CD] and draw an arc. Without changing the compass width, place the compass needle point on D and draw an overlapping arc. Mark the two points of intersection where the arcs intersect. Using a straight edge, draw a line through these two points. This line is the perpendicular bisector of [CD]. 90o D C 5 ACTIVE MATHS 1
5 Construction 4 Line Perpendicular to a Given Line l, Passing Through a Given Point on l Method 1: solution Using a Set Square Line up one side of er side on the line l. Draw a ray from B using the edge of the set square. Then extend this ray beyond B so it is below the line l. This line is perpendicular to the line l and passes through the point B. Mark in the 90o angle. Use a protractor or set square to check that the constructed line is perpendicular to the line l. 90o B l 6 ACTIVE MATHS 1
5 Construction 4 Line Perpendicular to a Given Line l, Passing Through a Given Point on l Method 2: Solution Using a Protractor Place the centre of the protractor on the point B. At the 90o mark on the protractor, mark a point C. Using a straight edge draw a ray from B to the point C. Extend the ray beyond B, so it is below the line l. Mark in the 90o angle. This line is perpendicular to the line l and passes through the point B. Use a protractor or set square to check that the constructed line is perpendicular to the line l. C l 90o B 7 ACTIVE MATHS 1
5 Construction 5 Line Parallel to a Given Line, Through a Given Point Method 1: Solution Using a Set Square Using a set square, draw a line perpendicular to the line m and through the point C. Line up one of the two shorter sides of the set square at point C and the other shorter side on the perpendicular line. Now draw a line through the point C. This line is parallel to the line m and passes through the point C. Indicate the lines that are perpendicular on your construction. Use a protractor or set square to check that the constructed line is parallel to the line m. C 90o 90o m 8 ACTIVE MATHS 1
5 Construction 5 Line Parallel to a Given Line, Through a Given Point Method 2: Using a Protractor and Set Square Using a set square, draw a line perpendicular to the line m and through the point C. Line up the protractor with this perpendicular line and place the centre of the protractor at the point C. At the 90 mark on the protractor mark the point D. Now draw a line passing through both C and D. This line is parallel to the line m and passes through the point C. Indicate the lines that are perpendicular on your construction. Use a protractor or set square to check that the constructed line is parallel to the line m. C D 90o 90o m 9 ACTIVE MATHS 1
5 Construction 6 Division of a Line Segment into Three Equal Segments, Without Measuring From point A (or B), draw a ray at an acute angle to the given line segment. Place the compass needle point on A. Using the same compass width, mark off three equal arcs along the ray. (Use a small compass width.) Label the points of intersection R, S and T. Use a straight edge to draw a line segment from T to B. Using a set square and straight edge, line the set square up with [TB]. Slide the set square along the straight edge. Using the set square, draw a line segment from S and R to [AB]. The line segment [AB] has now been divided into three equal segments. A B R S T 10 ACTIVE MATHS 1
5 Construction 8 Line Segment of a Given Length on a Given Ray Construct a line segment 5 cm in length on the given ray. Draw a ray through the two points X and Y, starting at X. Using a ruler, draw [EF] of length 5 cm. Place the compass needle point on the point E. Adjust the compass width until it is at point F, i.e. the compass width is 5 cm. Using this compass width, place the compass needle point on the point X. Without adjusting the compass width, draw an arc that crosses the ray. Label this point of intersection as Z. 5 cm F E Ray 5 cm Z X Y 11 ACTIVE MATHS 1


