DNA Extraction: A User's Manual for Plant Material
 undefined


DNA Extraction: A
User’s Manual
Margarita Hernandez
Instruction Manual
ENC3254
02/28/14

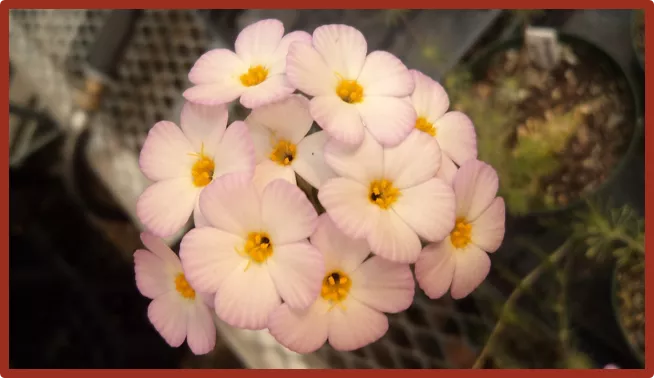
A step by step guide on how to effectively prepare,
extract and store DNA from plant material for a
first-time user
About this Manual

This manual was created for the purpose of
guiding individuals who have not previously
conducted a DNA extraction. Users are expected
to know several techniques, such as how to
properly pipet and where the reagents and
equipment are stored in the laboratory. This
specific manual can be used for users working at
the Soltis Lab at the Florida Museum of Natural
History, as the images were taken in this
laboratory. Users from other plant laboratories will
also find this manual useful in extracting DNA from
their plant tissue as it is specifically catered to the
botanical fields.
14
 undefined
13
Table of Contents

Needed Materials…………………………………………...1
Make the CTAB Mixture……………………………………2
Prepare Your Leaf Material………………………………..3
Extract the DNA……………………………………………..4
Storage………………………………………………………13
About this Manual………………………………………….14
Storage
i
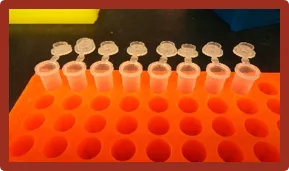

1. Once the pellet has dried
overnight, place the tubes back
onto the holding rack.
2. In each tube, pipet 30
microliters of autoclaved water
into each tube.
•
The DNA will dissolve into the
water and this will allow you to
dilute it later if necessary
3. Close the lids of the tubes
and let them sit in the oven at
37° Celsius for 15 minutes.
•
The heat of the oven will cause
the DNA to mix more quickly
and make the DNA available to
do more work.
4. Place the tubes in the
refrigerator of the lab and let
them sit for at least 4 hours
before use.
•
This step ensures that the DNA
is fully mixed with water and
there is no DNA still stuck at
the bottom of the tube

Turn the tubes right side up and place back
into your holding rack.
 undefined
Extract the DNA
Needed Materials

Reagents:
CTAB buffer
PVP (polyvinylpyrrolidone)
β-mercaptoethanol
24:1 Chloroform to Isoamyl-
Alcohol
Isopropanol
7.5 M Ammonium Acetate
70% ethanol
95% ethanol
Autoclaved water

Equipment:
Tissue grinder
Hot water bath
24 tube centrifuge
Vortex

Supplies:
12 eppendorf tubes
Holding rack
Glass jar with screw-able lid
20 mL graduate cylinder
Weigh boat
Zirconia glass beads
1000 and 200 microliter-
pipets
Large Kim Wipes
Glass beaker

Attire
Gloves
Closed toed shoes
Long pants

31. Place the test tube holder with the tubes in the center of
the Kim Wipe.
32. Grab each tube and pour off the remaining liquid.
•
Be especially careful in this step not to lose the DNA pellet. It
is now more visible but it can easily fall out of the tube.
33. Invert the tube against the test tube rack.
•
This will allow the pellet to dry.
34. Do this for every tube and allow it to sit overnight.
35. Dispose of the liquid inside of the beaker in an ethanol
waste container.
1
12
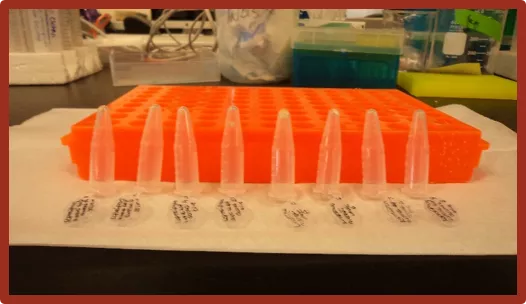

The image above shoes the tubes inverted so that the DNA pellet can dry. The DNA
pellet is located at the tip of each tube.
Extract the DNA
Make the CTAB Mixture
1. Find a pair of gloves that
properly fits your hand size.
•
Keep these gloves on throughout
the entire procedure. This
protects not only your hands from
any possible damaging reagents
but also prevents your samples
from becoming contaminated.
2. Use a glass jar that has a screw-
able lid and add 17 mL of CTAB
buffer.
•
You may use the 20 mL graduated
cylinder to measure out the CTAB
buffer
3. Weight out 0.68 grams of PVP
on a weigh boat and add to CTAB
in the glass jar.
•
The PVP will float on top of the
CTAB mixture at first. This is ok.
4. Turn on the water bath and set it
to 55° Celsius.
5. Place and tighten the lid on the
jar and set it on the water bath.
•
The mixture can only properly
mix when it is set to a high
temperature
27. Centrifuge the tubes again for 5 minutes.
28. Complete steps 24-27 again.
29. While the tubes are centrifuging, find an area in your lab
bay where you can let the tubes sit overnight. Place a clean
large sized Kim Wipe onto the spot where you will place your
tubes.
30. Once the tubes are done centrifuging, place the tubes in
your test tube holder and take them to the Kim Wipe on your
lab bay. Make sure to also bring the beaker you have been
using to dispose the liquid.
11
2
The glass jar where you
will mix your CTAB and
PVP.
The water bath used to heat up your
glass jar and to incubate your tubes.
The Kim Wipe should be large enough to fit the entire holding rack. The one pictured here is
folded in half.
Extract the DNA
Prepare Your Leaf Material
24. Once the tubes are
done centrifuging, remove
the liquid in the same
fashion as step 20.
25. Add 700 microliters of
95% ethanol to each tube.
26. Vortex the tubes and
try to get the pellet
suspended from the
bottom.
•
You should now be able
to see the pellet. It will
look like a white oval
shape attached to the
bottom of your tube.
3
10
1. Get 8, 1.7 mL Eppendorf tubes
and set them inside of a test tube
rack.
2. Number the tubes 1-8.
3. In each tube, place 3-4 glass
beads.
4. Separate the leaf material into
small pieces and place them inside
of the tube.
•
The more material you have, the
more DNA you’ll extract.
•
As you put the plant material in
each tube, write down the name of
the species in a notebook
according to the number on the
tube. This prevents any confusion
as to what tube of DNA belongs to
each species.
5. Move the tubes with the glass
beads and the leaf material into the
rack that corresponds to the
grinder, as shown below.
6. Once inside the
rack, place it inside of
the grinder and tighten
the nobs accordingly.
7. Grind the leaf
material for 5 minutes.
8. Place the tubes back
in the rack you
originally had them in.
Make sure to examine the liquid in the
glass beaker each time your pour out a
tube. If your DNA pellet fell out, use clean
forceps to retrieve it.
The image on the left shows the glass
beads at the bottom of the tube. The image
on the right shows a good amount of leaf
material for the extraction.
Extract the DNA
Extract the DNA
1. Retrieve your glass jar from the hot water bath and check
that the PVP has fully dissolved into the CTAB mixture.
•
If the PVP has not dissolved, leave the jar inside of the water
bath for another 5-10 minutes
2. Using a 200 microliter pipet, add 85 microliters of β-
mercaptoethanol into your glass jar
3. Stir the reagents by gently shaking the jar.
4. Using a 1000 micro liter pipet, add 500 microliters of your
mixture into each individual tube.
•
You do not have to change pipet tips in between each tube as
long as the pipet tip does not touch any part of the mouth of
the tube
•
If this happens, change tips and continue
20. When the tubes are done
centrifuging, grab each
individual tube and pour out
the liquid into the beaker.
Leave the lid open on each
tube and place it back onto
your test tube rack.
•
Do this in a single motion.
Be careful not to lose the
pellet of DNA at the bottom
of the tube when doing this.
21. Using a 1000 microliter
pipet, add 700 microliters of
70% ethanol from the freezer
into each tube.
22. Vortex the tubes and try
to get the pellet suspended
from the bottom of the tube.
•
You may not be able to see
the pellet yet at this step.
This is ok.
23. Centrifuge the tubes
again for 5 minutes.
9
4
The
β
-mercaptoethanol is always stored in a separate container. Only add
this reagent to your glass jar when your leaf material is ready.
The DNA pictured here can be
seen as an opaque pellet at the
tip of the tube.
Extract the DNA
Extract the DNA
15.There should be roughly 400
microliters of aqueous solution
in your new tube. Now add 250
microliters of isopropanol
alcohol and 32 microliters of
7.5 M ammonium acetate to
each tube.
•
These solutions must be at or
below 0° Celsius when added
to the DNA solution. This is
done because cold reagents
are more advantageous when
trying to separate the DNA
from the solution.
16. Vortex the mixture until all
liquids are in solution.
17. Place the test tube rack in
the -80° Celsius freezer for 20
minutes minimum.
•
You may leave the tubes in
their longer but this increases
your chances for
contamination.
18. After the 20 minutes,
centrifuge your tubes for 10
minutes on maximum speed.
•
This packs the DNA at the
bottom of the tube
19. While the tubes are
centrifuging, grab a medium
sized glass beaker.
5. Close the tubes tightly and
vortex the mixture of the plant
material and CTAB so that all
of the plant material is
suspended in the solution.
6. Place the tubes into the
floating tube holders and
incubate them in the hot water
bath for 15 minutes.
7. While the tubes are
incubating, get another 8
tubes and label them with the
correct species name from the
notebook.
•
You will need these tubes to
store the DNA
8. After your tubes are
finished incubating, remove
them from the water bath and
place them back into your test
tube rack. Turn off the water
bath.
5
8
Pictured above is the freezer where
you will store your tubes so that the
DNA can separate from the solution
.
To vortex your tubes, turn
the switch on the vortex
machine to “On” and press
your tubes against the
vibrating pad.
The image to the left shows the floating tube holder that gets placed inside the water bath. This
step is important because it allows the extraction to proceed at a faster rate.
Extract the DNA
Extract the DNA
9. Using a 1000 microliter
pipet, place 500 microliters
of 24:1 Chloroform Isoamyl
Alcohol in each tube.
•
WARNING
: Do this step
under the fume hood of your
laboratory as the fumes from
the chloroform can be
detrimental to your health.
10. Vortex the tubes until the
CTAB and the Chloroform are
fully mixed.
11. Centrifuge the tubes for
10 minutes at a speed of 13.2
(x1000) revolutions per
minute.
•
When loading the tubes into
the centrifuge, make sure
that the centrifuge is
balanced with a
corresponding tube on the
opposite side of the
centrifuge for every tube in
the side you are filling. In
this case, there would be 4
on one side and 4 directly
across from them on the
other side.
12. After the 10 minutes, remove the
tubes from the centrifuge and place in
the test tube rack.
•
You should see three layers (as
pictured to the right) separated in the
tube. The first is the aqueous layer that
contains the DNA. This is the most
important layer. The second is the left
over plant material. It should look like
a relatively thin green or brown film.
The third layer contains all the waste
product for the procedure.
13. Set a 200 microliter pipet to 195
microliters. Bring the test tubes that
have the species name over to where
you are working. Using the pipet,
remove the top liquid later of the
centrifuged tubes and place this
aqueous solution into the newly labeled
tubes.
•
Do this for all the tubes and make sure
to only pipet out the top layer and not
any part of the other two layers.
14. Once all the aqueous layers have
been transferred to new tubes, discard
the solutions left in the numbered tubes
in the appropriate waste container. The
tubes may now be discarded in the lab
trash.
•
The tubes will be discarded in the
biohazard waste bin of your lab (as
pictured to the right)
7
6
Pictured above is a balanced centrifuge. This
means that each tube has a corresponding
tube on the opposite side
A step-by-step guide on preparing, extracting, and storing DNA from plant material for first-time users, specifically tailored for individuals in botanical fields. The manual covers materials needed, CTAB buffer mixture preparation, leaf material preparation, DNA extraction process, and proper storage techniques. Users are advised on wearing proper attire, handling reagents, centrifuging steps, and drying DNA pellets. Detailed instructions and images assist users in successfully conducting DNA extraction procedures.

Download Presentation

Please find below an Image/Link to download the presentation.
The content on the website is provided AS IS for your information and personal use only. It may not be sold, licensed, or shared on other websites without obtaining consent from the author.If you encounter any issues during the download, it is possible that the publisher has removed the file from their server.
You are allowed to download the files provided on this website for personal or commercial use, subject to the condition that they are used lawfully. All files are the property of their respective owners.
The content on the website is provided AS IS for your information and personal use only. It may not be sold, licensed, or shared on other websites without obtaining consent from the author.
E N D
Presentation Transcript
DNA Extraction: A User s Manual About this Manual A step by step guide on how to effectively prepare, extract and store DNA from plant material for a first-time user This manual was created for the purpose of guiding individuals who have not previously conducted a DNA extraction. Users are expected to know several techniques, such as how to properly pipet and where the reagents and equipment are stored in the laboratory. This specific manual can be used for users working at the Soltis Lab at the Florida Museum of Natural History, as the images were taken in this laboratory. Users from other plant laboratories will also find this manual useful in extracting DNA from their plant tissue as it is specifically catered to the botanical fields. Margarita Hernandez Instruction Manual ENC3254 02/28/14 14
Storage Table of Contents 1. Once the pellet has dried overnight, place the tubes back onto the holding rack. 2. In each tube, pipet 30 microliters of autoclaved water into each tube. The DNA will dissolve into the water and this will allow you to dilute it later if necessary Needed Materials ...1 Make the CTAB Mixture 2 Prepare Your Leaf Material ..3 3. Close the lids of the tubes and let them sit in the oven at 37 Celsius for 15 minutes. The heat of the oven will cause the DNA to mix more quickly and make the DNA available to do more work. Extract the DNA ..4 Storage 13 About this Manual .14 Turn the tubes right side up and place back into your holding rack. 4. Place the tubes in the refrigerator of the lab and let them sit for at least 4 hours before use. This step ensures that the DNA is fully mixed with water and there is no DNA still stuck at the bottom of the tube i 13
Extract the DNA Needed Materials 31. Place the test tube holder with the tubes in the center of the Kim Wipe. Supplies: Reagents: 12 eppendorf tubes Holding rack Glass jar with screw-able lid 20 mL graduate cylinder Weigh boat Zirconia glass beads 1000 and 200 microliter- pipets Large Kim Wipes Glass beaker CTAB buffer PVP (polyvinylpyrrolidone) -mercaptoethanol 24:1 Chloroform to Isoamyl- Alcohol Isopropanol 7.5 M Ammonium Acetate 70% ethanol 95% ethanol Autoclaved water 32. Grab each tube and pour off the remaining liquid. Be especially careful in this step not to lose the DNA pellet. It is now more visible but it can easily fall out of the tube. 33. Invert the tube against the test tube rack. This will allow the pellet to dry. 34. Do this for every tube and allow it to sit overnight. 35. Dispose of the liquid inside of the beaker in an ethanol waste container. Equipment: Attire Tissue grinder Hot water bath 24 tube centrifuge Vortex Gloves Closed toed shoes Long pants The image above shoes the tubes inverted so that the DNA pellet can dry. The DNA pellet is located at the tip of each tube. 12 1
Extract the DNA Make the CTAB Mixture 1. Find a pair of gloves that properly fits your hand size. Keep these gloves on throughout the entire procedure. This protects not only your hands from any possible damaging reagents but also prevents your samples from becoming contaminated. 27. Centrifuge the tubes again for 5 minutes. 28. Complete steps 24-27 again. 29. While the tubes are centrifuging, find an area in your lab bay where you can let the tubes sit overnight. Place a clean large sized Kim Wipe onto the spot where you will place your tubes. 2. Use a glass jar that has a screw- able lid and add 17 mL of CTAB buffer. You may use the 20 mL graduated cylinder to measure out the CTAB buffer 30. Once the tubes are done centrifuging, place the tubes in your test tube holder and take them to the Kim Wipe on your lab bay. Make sure to also bring the beaker you have been using to dispose the liquid. The glass jar where you will mix your CTAB and PVP. 3. Weight out 0.68 grams of PVP on a weigh boat and add to CTAB in the glass jar. The PVP will float on top of the CTAB mixture at first. This is ok. 4. Turn on the water bath and set it to 55 Celsius. 5. Place and tighten the lid on the jar and set it on the water bath. The mixture can only properly mix when it is set to a high temperature The water bath used to heat up your glass jar and to incubate your tubes. The Kim Wipe should be large enough to fit the entire holding rack. The one pictured here is folded in half. 2 11
Extract the DNA Prepare Your Leaf Material 1. Get 8, 1.7 mL Eppendorf tubes and set them inside of a test tube rack. 6. Once inside the rack, place it inside of the grinder and tighten the nobs accordingly. 2. Number the tubes 1-8. 7. Grind the leaf material for 5 minutes. 8. Place the tubes back in the rack you originally had them in. 3. In each tube, place 3-4 glass beads. 24. Once the tubes are done centrifuging, remove the liquid in the same fashion as step 20. 4. Separate the leaf material into small pieces and place them inside of the tube. The more material you have, the more DNA you ll extract. As you put the plant material in each tube, write down the name of the species in a notebook according to the number on the tube. This prevents any confusion as to what tube of DNA belongs to each species. 25. Add 700 microliters of 95% ethanol to each tube. 26. Vortex the tubes and try to get the pellet suspended from the bottom. You should now be able to see the pellet. It will look like a white oval shape attached to the bottom of your tube. 5. Move the tubes with the glass beads and the leaf material into the rack that corresponds to the grinder, as shown below. Make sure to examine the liquid in the glass beaker each time your pour out a tube. If your DNA pellet fell out, use clean forceps to retrieve it. The image on the left shows the glass beads at the bottom of the tube. The image on the right shows a good amount of leaf material for the extraction. 10 3
Extract the DNA Extract the DNA 1. Retrieve your glass jar from the hot water bath and check that the PVP has fully dissolved into the CTAB mixture. If the PVP has not dissolved, leave the jar inside of the water bath for another 5-10 minutes 20. When the tubes are done centrifuging, grab each individual tube and pour out the liquid into the beaker. Leave the lid open on each tube and place it back onto your test tube rack. Do this in a single motion. Be careful not to lose the pellet of DNA at the bottom of the tube when doing this. 2. Using a 200 microliter pipet, add 85 microliters of - mercaptoethanol into your glass jar 3. Stir the reagents by gently shaking the jar. 4. Using a 1000 micro liter pipet, add 500 microliters of your mixture into each individual tube. You do not have to change pipet tips in between each tube as long as the pipet tip does not touch any part of the mouth of the tube If this happens, change tips and continue 21. Using a 1000 microliter pipet, add 700 microliters of 70% ethanol from the freezer into each tube. 22. Vortex the tubes and try to get the pellet suspended from the bottom of the tube. You may not be able to see the pellet yet at this step. This is ok. The DNA pictured here can be seen as an opaque pellet at the tip of the tube. 23. Centrifuge the tubes again for 5 minutes. The -mercaptoethanol is always stored in a separate container. Only add this reagent to your glass jar when your leaf material is ready. 4 9
Extract the DNA Extract the DNA 5. Close the tubes tightly and vortex the mixture of the plant material and CTAB so that all of the plant material is suspended in the solution. 15.There should be roughly 400 microliters of aqueous solution in your new tube. Now add 250 microliters of isopropanol alcohol and 32 microliters of 7.5 M ammonium acetate to each tube. These solutions must be at or below 0 Celsius when added to the DNA solution. This is done because cold reagents are more advantageous when trying to separate the DNA from the solution. 6. Place the tubes into the floating tube holders and incubate them in the hot water bath for 15 minutes. 7. While the tubes are incubating, get another 8 tubes and label them with the correct species name from the notebook. You will need these tubes to store the DNA 16. Vortex the mixture until all liquids are in solution. To vortex your tubes, turn the switch on the vortex machine to On and press your tubes against the vibrating pad. 8. After your tubes are finished incubating, remove them from the water bath and place them back into your test tube rack. Turn off the water bath. 17. Place the test tube rack in the -80 Celsius freezer for 20 minutes minimum. You may leave the tubes in their longer but this increases your chances for contamination. 18. After the 20 minutes, centrifuge your tubes for 10 minutes on maximum speed. This packs the DNA at the bottom of the tube Pictured above is the freezer where you will store your tubes so that the DNA can separate from the solution. 19. While the tubes are centrifuging, grab a medium sized glass beaker. The image to the left shows the floating tube holder that gets placed inside the water bath. This step is important because it allows the extraction to proceed at a faster rate. 8 5
Extract the DNA Extract the DNA 12. After the 10 minutes, remove the tubes from the centrifuge and place in the test tube rack. You should see three layers (as pictured to the right) separated in the tube. The first is the aqueous layer that contains the DNA. This is the most important layer. The second is the left over plant material. It should look like a relatively thin green or brown film. The third layer contains all the waste product for the procedure. 9. Using a 1000 microliter pipet, place 500 microliters of 24:1 Chloroform Isoamyl Alcohol in each tube. WARNING: Do this step under the fume hood of your laboratory as the fumes from the chloroform can be detrimental to your health. 10. Vortex the tubes until the CTAB and the Chloroform are fully mixed. 13. Set a 200 microliter pipet to 195 microliters. Bring the test tubes that have the species name over to where you are working. Using the pipet, remove the top liquid later of the centrifuged tubes and place this aqueous solution into the newly labeled tubes. Do this for all the tubes and make sure to only pipet out the top layer and not any part of the other two layers. 11. Centrifuge the tubes for 10 minutes at a speed of 13.2 (x1000) revolutions per minute. When loading the tubes into the centrifuge, make sure that the centrifuge is balanced with a corresponding tube on the opposite side of the centrifuge for every tube in the side you are filling. In this case, there would be 4 on one side and 4 directly across from them on the other side. 14. Once all the aqueous layers have been transferred to new tubes, discard the solutions left in the numbered tubes in the appropriate waste container. The tubes may now be discarded in the lab trash. The tubes will be discarded in the biohazard waste bin of your lab (as pictured to the right) Pictured above is a balanced centrifuge. This means that each tube has a corresponding tube on the opposite side 6 7