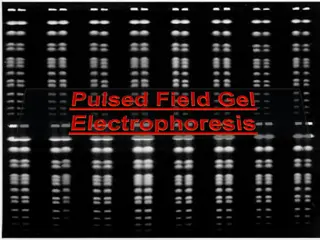
Understanding DNA Extraction, Quantitation and Amplification
 undefined


Understanding DNA
Extraction, Quantitation
and Amplification

Cassandra Canela
Ariel Payan


Overview


•
Overall analytical process
•
Basics
•
Differential extraction vs unknown/known
extraction
•
How to find the information within paperwork
•
Issues
•
Contamination
•
Sample Switches
•
Inhibition/Degradation
•
Prevention and Detection – quality assurance
S
t
e
p
1
:
E
x
t
r
a
c
t
i
o
n
REMOVAL AND ISOLATION OF THE
DNA FROM THE SAMPLE
COLLECTED AT SEROLOGY.
How do we extract the sample:
•
Two main steps
•
Lysis
•
Heat and multiple chemicals are used to break open the cells in the bodily fluid and release
the DNA.
•
Purification
•
Unwanted cell parts are removed, and the pure DNA is suspended in liquid.
Two categories of Extraction
Differential Extraction
•
Allows for isolation of sperm cells –
samples suspected (or confirmed) to
contain semen
•
Sperm cells outer membrane requires a
stronger chemical than other cell types
•
Vaginal swabs
•
Breast swabs
•
Unknowns and Knowns (Non
Differentials)
•
Isolates all DNA from all DNA sources (i.e.
semen, blood, skin cells, etc)
•
Unknowns
•
Right hand fingernail swabs
•
Swabbing from ligature
•
Cutting … from light grey hooded sweatshirt
•
Knowns
•
Blood card
•
Buccal swab
How do you know which category of extraction was
performed on your sample?
Lysis: Differentials vs. Unknowns/Knowns
Differentials
•
Chemical 1 (ex. pro K) added to sample
•
Liquid containing DNA from cellular
material removed leaving liquid containing
intact sperm cells (removed portion -
epithelial cell fraction)
•
Additional stronger chemical (ex. DTT)
added to break open sperm cells and
release the DNA (sperm cell fraction)
Unknowns/Knowns
Combination of chemical(s) added at
the same time to break open all cells
that may be present
Potential Issues with Differential Extraction
•
Carry Over
•
Fraction doesn’t separate 100%
•
Sperm cells - lost
•
Pipette up sperm fraction with removal of epithelial fraction
Quality Assurance Measure:
Reagent Blanks
•
Consist of all reagents used in the procedure just without any actual DNA
added
•
Must have at least one per extraction batch
•
Must be extracted alongside the samples
•
Main purpose – used to detect contamination
Manual vs Robotic Extraction
Manual
•
More labor intensive on the analyst
•
Minimal equipment needed
•
One tube open at a time
Robotic
•
Less human manipulation
•
Improves accuracy and precision
between sample and from plate to plate
•
To set up instrument, all sample tubes
will be open at the same time
Potential Issues: Contamination and Sample
Switch
Can’t tell right now – could suspect if something happened during
extraction (documentation?)
•
Contamination
•
Detectable in reagent blanks
•
Minimized by:
•
use of robotics
•
decontamination of workspace,
equipment, and consumables prior to
extracting
•
Sample Switch
•
Robotics – correct placement of
samples
•
Be vigilant and reduce distractions
S
t
e
p
2
:
Q
u
a
n
t
i
t
a
t
i
o
n
•
DETERMINE APPROXIMATELY
HOW MUCH DNA IS PRESENT IN
THE SAMPLE
•
AN ESTIMATION
Basics: Real Time PCR
•
Utilizes a standard curve – set of
samples with a known amount of
DNA (range is dependent on kit used)
•
Instrument detects the fluorescence of
the sample in “real time”
•
Time of fluorescence is compared to
the standard curve and an approximate
quant value is reported by the software
Quality Assurance: Controls
•
Standard Curve
•
Must meet specific requirements
•
Negative Template Control
•
Similar to reagent blanks
•
Contains all reagents, no DNA
•
Background plate
•
Can be run at certain intervals to help
detect fluorescence that is present in
the instrument itself
•
Helps decontaminate/clean the
instrument
Potential Issues: Contamination and Sample
Switch
•
Contamination
•
Possible Detection
•
Should not have quant value in
reagent blanks or negative template
control
•
Sample Switch
•
Detection – limited
•
Reagent blanks
•
Prevention
•
Use of robotics
•
Possibility of verification
Why do we Quant? – 3 reasons
Additional potential issue: Inhibition
•
What is it???
•
Caused by things contained within the sample itself that were not removed during
extraction and can prevent (inhibit) the amplification process from happening
•
Can prevent the process either partially or entirely
•
Detection
•
Utilizes the IPC (internal positive control) within the quant reaction
•
Information available within lab’s quant paperwork
Why do we Quant? – 3 reasons
Quant Threshold
S
t
e
p
3
:
A
m
p
l
i
f
i
c
a
t
i
o
n
•
Making billions of copies of specific locations
on the DNA that we want to look at
•
Utilizes the polymerase chain reaction (PCR)
What is
being
copied?
•
Short Tandem Repeats (STR)
•
Number of locations copied is kit dependent
•
Current kits
•
GlobalFiler
•
Investigator 24plex
•
PowerPlex Fusion
•
Older kits
•
Identifiler Plus
•
PowerPlex 16
•
MiniFiler
•
Y-STRs
•
PowerPlex Y23
•
Yfiler Plus
•
Investigator Argus Y-28
How do you know which kit was used?
Basics: How does it
work?
•
Polymerase chain reaction
•
Cyclic process
•
1 cycle utilizes three separate
temperatures to break apart the DNA,
find the area we want to copy, and
make the copy
•
Cycle 2 – N: repeats these three
temperatures
Optimal Amount of Sample Needed for
Reaction
•
Each kit validated at a range of optimal DNA Template
•
Sweet spot wanted where we have an optimal amount of copies being made during
the PCR process
•
Too much – leads to an excessive amount of artifacts and difficulties in interpretation
•
Reamp less
•
Too little – leads to not enough copies being made which can lead to difficult interpretation
•
Sample dependent
•
Reamp more, if possible
Quality Assurance: Controls
•
Positive Control
•
Known DNA from a known
individual
•
Will lead to a known DNA profile
during separation/detection step
•
Included in kit
•
Negative Control
•
Similar to reagent blanks
•
Contains all reagents, no DNA
Potential Issues: Contamination and Sample
Switch
Like extraction - can’t tell right now; unless something happened during
set up process that would indicate the possibility (documentation)
•
Contamination
•
No DNA in negative control (or reagent
blanks)
•
Prevention
•
use of robotics
•
decontamination of workspace, equipment, and
consumables prior to extracting
•
Dedicated workspace for amplification set up
•
Sample Switch
•
Prevention
•
Robotics
•
Possibility of verification
Final Step (4):
Separation and
Detection
•
Taking all the copies we
made, separating them by
size and detecting them
utilizing a laser and a
camera. The detection is
captured in a
picture/graphical format
called an
electropherogram (the
DNA Profile).
Basics: How
it works
Since DNA is
negatively charged, we
use a process called
capillary
electrophoresis.
Now we can further assess both the
quality controls and the potential issues
that occur during the lab process.
Did the amplification
process work?
•
Amplification positive
control
•
The correct DNA
profile MUST be
detected
Contamination
•
Labs are required to have a procedure that covers the detection and
prevention of contamination (per the quality assurance standards set by the
FBI).
•
Definition of contamination will be lab/lab system specific.
Reagent Blanks and
Negative Amplification
Controls
•
Assessed for
Contamination
•
Want them to be free of
contamination
Contamination
Detected
•
If contamination is
detected, the lab will
follow their
contamination protocol.
•
The detection of
contamination should
be documented in the
lab’s paperwork
Profile Comparison Tool
•
Detection for Contamination and Sample Switches
•
Component of Data Analysis Software
•
Compares samples within batch to other samples within batch and to lab
personnel/lab contractors contained within the software
Profile Comparison Example
Inhibition
•
Inhibition –
•
Profiles can simply look like low
level samples.
•
Can do additional steps to
overcome inhibitors if sample is
inhibited (remember quant info).
Additional Potential Issue: Degradation
•
What is it?
•
Caused by the DNA breaking down from one long strand into shorter broken strands
(typically caused by environmental factors like humidity or sunlight). The shorter strands can
prevent the areas we are searching for from being able to be found because the area is either
not there or the isn’t fully intact to copy.
•
Can prevent us from getting a full profile during DNA
•
If degradation is bad enough, can prevent us from getting a profile at all
(Detection at Quant)
Degradation index – present in newer quant kits (located within quant paperwork)
Degradation
•
Degradation –
•
Happens prior to the evidence
coming into the lab (environmental
factors)
•
Can happen based on storage of the
evidence – wet, damp evidence
•
Naturally occurs over time
•
Unknown how it is going to affect
(and if it will have an affect on) the
evidence until a DNA profile is
developed.
Quality Assurance:
Reagents and Instrumentation
•
Per the QAS, the laboratory must define what is considered a critical reagent
and critical equipment (certain things are required to be included)
•
Critical reagents
•
Must be evaluated prior to use in casework
•
Critical Equipment
•
Lab must have a program to ensure proper maintenance
•
Must have a process for performance checks to evaluate that the equipment is working
Thank you!
Questions?
Cassandra Canela
Assistant Technical Leader
TXDPS Garland Crime Lab
Cassandra.canela@dps.Texas.gov
Ariel Payan
Capitol Area Private Defender Service
Ariel@CAPDS.org

Learn the fundamentals of DNA extraction, including the two categories of extraction, potential issues, and how to determine the extraction category of your sample.

Download Presentation

Please find below an Image/Link to download the presentation.
The content on the website is provided AS IS for your information and personal use only. It may not be sold, licensed, or shared on other websites without obtaining consent from the author. Download presentation by click this link. If you encounter any issues during the download, it is possible that the publisher has removed the file from their server.
E N D
Presentation Transcript
Understanding DNA Extraction, Quantitation and Amplification Cassandra Canela Ariel Payan
Overall analytical process Basics Differential extraction vs unknown/known extraction How to find the information within paperwork Overview Issues Contamination Sample Switches Inhibition/Degradation Prevention and Detection quality assurance
Step 1: Extraction REMOVAL AND ISOLATION OF THE DNA FROM THE SAMPLE COLLECTED AT SEROLOGY.
How do we extract the sample: Two main steps Lysis Heat and multiple chemicals are used to break open the cells in the bodily fluid and release the DNA. Purification Unwanted cell parts are removed, and the pure DNA is suspended in liquid.
Two categories of Extraction Unknowns and Knowns (Non Differentials) Isolates all DNA from all DNA sources (i.e. semen, blood, skin cells, etc) Unknowns Right hand fingernail swabs Swabbing from ligature Cutting from light grey hooded sweatshirt Knowns Blood card Buccal swab Differential Extraction Allows for isolation of sperm cells samples suspected (or confirmed) to contain semen Sperm cells outer membrane requires a stronger chemical than other cell types Vaginal swabs Breast swabs
How do you know which category of extraction was performed on your sample?
Lysis: Differentials vs. Unknowns/Knowns Differentials Unknowns/Knowns Chemical 1 (ex. pro K) added to sample Liquid containing DNA from cellular material removed leaving liquid containing intact sperm cells (removed portion - epithelial cell fraction) Combination of chemical(s) added at the same time to break open all cells that may be present Additional stronger chemical (ex. DTT) added to break open sperm cells and release the DNA (sperm cell fraction)
Potential Issues with Differential Extraction Carry Over Fraction doesn t separate 100% Sperm cells - lost Pipette up sperm fraction with removal of epithelial fraction
Quality Assurance Measure: Reagent Blanks Consist of all reagents used in the procedure just without any actual DNA added Must have at least one per extraction batch Must be extracted alongside the samples Main purpose used to detect contamination
Manual vs Robotic Extraction Robotic Less human manipulation Improves accuracy and precision between sample and from plate to plate To set up instrument, all sample tubes will be open at the same time Manual More labor intensive on the analyst Minimal equipment needed One tube open at a time
Potential Issues: Contamination and Sample Switch Can t tell right now could suspect if something happened during extraction (documentation?) Contamination Detectable in reagent blanks Minimized by: use of robotics decontamination of workspace, equipment, and consumables prior to extracting Sample Switch Robotics correct placement of samples Be vigilant and reduce distractions
Step 2: Quantitation DETERMINE APPROXIMATELY HOW MUCH DNA IS PRESENT IN THE SAMPLE AN ESTIMATION
Basics: Real Time PCR Utilizes a standard curve set of samples with a known amount of DNA (range is dependent on kit used) Instrument detects the fluorescence of the sample in real time Time of fluorescence is compared to the standard curve and an approximate quant value is reported by the software
Quality Assurance: Controls Standard Curve Must meet specific requirements Background plate Can be run at certain intervals to help detect fluorescence that is present in the instrument itself Helps decontaminate/clean the instrument Negative Template Control Similar to reagent blanks Contains all reagents, no DNA
Potential Issues: Contamination and Sample Switch Contamination Possible Detection Should not have quant value in reagent blanks or negative template control Sample Switch Detection limited Reagent blanks Prevention Use of robotics Possibility of verification
Why do we Quant? 3 reasons 1 Distinguish between inhibition and low template samples
Additional potential issue: Inhibition What is it??? Caused by things contained within the sample itself that were not removed during extraction and can prevent (inhibit) the amplification process from happening Can prevent the process either partially or entirely Detection Utilizes the IPC (internal positive control) within the quant reaction Information available within lab s quant paperwork
Why do we Quant? 3 reasons 1 2 3 Distinguish between inhibition, degraded, and low template samples Determine the optimal amount of our sample needed to perform the amplification process Help us choose the appropriate DNA testing procedure to perform (quant thresholds)
Step 3: Amplification Making billions of copies of specific locations on the DNA that we want to look at Utilizes the polymerase chain reaction (PCR)
Short Tandem Repeats (STR) Number of locations copied is kit dependent Current kits GlobalFiler Investigator 24plex PowerPlex Fusion Older kits Identifiler Plus PowerPlex 16 MiniFiler Y-STRs PowerPlex Y23 Yfiler Plus Investigator Argus Y-28 What is being copied?
Basics: How does it work? Polymerase chain reaction Cyclic process 1 cycle utilizes three separate temperatures to break apart the DNA, find the area we want to copy, and make the copy Cycle 2 N: repeats these three temperatures
Optimal Amount of Sample Needed for Reaction Each kit validated at a range of optimal DNA Template Sweet spot wanted where we have an optimal amount of copies being made during the PCR process Too much leads to an excessive amount of artifacts and difficulties in interpretation Reamp less Too little leads to not enough copies being made which can lead to difficult interpretation Sample dependent Reamp more, if possible
Quality Assurance: Controls Positive Control Known DNA from a known individual Will lead to a known DNA profile during separation/detection step Included in kit Negative Control Similar to reagent blanks Contains all reagents, no DNA
Potential Issues: Contamination and Sample Switch Like extraction - can t tell right now; unless something happened during set up process that would indicate the possibility (documentation) Contamination No DNA in negative control (or reagent blanks) Prevention use of robotics decontamination of workspace, equipment, and consumables prior to extracting Dedicated workspace for amplification set up Sample Switch Prevention Robotics Possibility of verification
Final Step (4): Separation and Detection Taking all the copies we made, separating them by size and detecting them utilizing a laser and a camera. The detection is captured in a picture/graphical format called an electropherogram (the DNA Profile).
Basics: How it works Since DNA is negatively charged, we use a process called capillary electrophoresis.
Now we can further assess both the quality controls and the potential issues that occur during the lab process.
Did the amplification process work? Amplification positive control The correct DNA profile MUST be detected
Contamination Labs are required to have a procedure that covers the detection and prevention of contamination (per the quality assurance standards set by the FBI). Definition of contamination will be lab/lab system specific.
Reagent Blanks and Negative Amplification Controls Assessed for Contamination Want them to be free of contamination
Contamination Detected If contamination is detected, the lab will follow their contamination protocol. The detection of contamination should be documented in the lab s paperwork
Profile Comparison Tool Detection for Contamination and Sample Switches Component of Data Analysis Software Compares samples within batch to other samples within batch and to lab personnel/lab contractors contained within the software
Inhibition Profiles can simply look like low level samples. Can do additional steps to overcome inhibitors if sample is inhibited (remember quant info). Inhibition
Additional Potential Issue: Degradation What is it? Caused by the DNA breaking down from one long strand into shorter broken strands (typically caused by environmental factors like humidity or sunlight). The shorter strands can prevent the areas we are searching for from being able to be found because the area is either not there or the isn t fully intact to copy. Can prevent us from getting a full profile during DNA If degradation is bad enough, can prevent us from getting a profile at all (Detection at Quant) Degradation index present in newer quant kits (located within quant paperwork)
Degradation Happens prior to the evidence coming into the lab (environmental factors) Can happen based on storage of the evidence wet, damp evidence Naturally occurs over time Degradation Unknown how it is going to affect (and if it will have an affect on) the evidence until a DNA profile is developed.
Quality Assurance: Reagents and Instrumentation Per the QAS, the laboratory must define what is considered a critical reagent and critical equipment (certain things are required to be included) Critical reagents Must be evaluated prior to use in casework Critical Equipment Lab must have a program to ensure proper maintenance Must have a process for performance checks to evaluate that the equipment is working
Thank you! Questions? Cassandra Canela Assistant Technical Leader TXDPS Garland Crime Lab Cassandra.canela@dps.Texas.gov Ariel Payan Capitol Area Private Defender Service Ariel@CAPDS.org


")


:")