Caterpillar Cat CS-563E CP-563E Vibratory Compactor (Prefix CNT) Service Repair Manual Instant Download (CNT00001 and up)
Please open the website below to get the complete manualnn// n
Download Presentation

Please find below an Image/Link to download the presentation.
The content on the website is provided AS IS for your information and personal use only. It may not be sold, licensed, or shared on other websites without obtaining consent from the author. Download presentation by click this link. If you encounter any issues during the download, it is possible that the publisher has removed the file from their server.
E N D
Presentation Transcript
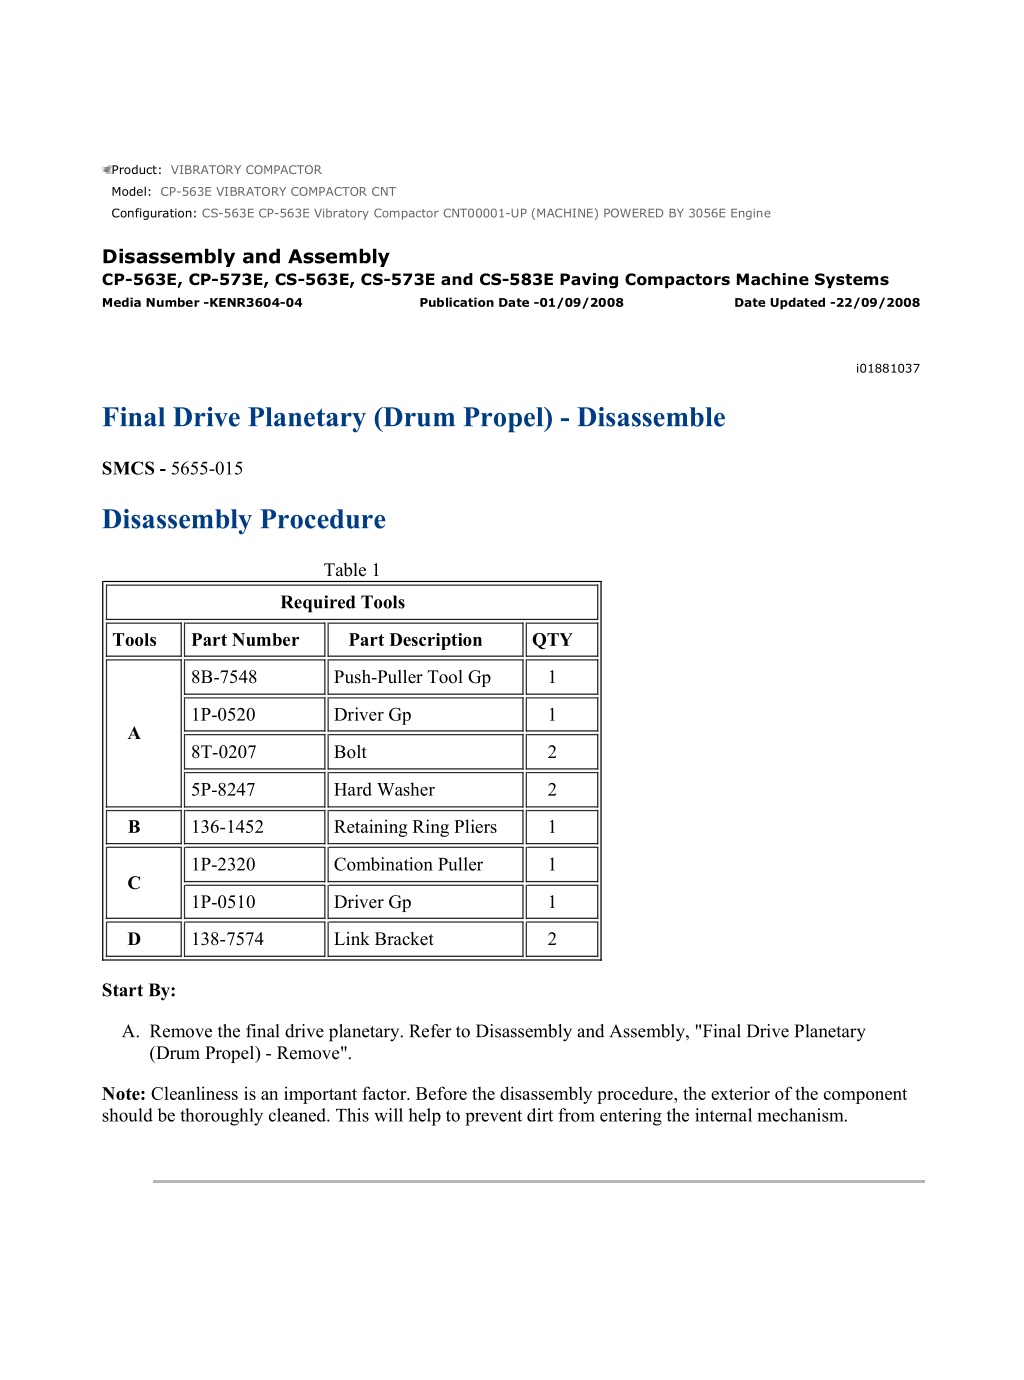
CS-563E CP-563E Vibratory Compactor CNT00001-UP (MACHINE) POWERED B... 1/10 Product: VIBRATORY COMPACTOR Model: CP-563E VIBRATORY COMPACTOR CNT Configuration: CS-563E CP-563E Vibratory Compactor CNT00001-UP (MACHINE) POWERED BY 3056E Engine Disassembly and Assembly CP-563E, CP-573E, CS-563E, CS-573E and CS-583E Paving Compactors Machine Systems Media Number -KENR3604-04 Publication Date -01/09/2008 Date Updated -22/09/2008 i01881037 Final Drive Planetary (Drum Propel) - Disassemble SMCS - 5655-015 Disassembly Procedure Table 1 Required Tools Tools Part Number Part Description QTY 8B-7548 Push-Puller Tool Gp 1 1P-0520 Driver Gp 1 A 8T-0207 Bolt 2 5P-8247 Hard Washer 2 B 136-1452 Retaining Ring Pliers 1 1P-2320 Combination Puller 1 C 1P-0510 Driver Gp 1 D 138-7574 Link Bracket 2 Start By: A. Remove the final drive planetary. Refer to Disassembly and Assembly, "Final Drive Planetary (Drum Propel) - Remove". Note: Cleanliness is an important factor. Before the disassembly procedure, the exterior of the component should be thoroughly cleaned. This will help to prevent dirt from entering the internal mechanism. https://127.0.0.1/sisweb/sisweb/techdoc/techdoc_print_page.jsp?returnurl=/sis... 2021/3/30
CS-563E CP-563E Vibratory Compactor CNT00001-UP (MACHINE) POWERED B... 2/10 Illustration 1 g00977445 Illustration 2 g00831857 Sudden release of spring force can cause injury. To prevent the possibility of injury, follow the procedure to relieve the spring pressure. 1. Install Tooling (A) on the final drive planetary, as shown. Use Tooling (A) and compress springs (4) under retaining disc (2) enough to eliminate the spring pressure on retaining ring (1) . 2. Use Tooling (B) and remove retaining ring (1) . https://127.0.0.1/sisweb/sisweb/techdoc/techdoc_print_page.jsp?returnurl=/sis... 2021/3/30
CS-563E CP-563E Vibratory Compactor CNT00001-UP (MACHINE) POWERED B... 3/10 Illustration 3 g00831858 3. Remove retaining disc (2) . 4. Remove 16 springs (4) from brake piston (5) . 5. Remove brake piston (5) from the hub. 6. Remove retaining ring (6), shims (8), and coupling (3) from sun gear (7) . https://127.0.0.1/sisweb/sisweb/techdoc/techdoc_print_page.jsp?returnurl=/sis... 2021/3/30
https://www.ebooklibonline.com Hello dear friend! Thank you very much for reading. Enter the link into your browser. The full manual is available for immediate download. https://www.ebooklibonline.com
CS-563E CP-563E Vibratory Compactor CNT00001-UP (MACHINE) POWERED B... 4/10 Illustration 4 g00977458 7. Remove discs (11) and friction discs (10) . 8. Remove O-ring seals (9) and (14). Remove backup rings (13) and (12) . Note: When discs (11) and friction discs (10) are removed, some of the final drive planetaries will have shim (15) under the last disc. Illustration 5 g00977461 9. Remove retaining ring (16). Remove flange cover (17) from input ring gear (18) . Illustration 6 g00977463 10. Remove bolts (19). Remove input ring gear (18) from the housing. https://127.0.0.1/sisweb/sisweb/techdoc/techdoc_print_page.jsp?returnurl=/sis... 2021/3/30
CS-563E CP-563E Vibratory Compactor CNT00001-UP (MACHINE) POWERED B... 5/10 Illustration 7 g00977464 11. Remove O-ring seals (20) and (21) from input ring gear (18) . 12. Remove dowels (22) from input ring gear (18) . Illustration 8 g00977466 Illustration 9 g00977467 13. Remove sun gear (7), planetary carrier (23), and sun gear (24) from the housing. 14. Remove sun gears (7) and (24) from planetary carrier (23) . https://127.0.0.1/sisweb/sisweb/techdoc/techdoc_print_page.jsp?returnurl=/sis... 2021/3/30
CS-563E CP-563E Vibratory Compactor CNT00001-UP (MACHINE) POWERED B... 6/10 Illustration 10 g00831872 15. Remove retaining ring (26), antirotation washer (27), planetary gear (25), eighteen needle bearings (28) and the gear washer from gear pin (29) . 16. Repeat Step 15 and remove the remaining two planetary gears. 17. Remove gear pins (29) from planetary carrier (23), if necessary. 18. Remove disc (30) from planetary carrier (23), if necessary. Illustration 11 g00977595 19. Remove planetary carrier (31) from the housing. Illustration 12 g00831875 https://127.0.0.1/sisweb/sisweb/techdoc/techdoc_print_page.jsp?returnurl=/sis... 2021/3/30
CS-563E CP-563E Vibratory Compactor CNT00001-UP (MACHINE) POWERED B... 7/10 20. Remove retaining ring (35), gear washer (36), planetary gear (37), 50 needle bearings (32), and the antirotation washer from gear pin (33) . 21. Repeat Step 20 and remove the remaining two planetary gears. 22. Remove gear pins (33) from planetary carrier (31), if necessary. 23. Remove disc (34) from planetary carrier (31), if necessary. Illustration 13 g00831876 24. Remove sun gear (38) and bolts (39) . Illustration 14 g00977606 25. Use Tooling (C) in order to remove planetary carrier (40) . https://127.0.0.1/sisweb/sisweb/techdoc/techdoc_print_page.jsp?returnurl=/sis... 2021/3/30
CS-563E CP-563E Vibratory Compactor CNT00001-UP (MACHINE) POWERED B... 8/10 Illustration 15 g00977635 26. Remove antirotation washers (41) . Illustration 16 g00977598 27. Remove planetary gears (42) and 225 needle bearings (43) from the planetary gear pins. There are 75 needle bearings on each of the planetary gear pins. Illustration 17 g00978758 28. Remove planetary gear pins (44), antirotation washers (45) and retaining disc (46) . https://127.0.0.1/sisweb/sisweb/techdoc/techdoc_print_page.jsp?returnurl=/sis... 2021/3/30
CS-563E CP-563E Vibratory Compactor CNT00001-UP (MACHINE) POWERED B... 9/10 Illustration 18 g00978761 29. Use Tooling (D) and a suitable lifting device in order to remove housing (47) from hub (48). The weight of the hub is 43 kg (95 lb). Illustration 19 g00978762 30. Remove bushings (49) from hub (47) . 31. Remove the first half of Duo-Cone Seal (50) . Illustration 20 g00978764 32. Remove the second half of Duo-Cone Seal (50) from housing (47) . https://127.0.0.1/sisweb/sisweb/techdoc/techdoc_print_page.jsp?returnurl=/sis... 2021/3/30
CS-563E CP-563E Vibratory Compactor CNT00001-UP (MACHINE) POWERED ... 10/10 33. Remove bearings (52), bearing cups (53) and retaining rings (51) . https://127.0.0.1/sisweb/sisweb/techdoc/techdoc_print_page.jsp?returnurl=/sis... 2021/3/30
CS-563E CP-563E Vibratory Compactor CNT00001-UP (MACHINE) POWERED B... 1/12 Model: CP-563E VIBRATORY COMPACTOR CNT Configuration: CS-563E CP-563E Vibratory Compactor CNT00001-UP (MACHINE) POWERED BY 3056E Engine Disassembly and Assembly CP-563E, CP-573E, CS-563E, CS-573E and CS-583E Paving Compactors Machine Systems Media Number -KENR3604-04 Publication Date -01/09/2008 Date Updated -22/09/2008 i03251187 Duo-Cone Conventional Seals - Install SMCS - 7561-012; 7561-016 Assembly and Installation of Conventional Duo-Cone Seals This instruction provides the procedure for assembling and installing conventional Duo-Cone Seals. When the Duo-Cone Seals are installed and assembled, you must use the correct procedures. The Duo-Cone Seal may fail from one or more mistakes that are made during assembly or during installation of the seal components. Reference: Special Instruction, SEHS8484, "Tool and Specification Chart for Conventional Duo- Cone Seals" Required Tools Use the tools in Table 1 in order to correctly measure the spacing of the Duo-Cone Seals after the seals are installed. Table 1 Required Tools Item Part Number Description Qty 10 6V-3075 Dial Indicator 1 11 6V-6167 Contact Point 1 12 3P-1565 Collet Assembly 1 13 165-8958 Dial Indicator Base 1 Correct Assembly of Conventional Duo-Cone Seals https://127.0.0.1/sisweb/sisweb/techdoc/techdoc_print_page.jsp?returnurl=/sis... 2021/3/30
CS-563E CP-563E Vibratory Compactor CNT00001-UP (MACHINE) POWERED B... 2/12 Illustration 1 g00446486 (1) Seal ring (2) Rubber toric ring (3) Housing retaining lip (4) Housing ramp (5) Seal ring housing (6) Seal ring face (7) Seal ring ramp (8) Seal ring retaining lip (9) Installation tool Assembly and Installation Procedure Avoid prolonged skin contact with isopropyl alcohol. Avoid breathing the vapors in enclosed areas without adequate ventilation and do not smoke. Isopropyl alcohol is flammable. Do not use near open flame, welding operations, or around heated surfaces exceeding 482 C (900 F). https://127.0.0.1/sisweb/sisweb/techdoc/techdoc_print_page.jsp?returnurl=/sis... 2021/3/30
CS-563E CP-563E Vibratory Compactor CNT00001-UP (MACHINE) POWERED B... 3/12 1. Remove any film, dust or other foreign matter from the following components: Rubber toric ring (2) Housing ramp (4) Seal ring ramp (7) Housing retaining lip (3) Seal ring retaining lip (8) Seal ring housing (5) Note: Seal rings have very sharp edges. Protective gloves should be worn in order to prevent injury. Use isopropyl alcohol or other approved cleaning agents. Use a clean lint free cloth for wiping. All components should be completely dry before proceeding. Note: Never permit oil to contact rubber toric ring (2), housing ramp (4) or seal ring ramp (7) before both seal rings (1) are assembled in the final position. Illustration 2 g00534617 https://127.0.0.1/sisweb/sisweb/techdoc/techdoc_print_page.jsp?returnurl=/sis... 2021/3/30
CS-563E CP-563E Vibratory Compactor CNT00001-UP (MACHINE) POWERED B... 4/12 Illustration 3 g00446488 2. Put rubber toric ring (2) on seal ring (1). Make sure that the rubber toric ring is positioned at the bottom of seal ring ramp (7). The rubber toric ring must rest against retaining lip (8). The rubber toric ring must be straight in the seal ring. The rubber toric ring must not be twisted. Note: Be careful when you are working on the rubber toric ring. Nicks, cuts or scratches may cause leaks. 3. Refer to Special Instruction, SEHS8484, "Tool and Specification Chart for Conventional Duo-Cone Seals" in order to select the proper installation tool. Illustration 4 g00534621 Use towels or a mat (A) that is made of foam in order to aid in the installation of toric ring (2). https://127.0.0.1/sisweb/sisweb/techdoc/techdoc_print_page.jsp?returnurl=/sis... 2021/3/30
CS-563E CP-563E Vibratory Compactor CNT00001-UP (MACHINE) POWERED B... 5/12 4. Use Tooling (9) to install rubber toric ring (2) on seal ring (1). Lightly dampen the lower half of rubber toric ring (2) with an appropriate lubricant. Refer to the "Acceptable Lubricants for Assembly" in this publication for additional information. Use the following procedure in order to dampen the rubber toric ring: Wipe the seal with a lint free cloth. Place towels or a mat that is made of foam at the bottom of a container. Soak the towels or the mat with the lubricant. Dip the rubber toric seal in the container. Note: Periodically inspect the installation tool for damage. If necessary, replace the installation tool . Illustration 5 g00534622 5. Make sure that the lower half of rubber toric ring (2) is still wet. Use Tooling (9) in order to position seal ring (1) and rubber toric ring (2) squarely against seal ring housing (5). Make sure that you use sudden pressure and even pressure when you press a toric ring that has a small diameter. Press rubber toric ring (2) under housing retaining lip (3) that is part of seal ring housing (5). Use the following procedure in order to install a rubber toric ring that has a large diameter: Push the rubber toric ring over the seal ring retaining lip on one side. Tap the installation tool with a rubber mallet on the opposite side of the rubber toric ring. Tap until the rubber toric ring is past the seal ring retaining lip of the housing. https://127.0.0.1/sisweb/sisweb/techdoc/techdoc_print_page.jsp?returnurl=/sis... 2021/3/30
CS-563E CP-563E Vibratory Compactor CNT00001-UP (MACHINE) POWERED B... 6/12 Illustration 6 g00534720 (B) Assembled height (10) Dial indicator (11) Contact point (12) Collet assembly (13) Dial indicator base (plastic) 6. Check assembled height (B) at four locations that are 90 degrees from each other. Use a calibrated 6V-3075 Dial Indicator and the related tools in Table 1 in order to measure the assembled height. The difference in height must not exceed 1.0 mm (0.04 inch). Refer to Illustration 6. Illustration 7 g00446492 https://127.0.0.1/sisweb/sisweb/techdoc/techdoc_print_page.jsp?returnurl=/sis... 2021/3/30
CS-563E CP-563E Vibratory Compactor CNT00001-UP (MACHINE) POWERED B... 7/12 7. Do not adjust the seal ring (1) by pushing on the seal ring or by pulling on the seal ring. Use Tooling (9) in order to push down on the seal. Illustration 8 g00446493 Illustration 9 g00446494 Examples of incorrect assembly https://127.0.0.1/sisweb/sisweb/techdoc/techdoc_print_page.jsp?returnurl=/sis... 2021/3/30
CS-563E CP-563E Vibratory Compactor CNT00001-UP (MACHINE) POWERED B... 8/12 8. Rubber toric ring (2) may twist during installation if the seal is not completely wet or if there are burrs or fins on housing retaining lip (3) that is part of seal ring housing (5). Misalignments, twists and bulges of the rubber toric ring will cause Duo-Cone Seal failures. If correct installation is not obvious, remove the toric ring from the housing and repeat the installation procedure. Illustration 10 g00446495 9. Wipe seal ring face (6) that is part of seal rings (1) by using a lint free cloth. No particles of any kind are permissible on the sealing surfaces. A small piece of paper from a paper towel can force apart the seal ring face, which will cause a leak. Note: Rubber toric ring (2) must never slip on the ramps of seal ring (1) or the ramps of seal ring housing (5). In order to prevent slippage, allow adequate time for evaporation of the lubricant before proceeding with the procedure. Once the rubber toric ring is correctly positioned, the rubber toric ring must roll only on the ramps. https://127.0.0.1/sisweb/sisweb/techdoc/techdoc_print_page.jsp?returnurl=/sis... 2021/3/30
CS-563E CP-563E Vibratory Compactor CNT00001-UP (MACHINE) POWERED B... 9/12 Illustration 11 g00534623 10. Apply a thin film of clean oil on the entire seal ring face of one or both seals. Use a lint free cloth or brush in order to distribute the oil evenly. Be careful not to get any oil on the rubber toric rings. Lubricate the seal faces by using the same oil that was used during assembly. Dye may have been used in the oil that was used during assembly. Use the same kind of oil without dye in order to lubricate the seal faces. https://127.0.0.1/sisweb/sisweb/techdoc/techdoc_print_page.jsp?returnurl=/sis... 2021/3/30
CS-563E CP-563E Vibratory Compactor CNT00001-UP (MACHINE) POWERED ... 10/12 Illustration 12 g00446497 11. Make sure that both seal ring housings (5) are in correct alignment and that the seal ring housings are concentric. Move the parts slowly and move the parts carefully toward each other. Note: Do not force the seal ring and the seal ring housing together in a sudden manner. The seal component could be scratched or the seal component could be broken if the components are slammed together. 12. Tighten the bolts after the components are in the correct position. Acceptable Lubricants for Assembly Avoid prolonged skin contact with isopropyl alcohol. Avoid breathing the vapors in enclosed areas without adequate ventilation and do not smoke. Isopropyl alcohol is flammable. Do not use near open flame, welding operations, or around heated surfaces exceeding 482 C (900 F). Note: Do not use any liquid that leaves an oil film. Do not use any liquid that does not evaporate quickly. All of the guidelines for safety and all of the guidelines for disposal must be followed when you use a flammable liquid. The following liquids are acceptable lubricants for assembly: Quaker Solvo Clean 68-0 Houghto-Grind 60 CT Isopropyl alcohol Some seal kits come with silicone toric rings. Silicone toric rings can be chilled for easier installation. This will allow the toric ring to contract for easier installation. Seals should be placed in a freezer for 5 minutes. Temperature in the freezer should be between 40 C ( 40 F) to 18 C (0 F). Chilling should be done prior to installation. Contraction will be sufficient to allow installation. The seals should be allowed to warm to room temperature prior to further assembly. Result of Incorrect Assembly https://127.0.0.1/sisweb/sisweb/techdoc/techdoc_print_page.jsp?returnurl=/sis... 2021/3/30
CS-563E CP-563E Vibratory Compactor CNT00001-UP (MACHINE) POWERED ... 11/12 Illustration 13 g00446498 The slipping of the rubber toric ring on the housing ramp or on the seal ring ramp may result in uneven pressure on the seal face. Uneven pressure on the seal face causes galling, scoring, and leakage. If the rubber toric ring slips at one location but not all the way around the seal ring, the toric ring will twist. The twisted toric ring could be cocked. Seals that are cocked will cause uneven pressure on the seal face. Seals that are cocked may also cause possible galling, scoring, and leakage. The twisted toric ring could oscillate when the ring is rotated. Seals that oscillate may allow dirt into the seal joint. This is caused by the pumping action that is created by the toric ring that is oscillating. https://127.0.0.1/sisweb/sisweb/techdoc/techdoc_print_page.jsp?returnurl=/sis... 2021/3/30
CS-563E CP-563E Vibratory Compactor CNT00001-UP (MACHINE) POWERED ... 12/12 Illustration 14 g00446499 Illustration 14 shows a toric ring that is assembled incorrectly. The upper housing is stationary. The lower housing is rotating. Illustration 15 g00446500 Illustration 15 shows the same seal after the lower housing has rotated 180 degrees. In this position, there will be high pressure at point (B) and at point (X). These points of high pressure may result in galling of the toric rings. There will be low pressure at point (A) and at point (Y) which will result in possible leakage. https://127.0.0.1/sisweb/sisweb/techdoc/techdoc_print_page.jsp?returnurl=/sis... 2021/3/30
CS-563E CP-563E Vibratory Compactor CNT00001-UP (MACHINE) POWERED B... 1/11 Product: VIBRATORY COMPACTOR Model: CP-563E VIBRATORY COMPACTOR CNT Configuration: CS-563E CP-563E Vibratory Compactor CNT00001-UP (MACHINE) POWERED BY 3056E Engine Disassembly and Assembly CP-563E, CP-573E, CS-563E, CS-573E and CS-583E Paving Compactors Machine Systems Media Number -KENR3604-04 Publication Date -01/09/2008 Date Updated -22/09/2008 i02540039 Final Drive Planetary (Drum Propel) - Assemble SMCS - 5655-016 Assembly Procedure Table 1 Required Tools Tools Part Number Part Description Qty 8B-7548 Push-Puller Tool Gp 1 1P-0520 Driver Gp 1 A 8T-0207 Bolt 2 5P-8247 Hard Washer 2 B 136-1452 Retaining Ring Pliers 1 D 138-7574 Link Bracket 2 E 220-5726 Duo-Cone Seal Installer As 1 F 5P-0960 Molybdenum Grease 1 G 9S-3263 Thread Lock Compound 1 H 8T-5096 Dial Indicator Gp 1 Note: All of the components must be cleaned and inspected before assembly. If any of the components are beyond recommended limits, replace the components. Lubricate all moving parts with clean hydraulic oil during assembly. Assemble the final drive planetary with new seals. https://127.0.0.1/sisweb/sisweb/techdoc/techdoc_print_page.jsp?returnurl=/sis... 2021/3/30
Suggest: For more complete manuals. Please go to the home page. https://www.ebooklibonline.com If the above button click is invalid. Please download this document first, and then click the above link to download the complete manual. Thank you so much for reading
CS-563E CP-563E Vibratory Compactor CNT00001-UP (MACHINE) POWERED B... 2/11 Illustration 1 g00978764 1. Install retaining rings (51) , bearing cups (53) and bearings (52) in housing (47) . 2. Use Tooling (E) to install Duo-Cone Seal (50) in housing (47) . Refer to Disassembly and Assembly, "Duo-Cone Conventional Seals - Install" for the correct procedure. Illustration 2 g00978762 3. Use Tooling (E) to install Duo-Cone Seal (50) in hub (48) . Refer to Disassembly and Assembly, "Duo-Cone Conventional Seals - Install" for the correct procedure. 4. Install bushings (49) in hub (48) . Illustration 3 g00978761 https://127.0.0.1/sisweb/sisweb/techdoc/techdoc_print_page.jsp?returnurl=/sis... 2021/3/30
CS-563E CP-563E Vibratory Compactor CNT00001-UP (MACHINE) POWERED B... 3/11 5. Use Tooling (D) and a suitable lifting device in order to install housing (47) on hub (48) . The weight of the hub is 43 kg (95 lb). Illustration 4 g00978891 Illustration 5 g00978758 Note: Planetary gear pins (44) are not symmetrical. Install the longer end of the planetary gear pins in hub (48) . Note: Planetary gear pins (44) and the bores in hub (48) must be clean in order to allow proper installation. 6. Apply Tooling (F) on the shoulders of planetary gear pins (44) . Install antirotation washers (45) on planetary gear pins (44) . 7. Install antirotation washers (45) and planetary gear pins (44) in hub (48) . 8. Install retaining disc (46) . https://127.0.0.1/sisweb/sisweb/techdoc/techdoc_print_page.jsp?returnurl=/sis... 2021/3/30
https://www.ebooklibonline.com Hello dear friend! Thank you very much for reading. Enter the link into your browser. The full manual is available for immediate download. https://www.ebooklibonline.com


