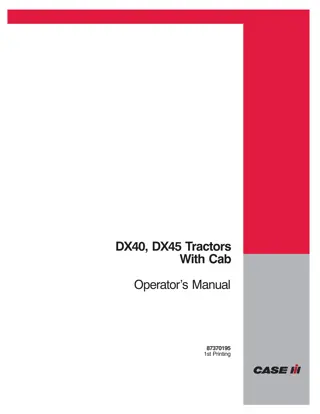
Case IH LX116 Loaders for D35 D40 D45 DX35 DX40 DX45 Tractors Operator’s Manual Instant Download (Publication No.87571255)
Please open the website below to get the complete manualnn//
Download Presentation

Please find below an Image/Link to download the presentation.
The content on the website is provided AS IS for your information and personal use only. It may not be sold, licensed, or shared on other websites without obtaining consent from the author. Download presentation by click this link. If you encounter any issues during the download, it is possible that the publisher has removed the file from their server.
E N D
Presentation Transcript
????? ??????? ??? ???? ???? ???? ????? ????? ???? ???????? ?????????? ?????? ???????? ???????? ????????
TO THE OWNER This manual contains information concerning the adjustment and maintenance of your Case IH Model LX116 Loader. You have purchased a dependable machine, but only by proper care and operation can you expect to receive the performance and long service built into this loader. Please have all operators read this manual carefully and keep it available for ready reference. Your Case IH dealer will instruct you in the general operation of your loader. (Refer to the Delivery Report at the back of this manual.) Your dealer s staff of factory-trained service technicians will be glad to answer any questions that may arise regarding the operation of your loader. Your Case IH dealer carries a complete line of genuine Case IH service parts. These parts are manufactured and carefully inspected to insure high quality and accurate fitting of any necessary replacement parts. Be prepared to give your dealer the model and PIN of the tractor and loader, when ordering parts. Locate these numbers now and record them below. Refer to the General Information section of this manual for the location of the model and PIN of your loader. Loader Model Tractor Model Loader PIN Tractor PIN PIN PLATE 50046503 CAUTION Thissafetyalertsymbolindicatesimportantsafetymessages inthis manual.When yousee thissymbol, carefully read the message that follows and be alert to the possibility of personal injury or death. CAUTION Pictures in this manual may show protective shielding open or removed to better illustrate a particular feature or adjustment. Be certain, however, to close or replace all shielding before operating the machine. IMPROVEMENTS CNH America LLC is continually striving to improve its products. We reserve the right to make improvements or changes when it becomes practical and possible to do so, without incurring any obligation to make changes or additions to the equipment sold previously. 0-1
CONTENTS SAFETY . . . . . . . . . . . . . . . . . . . . . . . . . . . . . . . . . . . . . . . . . . . . . . . . . . . . . . . . . . . . . . 0-5 GENERAL INFORMATION . . . . . . . . . . . . . . . . . . . . . . . . . . . . . . . . . . . . . . . . . . . . . 1-1 OPERATION . . . . . . . . . . . . . . . . . . . . . . . . . . . . . . . . . . . . . . . . . . . . . . . . . . . . . . . . . . 2-1 MAINTENANCE/LUBRICATION AND ASSEMBLY . . . . . . . . . . . . . . . . . . . . . . . . 3-1 TROUBLESHOOTING . . . . . . . . . . . . . . . . . . . . . . . . . . . . . . . . . . . . . . . . . . . . . . . . . 4-1 SPECIFICATIONS . . . . . . . . . . . . . . . . . . . . . . . . . . . . . . . . . . . . . . . . . . . . . . . . . . . . . 5-1 INDEX . . . . . . . . . . . . . . . . . . . . . . . . . . . . . . . . . . . . . . . . . . . . . . . . . . . . . . . . . . . . . . . 5-7 DELIVERY REPORT . . . . . . . . . . . . . . . . . . . . . . . . . . . . . . . . . . . . . . . . . . . . . . . . . . . 5-9 0-2
https://www.ebooklibonline.com Hello dear friend! Thank you very much for reading. Enter the link into your browser. The full manual is available for immediate download. https://www.ebooklibonline.com
CALIFORNIA Proposition 65 Warning Diesel engine exhaust and some of its constituents are known to the State of California to cause cancer, birth defects, and other reproductive harm. Battery posts, terminals and related accessories contain lead and lead compounds, chemicals known to the State of California to cause cancer and birth defects or other reproductive harm. Wash hands after handling. 0-3
PRECAUTIONARY STATEMENTS PERSONAL SAFETY Throughout this manual and on machine decals, you will find precautionary statements ( DANGER , WARNING ,and CAUTION )followedbyspecificinstructions.Theseprecautionsareintendedforthepersonal safety of you and those working with you. Please take the time to read them. DANGER Thisword DANGER indicatesanimmediatehazardoussituationthat,ifnotavoided,willresultindeath or serious injury. The color associated with Danger is RED. WARNING This word WARNING indicates a potentially hazardous situation that, if not avoided, could result in death or serious injury. The color associated with Warning is ORANGE. CAUTION Thisword CAUTION indicatesapotentiallyhazardoussituationthat,ifnotavoided,mayresultinminor or moderate injury. It may also be used to alert against unsafe practices. The color associated with Caution is YELLOW. FAILURE TO FOLLOW THE DANGER , WARNING , AND CAUTION INSTRUCTIONS MAY RESULT IN SERIOUS BODILY INJURY OR DEATH. MACHINE SAFETY The precautionary statement ( IMPORTANT ) is followed by specific instructions. This statement is intended for machine safety. IMPORTANT: The word IMPORTANT is used to inform the reader of something he needs to know to prevent minor machine damage if a certain procedure is not followed. INFORMATION NOTE: Instructions used to identify and present supplementary information. ASAE S441.3 FEB04 ISO 11684 0-4
SAFETY PRECAUTIONARY STATEMENTS A careful operator is the best operator. Most accidents can be avoided by observing certain precautions. To help prevent accidents, read the following precautions before operating this equipment. Equipment should be operated only by those who are responsible and instructed to do so. Carefullyreviewtheproceduresgiveninthismanualwithalloperators.Itisimportantthatalloperatorsbefamiliar with and follow safety precautions. GENERAL 3. Never allow anyone to get under the loader bucket or reach through the lift arms when the bucket is raised. 1. Read the Operator s Manual carefully before using the tractor or loader. Lack of operating knowledge can lead to accidents. 4. Do not walk or work under a raised loader, bucket, or attachment unless it is securely blocked or held in position. 2. Replace damaged or illegible safety decals. See the Specifications section of this manual for required decals. 5. Avoid overhead wires and obstacles when the loader is raised. Contacting electrical lines can cause electrocution. 3. Operate the tractor and loader only from the operator s seat. 6. Make sure all dismounted loaders are on a hard, level surface. THE TRACTOR 1. Useanapprovedrollbarandseatbeltforsafe operation.Overturningatractorwithoutaroll barcanresultindeathorinjury.Ifyourtractor is not equipped with a roll bar and seat belt, see your tractor dealer. 7. Do not repair, remove, or replace any parts of the loader while it is in the dismounted position. OPERATING THE LOADER 2. Equip your tractor with FOPS (Falling Object Protective Structure) and seat belts before installing or operating the loader. 1. It is the loader owner s responsibility to be certain that anyone operating the loader reads this manual first tobe awareof thesafe way of operating the loader. 3. Always use the seat belt when the roll bar is installed. Do not use the seat belt if the roll bar is removed from the tractor. 2. Exercise caution when operating the loader with a raised, loaded bucket or fork. 4. Add the recommended wheel ballast and/or rear weight as recommended in the owner s manual to provide good stability. 3. Avoidloosefill,rocks,andholes.Theycanbe dangerous for loader operation or move- ment. 5. Move the wheels to the tractor manufactur- er s widest recommended settings to in- crease stability. 4. Use care to maintain proper stability when operating on steep grades. Always carry the bucket in the lowest position possible. 6. Move and turn the tractor at low speeds. 5. Allow for the loader length when making turns. THE LOADER 6. Stop lowering or lifting. the loader arms gradually when 1. Improper use of a loader can cause serious injury or death. 2. Do not lift or carry anybody on the loader or in the bucket or attachment. 0-5
MAINTENANCE 7. Usecautionwhen handlingloose orshiftable loads. 1. When servicing or replacing the pins in the cylinder ends, bucket, etc., always use a brass drift and hammer. Failure to do so could result in injury from flying metal fragments. 8. Carry the bucket at a low position during transport for better visibility. 9. When parking or servicing, lower the bucket to the ground, stop the engine, and set the park brakes before leaving the tractor seat. 2. Do not modify or alter, or permit anyone else to modify or alter, the loader or any of its components or any loader function without first consulting a Case IH dealer. If you have any questions regarding loader modifica- tions, contact Case IH. 10. Operate the loader controls only when properly seated at the controls. 11. Using front end loaders without special attachmentsforhandlinglargeheavyobjects such as large round or rectangular bales, logs, and oil drums is NOT RECOMMENDED. 3. Always wear safety goggles when servicing or repairing the machine. 12. Handling extremely dangerous due to: large heavy objects can be 4. Escaping hydraulic/diesel fluid under pres- sure can penetrate the skin, causing serious injury. danger of rolling the tractor over. danger of upending the tractor. danger of the object rolling or sliding down the loader arms onto the operator. 13. If you must perform this sort of work (see #12 above), protect yourself by: DONOTuseyourhandtocheck forleaks. Use a piece of cardboard or paper to search for leaks. Stop the engine and relieve the pressure before connecting or disconnecting the hydraulic or diesel lines. Tighten all connections before starting the engine or pressuring the lines. If any fluid is injected into the skin, obtain medical attention IMMEDIATELY or gan- grene may result. 5. Do not tamper with the relief valve setting. The relief valve is preset at the factory. Changing the setting can cause overloading the loader and tractor, and serious operator injury may result. using the proper attachment. never lifting the load higher than neces- sary to clear the ground when moving. ballasting the tractor rear to compensate for the load. neverlifting largeobjects withequipment that does not have an anti- -rollback device. moving slowly and carefully, avoiding rough terrain. WHEN YOU SEE THIS SYMBOL IT MEANS: ATTENTION! BECOME ALERT! YOUR SAFETY IS INVOLVED! 0-6
SAFETY DECALS The following safety decals have been placed on your machine in the areas indicated. They are intended for your personal safety and for those working with you. Please take this manual and walk aroundyourmachinetonotethecontentandlocation of these warning signs. Review these warning signs and the operating instructions detailed in this manual with your machine operators. IMPORTANT: Be a safe operator. Thoroughly acquaint yourself with the following before attempt- ing to operate the loader: 1. The safety information in the tractor and loader operator s manuals. 2. The operating instructions in the operator s manual. Keep the decals legible. If they are not, obtain replacementsfromyourauthorizeddealer.Thedecal replacementpartnumbersarelistedwitheachdecal. 3. The controls on the loader and tractor. 1 2 DANGER/WARNING Decal Part No.: 86589568 Location: Right side, rear of mount upright WARNING Decal Part No.: 86589569 Location: Left side, rear of mount upright 0-7
LX116 MOUNT KIT DECAL PLACEMENT 2 1 0-8
DANGER Decal Part No.: 86979961 Location: Right and Left side; lower loader boom Decal, Case IH -- LX116 Part No.: 87028688 Location: Right side, loader boom Decal, Case IH -- LX116 Part No.: 87028687 Location: Left side, loader boom 0-9
5 4 3 3 0-10
ECOLOGY AND THE ENVIRONMENT Soil, air, and water are vital factors of agriculture and life in general. When legislation does not yet rule the treatment of some of the substances which are required by advanced technology, common sense should govern the use and disposal of products of a chemical and petrochemical nature. 3. Modern oils contain additives. Do not burn contaminated fuels and or waste oils in ordinary heating systems. 4. Avoid spillage when draining off used engine coolant mixtures, engine, gearbox and hydraulic oils, brake fluids, etc. Do not mix drained brake fluids or fuels with lubricants. Store them safely until they can be disposed of in a proper way to comply with local legislation and available resources. The following are recommendations whichmay beof assistance: Become acquainted with and ensure that you understand the relative legislation applicable to your country. Where no legislation exists, obtain information from suppliers of oils, filters, batteries, fuels, antifreeze, cleaning agents, etc., with regard to their effect on man and nature and how to safely store, use and dispose of these substances. Agricultural consultants will, in many cases, be able to help you as well. 5. Modern coolant mixtures, i.e. antifreeze and other additives, should be replaced every two years. They should not be allowed to get into the soil but should be collected and disposed of safely. 6. Donotopentheair-conditioningsystemyourself. It contains gases which should not be released into the atmosphere. conditioning specialist has a special extractor for thispurposeandwillhavetorechargethesystem properly. Your dealer or air HELPFUL HINTS 7. Repair any leaks or defects in the engine cooling or hydraulic system immediately. 1. Avoid filling tanks using cans or inappropriate pressurized fuel delivery systems which may cause considerable spillage. 8. Do not increase the pressure in a pressurized circuit as this may lead to a component failure. 2. In general, avoid skin contact with all fuels, oils, acids, solvents, etc. Most of them contain substanceswhichmaybeharmfultoyourhealth. 9. Protect hoses during welding as penetrating weld splatter may burn a hole or weaken them, allowing the loss of oils, coolant, etc. 0-11
UNIVERSAL SYMBOLS As a guide to the operation of your tractor, various universal symbols have been utilized on the instruments, con- trols, switches, and fuse box. The symbols are shown below with an indication of their meaning. Thermostart starting aid Position Control Radio P.T.O. Draft Control Transmission in neutral Keep alive memory N Alternator charge KAM Accessory socket Creeper gears Turn signals Fuel level Implement socket Turn signals --one trailer Slow or low setting Automatic Fuel shut-off %age slip Turn signals --two trailers Fast or high setting Engine speed (rev/min x 100) Hitch raise (rear) Front wind- screen wash/wipe Ground speed Hours recorded Hitch lower (rear) Rear wind- screen wash/wipe Differential lock Engine oil pressure Hitch height limit (rear) Rear axle oil tem- perature Heater temp- erature control Engine coolant temperature Hitch height limit (front) Heater fan Hitch disabled Coolant level Transmission oil pressure Hydraulic and transmission filters Air conditioner FWD engaged Tractor lights Air filter blocked Remote valve extend Headlamp main beam FWD disengaged Parking brake Remote valve retract Headlamp dipped beam Brake fluid level Warning! Remote valve float Trailer brake Hazard warning lights Work lamps Malfunction! See Operator s Manual Stop lamps Roof beacon Variable control Malfunction! (alternative symbol) See Operator s Manual Warning! Corrosive substance Pressurized! Open carefully Horn 0-12
SECTION 1 GENERAL INFORMATION The LX116 loader attachment is designed to be compatible with the D35, D40, D45, DX35, DX40, and DX45 compact tractors. The LX116 can be used with both two-and four-wheel drive models. The loader is a quick attach unit, and no tools are required to mount or dismount the loader from the tractor. The loader also has its own park stand. A fork and a complete line of heavyduty andmaterial buckets is available. As the capacities of the buckets have been matched to tractor size, the operator can choose the bucket best suited for the tractor and the job. Bucket recommendations are listed in the Specifications section of this manual. LX116 10998357 1 1-1
SECTION 1 - GENERAL INFORMATION MINIMUM HARDWARE TIGHTENING TORQUES IN NEWTON-METERS (FOOT POUNDS) FOR NORMAL ASSEMBLY APPLICATIONS METRIC NON-FLANGED HARDWARE AND LOCKNUTS CLASS 5.8 CLASS 8.8 CLASS 10.9 LOCKNUT CL.8 NOMINAL SIZE UNPLATED PLATED W/ZnCr UNPLATED PLATED W/ZnCr UNPLATED PLATED W/ZnCr W/CL8.8 BOLT M4 M6 M8 1.7 (15)* 5.8 (51)* 14 (124)* 2.2 (19)* 7.6 (67)* 18 (159)* 2.6 (23)* 8.9 (79)* 22 (195)* 3.4 (30)* 12 (102)* 28 (248)* 3.7 (33)* 13 (115)* 31 (274)* 4.8 (42)* 17 (150)* 40 (354)* 2.3 (20)* 7.8 (69)* 19 (169)* M10 28 (21) 36 (27) 43 (32) 56 (41) 61 (45) 79 (58) 38 (28) M12 49 (36) 63 (46) 75 (55) 97 (72) 107 (79) 138 (102) 66 (49) M16 M20 121 (89) 237 (175) 158 (117) 307 (226) 186 (137) 375 (277) 240 (177) 485 (358) 266 (196) 519 (383) 344 (254) 671 (495) 164 (121) 330 (243) M24 411 (303) 531 (392) 648 (478) 839 (619) 897 (662) 1160 (855) 572 (422) NOTE: Torque values shown with * are inch pounds. IDENTIFICATION HEX CAP SCREW AND CARRIAGE BOLTS CLASSES 5.6 AND UP MANUFACTURER S IDENTIFICATION PROPERTY CLASS HEX NUTS AND LOCKNUTS CLASSES 05 AND UP MANUFACTURER S IDENTIFICATION 86529681 REV F 5.1 PROPERTY CLASS CLOCK MARKING 1-2
SECTION 1 - GENERAL INFORMATION MINIMUM HARDWARE TIGHTENING TORQUES IN NEWTON-METERS (FOOT POUNDS) FOR NORMAL ASSEMBLY APPLICATIONS INCH NON-FLANGED HARDWARE AND LOCKNUTS SAE GRADE 2 SAE GRADE 5 SAE GRADE 8 LOCKNUTS NOMINAL SIZE UNPLATED or PLATED SILVER PLATED W/ZnCr UNPLATED or PLATED SILVER PLATED W/ZnCr UNPLATED or PLATED SILVER PLATED W/ZnCr GR.B w/GR5 BOLT GR.C w/GR8 BOLT NOMINAL SIZE GOLD GOLD GOLD 1/4 6.2 (55)* 8.1 (72)* 9.7 (86)* 13 (112)* 14 (121)* 18 (157)* 8.5 (75)* 12.2 (109)* 1/4 5/16 13 (115)* 17 (149)* 20 (178)* 26 (229)* 28 (250)* 37 (324)* 17.5 (155)* 25 (220)* 5/16 3/8 23 (17) 30 (22) 35 (26) 46 (34) 50 (37) 65 (48) 31 (23) 44 (33) 3/8 7/16 37 (27) 47 (35) 57 (42) 73 (54) 80 (59) 104 (77) 50 (37) 71 (53) 7/16 1/2 57 (42) 73 (54) 87 (64) 113 (83) 123 (91) 159 (117) 76 (56) 108 (80) 1/2 9/16 81 (60) 104 (77) 125 (92) 163 (120) 176 (130) 229 (169) 111 (82) 156 (115) 9/16 5/8 112 (83) 145 (107) 174 (128) 224 (165) 244 (180) 316 (233) 153 (113) 215 (159) 5/8 3/4 198 (146) 256 (189) 306 (226) 397 (293) 432 (319) 560 (413) 271 (200) 383 (282) 3/4 7/8 193 (142) 248 (183) 495 (365) 641 (473) 698 (515) 904 (667) 437 (323) 617 (455) 7/8 1 289 (213) 373 (275) 742 (547) 960 (708) 1048 (773) 1356 (1000) 654 (483) 924 (681) 1 NOTE: Torque values shown with * are inch pounds. IDENTIFICATION CAP SCREWS AND CARRIAGE BOLTS SAE GRADE 2 SAE GRADE 5 SAE GRADE 8 REGULAR NUTS SAE GRADE 5 HEX NUTS SAE GRADE 8 HEX NUTS LOCKNUTS GRADE IDENTIFICATION GRADE A NO MARKS GRADE B THREE MARKS GRADE IDENTIFICATION GRADE A NO NOTCHES GRADE B ONE CIRCUMFERENTIAL NOTCH GRADE C SIX MARKS GRADE C TWO CIRCUMFERENTIAL NOTCHES MARKS NEED NOT BE LOCATED AT CORNERS GRADE A NO MARK GRADE B LETTER B GRADE C LETTER C 86529681 REV F 5.2 GRADE IDENTIFICATION 1-3
Suggest: If the above button click is invalid. Please download this document first, and then click the above link to download the complete manual. Thank you so much for reading
https://www.ebooklibonline.com Hello dear friend! Thank you very much for reading. Enter the link into your browser. The full manual is available for immediate download. https://www.ebooklibonline.com

