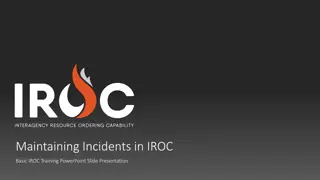
Basic Roster Management in IROC

This PowerPoint slide presentation provides a step-by-step guide on creating, modifying, and managing rosters in IROC software. Learn how to create new rosters, add positions, modify existing positions, and access the roster screen efficiently. Enhance your skills in roster management with practical demonstrations and clear instructions.

Download Presentation

Please find below an Image/Link to download the presentation.
The content on the website is provided AS IS for your information and personal use only. It may not be sold, licensed, or shared on other websites without obtaining consent from the author.If you encounter any issues during the download, it is possible that the publisher has removed the file from their server.
You are allowed to download the files provided on this website for personal or commercial use, subject to the condition that they are used lawfully. All files are the property of their respective owners.
The content on the website is provided AS IS for your information and personal use only. It may not be sold, licensed, or shared on other websites without obtaining consent from the author.
E N D
Presentation Transcript
Maintaining Rosters Basic IROC Training PowerPoint Slide Presentation
Create a roster in IROC. Add positions to a roster. Modify existing positions on a roster. Manage the roster list. Course Objectives
Accessing the Roster Screen On the IROC homepage, click the Roster icon in the Resources action tile to open the Roster screen.
Creating a New Roster 1. Make sure the Create New Roster radio button is selected. 2. Select a Catalog* category. 3. Select a Resource Name*. 4. Select the Method of Creation. 5. Provide a Roster Name*. 6. When done, click Create Roster.
Completed Roster Your roster appears on the right side of the screen, with the roster name showing at the top.
Finding an Existing Roster 1. Click the Edit Existing Roster radio button. 2. Select a Catalog* category. 3. Select a Resource Name*. 4. Select a Roster. The roster will appear on the right pane of the screen.
Adding Positions to a Roster 1. From the Roster screen, click the Add Positions + button. The Add Positions window will appear. 2. Select a Catalog*. 3. Choose a Catalog Item*. 4. Choose the Number of Positions. 5. Click Add Position.
Adding Positions from Resource You can also add a position by selecting an available resource. 1. From the Roster screen, click the Add Positions + button. The Add Positions window will appear. 2. Click the blue Add from Resource button. 3. Select a resource from the list. 4. Select a Qualification* if appropriate. 5. Click Add Position. To return to the normal Add Position function, click the blue Add Position button.
Modifying Existing Positions To add or edit a resource associated with a roster position, click the Edit icon for that position in the list on the right to bring up the Add Resources screen.
Setting a Local Resource to Available When adding a local resource to a position, the Set Available button will appear, allowing you to set the resource to available.
Managing the Roster List There are many options for managing roster positions. Documentation Clear roster Delete roster Reordering positions Edit positions Delete positions Rosters will save automatically when changes are made.
Course Objectives Review Create a roster in IROC. Add positions to a roster. Modify existing positions on a roster. Manage the roster list.