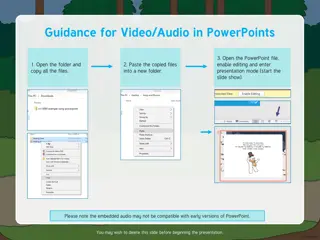
Adding Audio Comments to PowerPoint & Converting to MP4
Enhance your PowerPoint presentation by adding audio comments and converting the file to MP4 format. Follow step-by-step instructions for recording narration on Windows and Mac OS. Ensure your microphone is set up correctly and record narrations for each slide to create an engaging video submission.
Uploaded on Dec 12, 2024 | 0 Views
Download Presentation

Please find below an Image/Link to download the presentation.
The content on the website is provided AS IS for your information and personal use only. It may not be sold, licensed, or shared on other websites without obtaining consent from the author. Download presentation by click this link. If you encounter any issues during the download, it is possible that the publisher has removed the file from their server.
E N D
Presentation Transcript
How to add audio comments with Powerpoint and convert the file to MP4
Recorded Video Submission Instructions Recorded Presentation Submission Instructions to submit a video recording of your presentation narrated with your audio. Deadline: JUNE 2, 2022 Technical requirements: 10 slides maximum (including title and acknowledgment slides) with audio comments conversion of your presentation to a MP4 file - less than 80 MB - (see how to do slide 14 or 17) the name of your file must not contain accents, space or special characters => 5 minutes of audio comments on a PowerPoint presentation of 10 slides corresponds to a video file of 50 MB. Technical suggestions: Getting Started: Create your presentation content slides as you would normally do with PowerPoint or Keynote. Open your presentation in full screen mode. For example, if using Microsoft PowerPoint, open the Slide Show mode. Audio tips: Use a microphone and test your sound before you start the recording. A wired headset will generally produce the best quality audio and pickup less ambient noise. Record your presentation from a quiet location.
Record narration for PowerPoint Step-by-step instructions for how to record your narration on Windows and Mac OS. Narrations and timings can enhance a web-based or self-running slide show. You can record your PowerPoint presentation and capture narrations and slide timings. After you have made the recording, please save the presentation as a video file. Step 1 Setup Your Microphone : Before you start to record audio inside PowerPoint, start off by making sure that your microphone is plugged in and ready to record. Whether you're on Windows or macOS, you'll want to access the audio device settings and set your default microphone. You can't change which device to record from or set volume levels for the microphone inside of PowerPoint, so make sure that it's ready for recording before.
Record narration for PowerPoint on Windows Step 2 Recording: Make sure that you start on the first slide in PowerPoint to record audio and timings for the entire presentation. To record narrations in PowerPoint, start off by finding the Slide Show tab on PowerPoint's ribbon. Click on either the Recording tab or the Slide Show tab to change the available options. You will see this tab The Clear command deletes narrations or timings, so be careful when you use it. To get ready to record, select Record From Beginning to launch the recording
Record narration for PowerPoint Office 2013-2019 on Windows If you use Office 2013 - 2019 A new window will pop up with two options to set before you start recording: Leave both of these options checked to record audio narrations and synchronize slide change timing. 1. Slide and animation timings : PowerPoint automatically records the time you spend on each slide, including any animation steps that occur, and the use of any triggers on each slide. Narrations, ink and laser pointer : Record your voice as you run through your presentation. If you use the pen, Highlighter, eraser , or laser pointer*, PowerPoint records those for playback as well. *depends of your version 2.
Record narration for PowerPoint Office 2013-2019 on Windows 3. Recording your narration - the Recording toolbar: Once you start recording, PowerPoint will go into a full screen presentation view. It also begins recording audio from your microphone. At the top left corner of the window is the Recording toolbar Use your keyboard s right arrow to jump to the next slide and the left arrow to go to the previous slide. When you have finished, click on the X button in the upper right corner of the Recording window to complete the audio recording. A sound icon will appears in the lower-right corner of each slide that has narration. On the File menu, select Save to ensure all your recording has been saved in PowerPoint Presentation format.
Record narration for PowerPoint Office 2013-2019 on Windows 4. Preview the recorded slide show: On the Slide Show tab, click From Beginning. During playback, your animations, inking actions, laser pointer, audio and video play in sync.
Create a Video for PowerPoint Office 2013-2019 on Windows 5. Turn your presentation into a video: After you have recorded any timing and narrations, you are ready to create a video file: For Office 2013: Click File > Export > Create a Video. In the first drop-down box under the Create a Video heading, select the video quality : Presentation quality or Internet Quality. The second drop-down box under the Create a Video heading tells whether your presentation includes narration and timings. Choose the default value Use Recorded Timings and Narrations. Click Create Video. In the File name box, enter a file name for the video, browse for the folder that will contain this file and then click Save. In the Save as type box, choose MPEG-4 Video. Now you have finished, you can send us the video of your presentation. For more tutorials, check the Annexe part.
Create a Video for PowerPoint Office 2013-2019 on Windows After you have recorded any timing and narrations, you are ready to create a video file: For Office 2016 2019: Click File > Export > Create a Video. In the first drop-down box under the Create a Video heading, select the video quality : Full HD (1080P) or HD 720p). The second drop-down box under the Create a Video heading tells whether your presentation includes narration and timings. Choose the default value Use Recorded Timings and Narrations. Click Create Video. In the File name box, enter a file name for the video, browse for the folder that will contain this file and then click Save. In the Save as type box, choose MPEG-4 Video. Now you have finished, you can send us the video of your presentation. For more tutorials, check the Annexe part.
Record narration for PowerPoint Office 365 on Windows If you use Office 365 The slide show opens in the Recording window, with buttons at the top left for starting, pausing and stopping the recording: 3. Recording your narration : Click the round, red button (or R on your keyboard) to start the recording. A three-second countdown ensues, then the recording begins. The current slide is shown in the main pane of the recording window. Navigation arrows on either side of the current slide allow you to move to t the previous and next slides ; you can use your keyboard keyboard s right ar arrow to jump to the next slide and the left arrow to go to the previous slide. On the lower-right corner toggle off the camera
Record narration for PowerPoint Office 365 on Windows To end your recording, select the square Stop button. A sound icon will appears in the lower-right corner of each slide that has narration. On the File menu, select Save to ensure all your recording has been saved in PowerPoint Presentation format.
Record narration for PowerPoint Office 365 on Windows 4. Preview the recorded slide show: On the Slide Show tab, click From Beginning. During playback, your animations, inking actions, laser pointer, audio and video play in sync.
Create a Video for PowerPoint Office 365 on Windows 5. Turn your presentation into a video: After you have recorded any timing and narrations, you are ready to create a video file: For Office 365: Click File > Export > Create a Video. In the first drop-down box under the Create a Video heading, select the video quality : Full HD (1080P) or HD 720p). The second drop-down box under the Create a Video heading tells whether your presentation includes narration and timings. Choose the default value Use Recorded Timings and Narrations. Click Create Video. In the File name box, enter a file name for the video, browse for the folder that will contain this file and then click Save. In the Save as type box, choose MPEG-4 Video. Now you have finished, you can send us the video of your presentation. For more tutorials, check the Annexe part.
Record narration for PowerPoint on Mac Os Step 2 Recording: Make shure that you start on the first slide in PowerPoint to record audio and timings for the entire presentation. To record narrations in PowerPoint, start off by finding the Slide Show tab on PowerPoint's ribbon. Click on either the Record Slide Show. You will see this tab 1. Slide and animation timings : PowerPoint automatically records the time you spend on each slide, including any animation steps that occur, and the use of any triggers on each slide. Narrations, ink and laser pointer : Record your voice as you run through your presentation. If you use the pen, Highlighter, eraser , or laser pointer*, PowerPoint records those for playback as well. *depends of your version 2.
Record narration for PowerPoint Office 2013-2019 on Windows 3. Recording your narration - the Recording toolbar: Once you start recording, PowerPoint will go into a full screen presentation view. It also begins recording audio from your microphone. During the recording use: CTRL+click to access the recording commands. Use your keyboard s right arrow to jump to the next slide and the left arrow to go to the previous slide. When you have finished, click End Show to stop the audio recording. A Save dialog box appears. Click Yes to save your recording or No if you want to record it again. Click Play From Start to preview your recording.
Create a Video for PowerPoint Office on Mac Os 5. Turn your presentation into a video: *supported only by 2011, 2019 and 365 versions ; not by 2016 version After you have recorded any timing and narrations, you are ready to create a video file: For Office Mac*: Click File > Export > *do not use Save as, because it does not offer video options. In the File name box, enter a file name for the video, browse for the folder that will contain this file. Open the File Format list and select MP4. Select the video Quality : Presentation quality or Internet Quality. Check the box near Use Recorded Timings and Narrations. Click Export. In the File name box, enter a file name for the video, browse for the folder that will contain this file and then click Save. Now you have finished, you can send us the video of your presentation. For more tutorials, check the Annexe part.
Microsoft Office Support For Windows : Office 2013 2019 : https://support.office.com/en-us/article/record-a-slide-show-with-narration-and-slide-timings- 0b9502c6-5f6c-40ae-b1e7-e47d8741161c#OfficeVersion=Windows Office 365 : https://support.office.com/en-us/article/record-a-slide-show-with-narration-and-slide-timings- 0b9502c6-5f6c-40ae-b1e7-e47d8741161c For Mac OS : https://support.office.com/en-us/article/record-a-slide-show-with-narration-and-slide-timings-0b9502c6-5f6c-40ae- b1e7-e47d8741161c PowerPoint Help & Learning : https://support.office.com/en-us/powerpoint https://support.office.com/en-us/article/turn-your-presentation-into-a-video-c140551f-cb37-4818-b5d4- 3e30815c3e83#OfficeVersion=Office365 https://support.office.com/en-us/article/Save-a-presentation-as-a-movie-file-or-MP4-4e1ebcc1-f46b-47b6-922a- bac76c4a5691
THANK YOU Technical support department support-eudec@europa-organisation.com Adresse : 19, all es Jean Jaur s | 31 000 Toulouse | France www.europa-group.com


