Tips and Graphics for Enhancing Your CBS PowerPoint Template
Discover valuable tips and engaging graphics to optimize your usage of the CBS PowerPoint template. Explore a range of features including creating new CBS slides, utilizing different slide layouts, incorporating XL text for auditorium presentations, and accessing CBS photo resources. Learn about CBS colors, background grids, and transformation backgrounds to elevate your presentation design.
Download Presentation
Please find below an Image/Link to download the presentation.
The content on the website is provided AS IS for your information and personal use only. It may not be sold, licensed, or shared on other websites without obtaining consent from the author. Download presentation by click this link. If you encounter any issues during the download, it is possible that the publisher has removed the file from their server.

Presentation Transcript
TIPS & GRAPHICS for the CBS PowerPoint template
What is this? This is a presentation with tips and graphics for you to get the best out of the CBS PowerPoint template 2
CBS templates If you are working on a PC, the CBS templates are already in your start menu no need to download them 3
How to create a new CBS slide PC Press the arrow next to New slide to choose from 28 different CBS slides If you press the icon instead, you get the same slide as the one you are currently working on Mac 4
28 different CBS slides There are slides for titles and agendas, content, content XL and chapter pages 5
Content XL: Extra large text These are slides meant for a presentation in an auditorium All the eight Content XL slide layouts have large text (25 pt) This slide uses Text and Picture XL text A 6
Colours These are the CBS colours (PowerPoint automatically creates tints of the theme colours only use them if needed) Please do not use these colours 7
Photos CBS photo database: photo.cbs.dk The database is for CBS employees only You have access to the database if you are on campus or VPN 8
Grid If you need a background grid to place your elements, go to View and select Guides
Transformation background You can download gradient backgrounds in the designguide The gradients come in three diffent colours and six shapes 10
Illustrations Can also be downloaded from design.cbs.dk as .ai-files, png or svg 16
Illustrations Can also be downloaded from design.cbs.dk as .ai-files, png or svg 17
rshjul / Annual wheel Headline Text here Headline Text here Headline Text here 2023 18
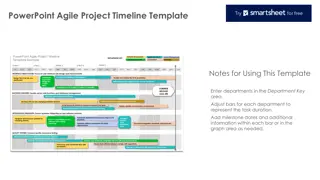
Tidslinje / Timeline September Oktober August Week 33 34 35 36 37 38 39 40 Uge 33 Workshop 1 Text Uge 34 Workshop 2 Text 29/8 Presentation Text 6/9-11/9 Text 19/9 Text Text 26/9 Presentation More text More text More text 4/10 Text More text More text More text More text More text More text 25/9 Presentation More text More text More text Uge 35-37 Text Text
Text Text Text Text Text Text Text here Text here Text here Text Text Text here Text here Text here Text here Text Text here Text here Text here Text here Text Text here Text here Text here Text here Text here 20
World map Copenhagen Business School
Process Week Week Week Week Week Date Detail Date Detail Date Detail Xx Xx Action Date Action Date Action Detail Xx Xx Xx Date Xx Xx Xx Actetur, adipisci velit Lorum ipsum Date/Optional text 22
Pointing boxes How to merge shapes This pointing box consists of a square and a rectangle. The shapes are not merged yet you can transform the rectangle and move the square as you like. Then merge the two shapes. How to merge shapes: Select both shapes Go to Shape Format (top menu) > Merge Shapes > Union Stroke: 0,5 pt. Date/Optional text 23
TIPS & TRICKS YOUR USER GUIDE TEXT STYLES HEADER & FOOTER PICTURES Use the TAB-key to jump through levels. Click ENTER, then TAB to switch from one level to the next level Do this at the very end to apply the changes on all slides On slides with pictureplaceholder, click on the icon and choose Insert Click on Header and Footer in the Insert tab (write the desired text, click date or page number from or to) To go back in levels use SHIFT-TAB Crop picture Alternatively, Increase and Decrease list level can be used 1. Click Crop to change size or focus of the picture Click Apply to All or Apply if only used on one slide 2. If you want to scale the picture, hold SHIFT-key down while dragging the corners of the picture Reset slide GRIDLINES Click the Reset menu to reset position, size and formatting of the slide placeholders to their default settings Click the View tab and set tick mark next to Guides HINT: If you delete the picture and insert a new one, the picture may lie in front of the text or graphic. If this happens, select the picture, right-click and choose Send to Back SLIDES & LAYOUTS HINT: Alt + F9 for quick view of guides Click on the menu New Slide in the Home tab to insert a new slide COPY/PASTE CONTENT Change layout Click on the arrow next to Layout to view a dropdown menu of possible slide layouts When copying old content to your new presentation, 2 options are available: 1. Best practice: Create a slide in your new presentation and copy one piece of content at a time (e.g. copy all text from one textbox) 2. Or copy an entire slide into your new presentation and then choose a fitting layout. Remember to delete the old, wrong layouts (go to View > Slidemaster and delete them)