Pinhole Imaging in NASA's PUNCH Mission

 
Photo: Alan Friedman
 
NASA PUNCH website:
 
/
https://punch.space.swri.edu


1
 
Welcome to Section 4:
 
Explaining and Understanding
How Pinhole Imaging Happens
 
Scan here 
to access all PUNCH Outreach products or visit:
For questions or to request our 1-page monthly newsletter:
Contact 
PUNCHOutreach@gmail.com
 
[
Really
] Understanding
Pinhole Projection of the Sun
 
Follow along with our playful learning adventure!
 
 
2
 
And 
PLEASE
 give us
feedback on these questions
at the link below:
Insights gained?
Remaining questions?
Ideas for improvements?
MARK 3 Version
Final Release for use up to
and including the Annular
Eclipse on 14 Oct 2023
 
Essential viewing:
6-minute “how-to-facilitate” video
[ 
https://punch.space.swri.edu/punch_outreach_pinholeprojector.php
 ]
 
3
 
4
 
Introducing Bhanu
[BAH-noo]
Bhanu means
 “ray of light”
in Sanskrit
 
Bhanu helps guide our way through these Sections. You are in 
Section 4 of 5
.
 
[
Really
] Understanding
Pinhole Projection of the Sun
 
CONTACT:
Dr. Cherilynn Morrow, Outreach Director for the NASA PUNCH mission [cherilynn.morrow@gmail.com]
4. Explaining and Understanding
How Pinhole Imaging Happens
 
5
Bahnu says:  Find the courage to be confused!
Lots of things worthy of our understanding are
worth the discomfort of not understanding
them at first.  Confusion is a sign that you are on
the path to a new insight.  Persevere!
 
Pinhole Projection of the Sun
 
CONTACT:
Dr. Cherilynn Morrow, Outreach Director for the NASA PUNCH mission [cherilynn.morrow@gmail.com]
1
. Projector 
close to surface
.
Triangle, round, and square
shapes of light are sharp.
2. 
Projector 
farther away
from surface
. All three shapes
of light are round and fuzzier.
Case 1
 
6
Case 2
square shape
of light
Smooth flat
projection surface
Image of round Sun
through square  hole
KEY QUESTION: 
Why don’t we see
round images of the Sun when the
projector is held closer to the
projection surface (Case 1), but we
do
 see them when we move it
farther away (Case 2)?
Were you
able to
observe
both
 
Case 1
and Case 2?
 
Pinhole Projection of the Sun
 
From our exploration of how pinhole projection of the
Sun behaves we have collected two 
key questions
:
 
 
7
 
1. Why don’t we see round images of the Sun when the projector
is held closer to the projection surface (Case 1), but we 
do
 see
them when we move it farther away (Case 2)?
 
2. How can small, 
non-round
 holes formed by gaps between
leaves, strands of a straw hat, fingers of our hands, and by our
pinhole projectors create images of the 
round
 Sun?
 
Pinhole Projection of the Sun
 
8
 
If you are not familiar with ray tracing,
OR if you would like to experience our
novel way of preparing learners to
understand ray tracing, please
continue to the next slide.
 
If you are already
familiar with 
ray
tracing
, go to slide 34.
 
Pinhole Projection of the Sun
 
From our exploration of how pinhole projection of the
Sun behaves we have collected two 
key questions
:
 
To address our two questions, we first need to study how light emitted
or reflected from an object interacts with the “pinhole” card to reach a
projection surface.
 
Bhanu will help. Because we should not look directly at the Sun, we will
pretend that Bhanu is the Sun, and our eye is viewing Bhanu from the
perspective of different positions on the projection surface.
 
 
9
 
To safely explore how light reflected from Bhanu
passes through a pinhole to a projection surface,
we view Bhanu through a small, non-round hole.
 
10
 
Bhanu
[BAH-noo]
Bhanu means
 “ray of light”
in Sanskrit
 
NEVER look at the Sun through
the holes in 
a pinhole projector
!
 
To make your own observations find an object like
Bhanu to view that can 
represent
 the Sun
 
An object about a foot (~30 cm) tall works well.
Your object should have different features at
the top and bottom and ideally left and right.
 
11
 
Bhanu
[BAH-noo]
Bhanu means
“ray of light”
in Sanskrit
 
Bhanu is ideal for our exploration.
The bear has a brown head and blue feet
,
plus 
a bow on the left, but not on the right.
 
Then find or create a small hole to use for this activity.
 
You can use a 3 x 5 card or a
section of a cereal box. Cut
a small (~5 mm) square hole
near the center of it.
 
12
 
If you do not have a 3-Hole PUNCH pinhole
projector, then make a card with small hole.
 
If you cannot use or make a card with a hole,
then you can use a small gap in your fingers
 
13
 
Any shape of small hole
works for this activity.
 
Place the object you have selected
a few feet away from you.
 
For an object about a foot (~30 cm) tall, a distance of
4 to 5 feet (1.2 to 1.5 m) away from you works well.
 
14
 
Bhanu
[BAH-noo]
 
Hold the card next to your eye and look
through the hole at your chosen object
 
Make sure you can see 
ALL
 of
your object. If you cannot see
the whole object, then increase
the distance between you and
the object until you can.
 
MZ is using the hole in a
piece of paper to follow
along with this activity.
Your object
represents
the Sun
 
15
To learn how sunlight interacts with a pinhole, we view 
light reflected from your object (Bhanu) 
as if
   
it
were 
light emitted from the Sun
.  Your eye receives light 
as if 
it were a particular location on a
projection surface.
 
Starting with the card close to your eye and seeing
the whole object….
Move the card a bit farther away from your eye
while looking at the object through the hole.
 
Notice that the farther away you hold the card, the
less of the object you see directly through the hole.
 
How far do you have
to move the card from
your eye before you
can no longer see the
whole object?
 
16
 
Card with
hole
 
How much of the object you can see depends on the
distance between your eye and the card with the hole
 
Eye
 
17
 
Card with hole
is 
closer
 to
your eye
 
Card with hole is
farther
 from your eye
 
Projection
surface
 
Projection
surface
 
Card with
hole
 
Eye
 
What happens if we change the viewpoint of our eye?
 
18
 
Card with hole is
farther
 from your eye
 
Head moved
DOWN
 to look
through the hole
 
Card with
hole
 
Card with hole is
farther
 from your eye
 
Eye
 
??
 
??
 
Projection
surface
 
Projection
surface
 
Which part of the
object can you see?
 
19
 
To change the viewpoint of your eye through the hole…
 
??
 
1.
Hold the card steady at a distance where you cannot
see the whole object, but only the middle parts.
2.
Move your head DOWN just a little bit while still
looking at the object through the hole.
 
Which part of the
object can you see?
 
The top of the object
 
When you move your head 
DOWN
 while holding the
card steady, you should be able to see the 
upper
 parts
of the object.
 
20
 
Which part of the
object can you see?
 
21
 
Keeping your card steady, now move your head 
UP
 just
a bit while still looking at the object through the hole.
 
??
 
Which part of the
object can you see?
 
22
 
When you move your head
 UP 
while holding the card
steady, you should be able to see the 
lower
 parts of
the object.
 
The bottom
 
23
 
When the card is farther away from your eye and you
move your head 
UP
, you can see the lower parts of the
object (including Bhanu’s feet) through the hole.
 
Card with
hole
 
Card with hole is
farther
 from your eye
 
Head moved 
UP
to look through
the hole
 
Only light from
Bhanu’s lower parts
can reach the eye
 
Card with hole
 
Card with hole is
farther
 from your eye
 
Eye
 
Eye
 
Projection
surface
 
Card with
hole
 
Eye
 
When the card is farther away from your eye and you
move your head 
DOWN
, you can see the upper parts of
the object (including Bhanu’s head) through the hole.
 
24
 
Card with hole is
farther
 from your eye
 
Head moved
DOWN
 to look
through the hole
 
Only light from
Bhanu’s upper parts
can reach the eye
 
Card with hole
 
Card with hole is
farther
 from your eye
 
Eye
 
Projection
surface
NEVER EVER look at the Sun through the holes!
 
We are using Bhanu
(your object) to represent the Sun. Bhanu is helping us to SAFELY learn
how sunlight passes through the hole to reach the projection surface.
 
25
 
26
 
Seeing your object (Bhanu)
from the different eye positions
 
Smooth flat
projection surface
 
Card with hole
 
Head in middle
 
Head raised up
 
Head lowered down
 
As you look at Bhanu through the hole from the “
middle eye
” viewpoint, your
eye receives light only from the middle parts of Bhanu. T
his part of the projection
surface cannot receive any light rays from Bhanu’s ear (tan lines) or foot (blue
lines) because they are blocked by the card.
 
Every point on your object (Bhanu) reflects light (from sources
in the room) in all directions. This is shown at two points:
1)
the tan lines from Bhanu’s ear and
2)
the blue lines from Bhanu’s foot.
 
27
 
Seeing your object (Bhanu)
from the different eye positions
 
The viewpoint of your eye is like a location on the projection surface.
We want to know: Which parts of the projection surface receive
light from which parts of Bhanu?
 
Smooth flat
projection surface
 
Card with hole
 
Head in middle
 
Head raised up
 
Head lowered down
 
When you looked through the hole at Bhanu from lower and higher
viewpoints you could see that:
 
only light from the upper parts of Bhanu would reach the lower
parts of the projection surface, and
only light from the lower parts of Bhanu would reach the upper
parts of the projection surface.
 
Now return to your card with the hole:
1. Hold the card steady at a distance from your eye where you
cannot
 see all of your object (Bhanu), but just the middle parts.
2. Move your head around to change your direction of viewing the
object through the hole: up, down, left, right, and so on.
 
As you move your head around,
notice that you can receive
reflected light from all parts of the
object, even though you cannot
see the whole object from one
single perspective.
 
28
 
Move head left
 
Don’t see Bhanu’s bow
 
Move head right
 
See Bhanu’s bow
 
Move head up
 
See Bhanu’s feet
 
Move head down
 
See Bhanu’s head
 
Outreach
for the
NASA
PUNCH
mission
 
29
 
To understand pinhole imaging of the Sun, keep the Bhanu
activity in mind. It is important to hold this distinction
between seeing the whole object at once from a single
perspective (
Case 1
) and seeing only parts of the object from
corresponding opposite perspectives (
Case 2
).
 
Pinhole Projection of the Sun
 
Case 2
 
Case 1
 
For safety reasons during the previous activity, your
object (our Bhanu) has 
represented
 the Sun. To advance
our exploration we now turn Bhanu back into the Sun.
 
In the diagrams on the next three slides, Bhanu becomes the Sun.
 
The different viewpoints of your eye while looking at Bhanu
through the hole now return to being locations on a smooth flat
projection surface that receives the Sun’s light through the hole.
 
Sun                                              Bhanu
 
30
 
NEVER look at the Sun
through the holes in the card!
 
Card with hole
 
Card with hole
 
The distance between the card with the hole and the smooth flat
projection surface determines how much of the Sun’s disk would
be visible to the projection surface from a single viewpoint.
 
In CASE 1, 
the projection
surface would receive light
from 
all of the Sun’s disk
from a single viewpoint
 
In CASE 2, 
the projection
surface would receive light
from 
only part of the Sun’s
disk 
from a single viewpoint.
 
Case 1 
is like holding the
card close to your eye
and seeing ALL of the
object at once
 
Case 2 
is like holding the
card farther from your
eye and seeing PART of
the object
 
31
CASE 1 
- closer
CASE 2 
- farther
 
Smooth flat
projection
surface
 
Smooth flat
projection
surface
 
NEVER look at the
Sun through the
holes in the card!
 
In Case 2
, when the card with the hole is farther away from the
projection surface, the 
lower
 part of the projection surface only
receives light from the 
upper
 part of the Sun.
 
Smooth flat
projection
surface
 
Light from the 
upper
 part
of the Sun would only
reach the 
lower
 part of
the projection surface.
 
Card with hole
 
32
 
This is like when you
lowered your head to
see the top of the object
through the hole.
 
NEVER look at the
Sun through the
holes in the card!
 
Card with hole
 
Eye
 
Head moved
DOWN
 to look
through the hole
 
Only light from
Bhanu’s upper parts
can reach the eye
 
Lower part of
projection surface
 
In Case 2
, when the card with the hole is farther away from the
projection surface, the 
upper
 part of the projection surface only
receives light from the 
lower
 part of the Sun.
 
This is like when you
raised your head to see
the bottom of the object
through the hole.
 
NEVER look at the
Sun through the
holes in the card!
 
Card with hole
 
Eye
 
Card with hole
 
Smooth flat
projection
surface
 
Light from the 
lower
 part
of the Sun would only
reach the 
upper
 part of
the projection surface.
 
33
 
Head moved 
UP
to look through
the hole
 
Only light from
Bhanu’s lower parts
can reach the eye
 
Upper part of
projection surface
 
The Sun is VERY far away compared to distances between the projection
surface and the card-with-the-hole.  Thus, it is impossible to make
diagrams (such as those on the next slides) with the proper scale.
 
To make the principles of pinhole projection clear we adjust the size of
the Sun in the diagrams.  This allows us to illustrate how the 
apparent
size of the Sun compares to the size of the hole (as seen from the
projection surface).
 
34
 
Pinhole Projection of the Sun
 
PLEASE NOTE
 
Size
of
hole
 
Apparent size of
Sun relative to
the hole
 
When there is a closer distance
between the card-with-the-hole
and the projection surface, the
Sun appears smaller relative to
the hole.
 
When there is greater distance
between the card-with-the-hole
and the projection surface, the
apparent size of the Sun is larger
relative to the hole.
 
Pinhole Projection of the Sun
 
35
 
If the projection surface is close enough to the card-with-the-hole then
we get shapes of light and no imaging on the projection surface.  
[CASE 1]
 
Size
of
hole
 
Apparent size
of Sun relative
to the hole
 
 
If the projection surface is farther from the card-with-the-hole then we
begin to get the imaging effect where light from particular parts of the
Sun only reaches particular parts of the projection surface. 
[CASE 2]
 
Size
of
hole
 
Apparent size
of Sun relative
to the hole
 
This is like seeing the whole Bhanu
from a single perspective.
 
This is like seeing only part of Bhanu
from a single perspective.
 
Pinhole Projection of the Sun
 
Now we are ready to address our questions
 
36
 
1. Why don’t we see round images of the Sun when the projector
is held closer to the projection surface (Case 1), but we 
do
 see
them when we move it farther away (Case 2)?
 
2. How can small, 
non-round
 holes formed by gaps between
leaves, strands of a straw hat, fingers of our hands, and by our
pinhole projectors create images of the 
round
 Sun?
 
In 
CASE 1
, light from every part of the Sun can pass through every part of the hole.  So, light from
any part of the Sun can reach every part of the projection surface that is directly behind the hole.
Light from everywhere on the Sun fills the hole, making a shape of light on the projection surface
with the same shape as the hole.
 
Smooth flat
projection
surface
 
Card with hole
 
When the Sun’s apparent
size is smaller than the
square hole, we see a
square shape of light on
the projection surface
Sun
 
37
 
Pinhole Projection of the Sun
 
Why don’t we get solar images when the projector is
held closer to the surface?
CASE 1
 
At this closer distance between the
card and projection surface, light from
every part of the Sun’s disk can be
received through every part of the
hole to the projection surface.
CASE 1
 
Card with hole
 
Smooth, flat
projection surface
 
In 
CASE 2
, only light from near the center of the Sun can pass through
the hole to the projection surface. 
Parallel
 rays coming from the outer
parts of the Sun (dashed lines) are blocked by the card.  
BUT…
 
Sun
 
38
 
Pinhole Projection of the Sun
 
How can small, 
non-round
 holes create images of the 
round
 Sun?
CASE 2
 
At this larger distance between the
card and projection surface, only light
from part of the Sun’s disk can pass
directly through the hole to the
projection surface.
 
The Sun’s apparent
size is larger than  the
square hole.
 
Sun
 
Card with hole
 
39
 
Pinhole Projection of the Sun
 
Light from the upper part of the Sun arrives at the bottom part of the projection
surface (
red dashed line
). And light from the lower part of the Sun arrives at the
top part of the projection surface (
green dotted line
).
 
Recall when we pretended Bhanu was the Sun.  You shifted your head up to see the
bottom of Bhanu (
eye at green arrow tip
), and you shifted your head down to see
the top of Bhanu (
eye at red arrow tip
).
 
How can small, 
non-round
 holes create images of the 
round
 Sun?
CASE 2
 
Smooth, flat
projection surface
 
Bhanu was the Sun
so we could learn
how this works.
 
 
The Sun’s apparent
size is larger than  the
square hole.
 
BUT
…light rays coming in at an 
angle
 from the outer parts of the Sun 
can
pass through the hole to reach the projection surface.
 
Sun
 
Card with hole
 
Because the Sun’s disk is round, sunlight from outer parts of the Sun forms a ring of light that
surrounds the central shape of light.  In this case, we start to form a fuzzy, inverted image of
the round Sun through the square hole (or any other shape of hole with comparable size).
 
40
 
Pinhole Projection of the Sun
CASE 2
 
We see a circular
shape of light on the
projection surface
 
Smooth, flat
projection surface
CASE 2
 
Only light from the inner part
of the Sun’s disk can pass
directly through the hole to
the projection surface.
 
Light from outer parts of the
Sun’s disk can only reach the
projection surface at an angle.
 
How can small, 
non-round
 holes create images of the 
round
 Sun?
 
The Sun’s
apparent size is
larger than the
size of hole
Not to Scale
 
IMAGE NOT to SCALE
 
Sun
 
Card with hole
 
We start to see an image of the Sun because there begins to be 
correspondence
 between
light coming from a particular region of the Sun and light received at a particular (opposite)
region of the projection surface (top-to-bottom, left-to-right)
. This correspondence is key to
image formation. The tighter the correspondence, the sharper the inverted image on the
projection surface. In Case 1, there is no such 
correspondence and so no image forms.
 
41
 
Pinhole Projection of the Sun
CASE 2
 
We see a circular
shape of light on the
projection surface
 
Smooth, flat
projection surface
 
How can small, 
non-round
 holes create images of the 
round
 Sun?
 
IMAGE NOT to SCALE
 
Smooth flat
projection surface
 
Card with hole is
closer
 to surface
 
See hole-shaped
light shapes  on
projection surface
 
Sun
 
42
CASE 1
CASE 2
 
Sun
 
The 3 holes each make
a fuzzy round shape of
light on the surface
 
Card with hole is
farther
 from surface
 
Case 1
 
Case 2
 
Pinhole Projection of the Sun
 
How can small, 
non-round
 holes create inverted images of the 
round
 Sun?
 
CASE 1: 
No imaging of the Sun. 
Light from
every part of the Sun can pass through every
part of each of the holes (square, triangle, and
round) to the projection surface.
 
CASE 2:  
Start to form images of the Sun. 
Light
from outside the center of the Sun must pass
through the holes at an angle. This starts to force
a 
correspondence
 between places on the Sun and
places on the projection surface, which is
necessary for images of the Sun to start forming.
 
Projector held farther from
the smooth, flat projection
surface => fuzzy, inverted
images of the round Sun.
 
Smooth flat
projection surface
 
Projector held closer to the
smooth, flat projection surface
=> see hole shapes of light.
 
Sun
 
Card with square hole
 
Q: Why do we see an 
inverted
 image when light from an object is
projected through a pinhole onto a surface?
 
A: Because light from the Sun passes through the hole and arrives at the
opposite
 side of the projection surface, top-to-bottom AND right-to-left.
[Note the little sunspot]
 
43
 
Pinhole Projection of the Sun
CASE 2
 
We see a circular
shape of light on the
projection surface
 
Smooth, flat
projection surface
 
Pinhole Images seen on the projection surface are
“inverted” both top-to-bottom and left-to-right.
 
IMAGE NOT to SCALE
 
Our pinhole projector is based on the same principles as the  famous “camera obscura” effect.
 The image in the darkened space is inverted both top-to-bottom AND left-to-right.
 
Also see:  
https://en.wikipedia.org/wiki/Camera_obscura
 
44
1. Use the blue lines to find the top & bottom of
the statue in both the real scene and the projected
image on the board in the darkened area.
Can you also use the yellow line to find the head
of the person in both the real scene and the
2. Use the yellow line to find the head of the
person in both the real scene and the projected
image on the board in the darkened area.
3. By noting the position of the seated man in both the real scene and the projected
image, can you see that the image is inverted 
both
 top-to-bottom AND left-to-right?
 
 
How 
are 
Pinhole Images of Eclipses Inverted?
 
45
 
View through
solar protection
glasses
 
    See Section 5: 
APPENDIX A
Discovering How Pinhole Images of Eclipses are Inverted
An 
indoor demo 
using the 3-Hole PUNCH Pinhole Projector
with an F-shaped light source [
Super neat! Don’t miss it!]
A 3-slide 
demo
 using images from the 2017 solar eclipse
A 
6
-slide 
interactive inquiry
 
using images from the 2012
Annular Eclipse seen from Pueblo Bonito, Chaco Canyon, NM
 
Pinhole images
through gaps at
elbows
 
See how these contemporaneous images of the eclipsed 
Sun
are the same but inverted left-to-right and top-to-bottom
 
 
Why are our Projector Images Fuzzy?
Why Aren’t They in Focus?
 
46


See Section 5: APPENDIX B
W
h
a
t
 
D
o
e
s
 
i
t
 
M
e
a
n
 
t
o
 
b
e
 
i
n
 
F
o
c
u
s
?
 
Outreach
for the
NASA
PUNCH
mission
 
 
THANK YOU!
 
Thank you for your curiosity about pinhole projection!
We hope you’ve gained some enjoyable insights and will continue to explore!
 
PLEASE SEE 
ADDITIONAL INFO On the Next Slides (Section 5)
 
47
 
Pinhole Images of the Sun are Everywhere.
Keep an eye out every sunny day!
 
Bhanu
 
48
A
D
D
I
T
I
O
N
A
L
 
I
N
F
O
R
M
A
T
I
O
N


Link for Feedback
Valuable References
Credits & Acknowledgements
Links to PUNCH & PUNCH Outreach Products
 
CONTACT:
Dr. Cherilynn Morrow, Outreach Director for the NASA PUNCH mission [cherilynn.morrow@gmail.com]
 
[
Really
] Understanding
Pinhole Projection of the Sun
 
Follow along with our playful learning adventure!
 
​https://tinyurl.com/PinholeFeedback
 
49
 
And 
PLEASE
 give us
feedback on these questions
at the link below:
Insights gained?
Remaining questions?
Ideas for improvements?
MARK 3 Version
Final Release for use up to
and including the Annular
Eclipse on 14 Oct 2023
 
50
 
Valuable References
 
1.
Lenses and Pinholes: What Does “In Focus” Mean?
A brief and clear explanation about what it means to be “in focus”:
 
https://www.physicsforums.com/insights/lenses-pinholes-focus-mean/
2.  How a Pinhole Camera Works (Part 1)
Excellent diagrams:
 https://www.scratchapixel.com/lessons/3d-basic-rendering/3d-viewing-pinhole-camera
3.  Real image: Collection of focus points made by converging light rays
We love the simple but insightful stick-figure:
 
https://www.wikiwand.com/en/Real_image
4.  Your Eyes See Upside Down and Reversed
Lucid explanation by an eye doctor (MD) relating human eye to a pinhole camera:
https://bceye.com/retinal-image-inverted-reversed/
5.  Camera Obscura
The history of this wondrous effect, including reference to a possible paleo-camera:
 
https://en.wikipedia.org/wiki/Camera_obscura
    
http://paleo-camera.com/archeo-optics/
6.  Making, Measuring and Testing the “Optimal” Pinhole
A thorough and playful journey through the technical details of pinhole photography:
https://www.35mmc.com/26/10/2020/making-measuring-and-testing-the-optimal-pinhole-pinhole-
adventures-part-3-by-sroyon/
 
51
 
Credits & Acknowledgements
 
Primary Authors of the Explanatory Presentations:
Cherilynn Morrow, Robert Bigelow, and Mike Zawaski
cherilynn.morrow@gmail.com
 , 
arca965@gmail.com
, and 
mjzawaski@gmail.com
 
Thank you also to our web developer Don Kolinski for posting and updating our work on the PUNCH website.
 
Research & Development Team for the 
3-Hole PUNCH Pinhole Projector
Cherilynn Morrow 
(editor-in-chief, concept development, field testing, photos)
Robert Bigelow 
(concept development, technical specifications, text reviewer, photos)
Briana Ingermann 
(graphic design, text developer, field testing, procurement of printing, photos)
Mike Zawaski 
(reviewer/consultant on explanatory presentation, graphic support, photos)
 
Sanlyn Buxner 
(head of field testing and evaluation, photos)
Jason Trump, Nina Byers, Geoff Skelton 
(text reviewer, field testing, reviewer of explanatory presentations)
Marisa Bevington & Marialis Rosario Franco 
(text reviewers, Spanish language translation)
GB Cornucopia, Bobbye Middendorf, Jeremy Osowski, Stacy Wolff 
(text reviewers, field testers, photo collaborators)
 
Craig DeForest 
(PUNCH PI, product review and approval, field tester)
Sarah Gibson 
(PUNCH Project Scientist, product review and approval)
Nicki Viall 
(PUNCH Mission Scientist, field tester, product review and approval)
Ronnie Killough 
(PUNCH Program Manager, field tester)
Gilly Gilbert 
(PUNCH Associate Investigator, field tester)
Countless others 
(who participated in field testing events and gave us their feedback)
 
 
52


A
.
 
 
D
i
s
c
o
v
e
r
i
n
g
 
H
o
w
 
P
i
n
h
o
l
e
 
I
m
a
g
e
s
 
o
f
 
E
c
l
i
p
s
e
s
 
a
r
e
 
I
n
v
e
r
t
e
d
       Using images from the 2017 and 2012 Eclipses
 
 
E
.
 
 
A
 
S
h
o
r
t
l
i
s
t
 
o
f
 
O
u
r
 
F
a
v
o
r
i
t
e
 
P
i
n
h
o
l
e
-
R
e
l
a
t
e
d
 
R
e
s
o
u
r
c
e
s
 
B
.
 
 
W
h
y
 
a
r
e
 
t
h
e
 
3
-
H
o
l
e
 
P
U
N
C
H
 
P
i
n
h
o
l
e
 
P
r
o
j
e
c
t
o
r
 
I
m
a
g
e
s
 
F
u
z
z
y
?
        What does it mean to be in focus?
 
C
.
 
 
W
h
a
t
 
i
s
 
t
h
e
 
D
i
f
f
e
r
e
n
c
e
 
B
e
t
w
e
e
n
 
a
 
P
i
n
h
o
l
e
 
a
n
d
 
a
 
L
e
n
s
?
        Finding new appreciation for what the lens of an eye or a camera is doing
 
D
.
 
 
W
h
y
 
D
o
e
s
n
t
 
O
u
r
 
P
i
n
h
o
l
e
 
P
r
o
j
e
c
t
o
r
 
H
a
v
e
 
P
i
n
-
S
i
z
e
d
 
H
o
l
e
s
?
        Includes: DESIGN TRADE-OFFs for our Pinhole Projector
5
.
 
A
P
P
E
N
D
I
C
E
S
 
Photo: Alan Friedman
 
NASA PUNCH website:
https://punch.space.swri.edu
 
/


53
 
Please proceed to Section 5:
 
Appendices A-E
more insights and fun resources
 
Scan here 
to access all PUNCH Outreach products or visit:
https://punch.space.swri.edu/punch_outreach_products.php
For questions or to request our 1-page monthly newsletter:
Contact 
PUNCHOutreach@gmail.com
Slide Note
Embed
Share

Delve into the world of pinhole imaging with NASA's PUNCH mission. Explore how small, lens-less holes create images of the Sun and discover the fascinating process behind pinhole projection. Follow along a playful learning adventure with Bhanu guiding you through sections explaining pinhole imaging techniques. Get hands-on experience with the 3-Hole PUNCH Pinhole Projector and gain insights into observing pinhole images both indoors and outdoors. Embrace confusion as a stepping stone to new insights and understanding. Contact Dr. Cherilynn Morrow for more details.

  • Pinhole Imaging
  • NASA PUNCH
  • Outreach
  • Sun Projection
  • Learning

Uploaded on Apr 02, 2024 | 1 Views


Download Presentation

Please find below an Image/Link to download the presentation.

The content on the website is provided AS IS for your information and personal use only. It may not be sold, licensed, or shared on other websites without obtaining consent from the author.If you encounter any issues during the download, it is possible that the publisher has removed the file from their server.

You are allowed to download the files provided on this website for personal or commercial use, subject to the condition that they are used lawfully. All files are the property of their respective owners.

The content on the website is provided AS IS for your information and personal use only. It may not be sold, licensed, or shared on other websites without obtaining consent from the author.

E N D

Presentation Transcript


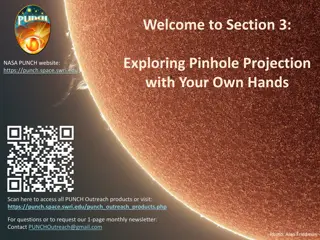
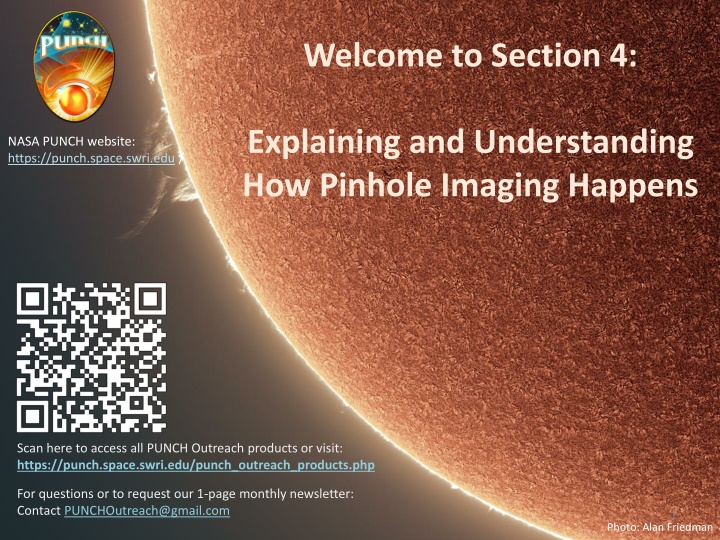
  1. Welcome to Section 4: Explaining and Understanding How Pinhole Imaging Happens NASA PUNCH website: https://punch.space.swri.edu / Scan here to access all PUNCH Outreach products or visit: https://punch.space.swri.edu/punch_outreach_products.php For questions or to request our 1-page monthly newsletter: Contact PUNCHOutreach@gmail.com 1 Photo: Alan Friedman

  2. [Really] Understanding Pinhole Projection of the Sun Follow along with our playful learning adventure! Outreach for the NASA PUNCH mission And PLEASE give us feedback on these questions at the link below: Insights gained? Remaining questions? Ideas for improvements? https://tinyurl.com/PinholeFeedback MARK 3 Version Final Release for use up to and including the Annular Eclipse on 14 Oct 2023 FRONT BACK 2

  3. Essential viewing: 6-minute how-to-facilitate video [ https://punch.space.swri.edu/punch_outreach_pinholeprojector.php ] Outreach for the NASA PUNCH mission 3

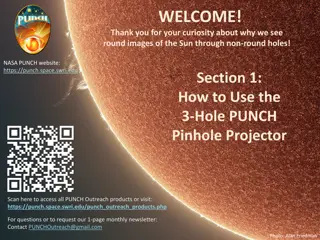
  4. [Really] Understanding Pinhole Projection of the Sun Introducing Bhanu [BAH-noo] Bhanu means ray of light in Sanskrit Outreach for the NASA PUNCH mission Bhanu helps guide our way through these Sections. You are in Section 4 of 5. Section Title of Section Description of Section introduces the 3-Hole PUNCH Pinhole Projector, demonstrates how to use it both outdoors and indoors, and describes its differences from a pinhole camera/viewer. How to Use the 3-Hole PUNCH Pinhole Projector 1 Observing Pinhole Images of the Sun in Our Everyday Environments teaches you how to observe the phenomenon of pinhole images of the Sun in our everyday world, both indoors and outdoors. 2 Exploring Pinhole Projection Using Your Own Hands invites you to explore the behavior of pinhole projection by experimenting with your own hands (try both palms up!) 3 guides your quest for explanations and deeper understanding of how pinhole imaging happens. After this, you will really understand why small, lens-less holes can create images. Explaining and Understanding How Pinhole Imaging Happens 4 APPENDICES A-E: More Insights & Fun Resources offers more insights & resources (e.g., explaining the relationship between pinhole images and the view through eclipse glasses) 5 CONTACT: Dr. Cherilynn Morrow, Outreach Director for the NASA PUNCH mission [cherilynn.morrow@gmail.com] 4

  5. Pinhole Projection of the Sun Outreach for the NASA PUNCH mission 4. Explaining and Understanding How Pinhole Imaging Happens Bahnu says: Find the courage to be confused! Lots of things worthy of our understanding are worth the discomfort of not understanding them at first. Confusion is a sign that you are on the path to a new insight. Persevere! 5 CONTACT: Dr. Cherilynn Morrow, Outreach Director for the NASA PUNCH mission [cherilynn.morrow@gmail.com]

  6. 1. Projector close to surface. Triangle, round, and square shapes of light are sharp. 2. Projector farther away from surface. All three shapes of light are round and fuzzier. Smooth flat projection surface Case 2 Case 1 Outreach for the NASA PUNCH mission Were you able to observe bothCase 1 and Case 2? Image of round Sun through square hole Sunlight comes from this direction and passes thru the holes square shape of light KEY QUESTION: Why don t we see round images of the Sun when the projector is held closer to the projection surface (Case 1), but we do see them when we move it farther away (Case 2)? JO is observing in the morning in Dec 6

  7. Pinhole Projection of the Sun From our exploration of how pinhole projection of the Sun behaves we have collected two key questions: Outreach for the NASA PUNCH mission 1. Why don t we see round images of the Sun when the projector is held closer to the projection surface (Case 1), but we do see them when we move it farther away (Case 2)? 2. How can small, non-round holes formed by gaps between leaves, strands of a straw hat, fingers of our hands, and by our pinhole projectors create images of the round Sun? 7

  8. Pinhole Projection of the Sun If you are not familiar with ray tracing, OR if you would like to experience our novel way of preparing learners to understand ray tracing, please continue to the next slide. Outreach for the NASA PUNCH mission If you are already familiar with ray tracing, go to slide 34. 8

  9. Pinhole Projection of the Sun From our exploration of how pinhole projection of the Sun behaves we have collected two key questions: Outreach for the NASA PUNCH mission To address our two questions, we first need to study how light emitted or reflected from an object interacts with the pinhole card to reach a projection surface. Bhanu will help. Because we should not look directly at the Sun, we will pretend that Bhanu is the Sun, and our eye is viewing Bhanu from the perspective of different positions on the projection surface. Sun Bhanu 9

  10. To safely explore how light reflected from Bhanu passes through a pinhole to a projection surface, we view Bhanu through a small, non-round hole. Outreach for the NASA PUNCH mission Bhanu [BAH-noo] Bhanu means ray of light in Sanskrit NEVER look at the Sun through the holes in a pinhole projector! 10

  11. To make your own observations find an object like Bhanu to view that can represent the Sun An object about a foot (~30 cm) tall works well. Your object should have different features at the top and bottom and ideally left and right. Outreach for the NASA PUNCH mission Sun Your object (our Bhanu) Bhanu [BAH-noo] Bhanu means ray of light in Sanskrit Bhanu is ideal for our exploration. The bear has a brown head and blue feet, plus a bow on the left, but not on the right. 11

  12. Then find or create a small hole to use for this activity. If you do not have a 3-Hole PUNCH pinhole projector, then make a card with small hole. Outreach for the NASA PUNCH mission You can use a 3 x 5 card or a section of a cereal box. Cut a small (~5 mm) square hole near the center of it. BACK 12

  13. If you cannot use or make a card with a hole, then you can use a small gap in your fingers Outreach for the NASA PUNCH mission Any shape of small hole works for this activity. 13

  14. Place the object you have selected a few feet away from you. Outreach for the NASA PUNCH mission Bhanu [BAH-noo] For an object about a foot (~30 cm) tall, a distance of 4 to 5 feet (1.2 to 1.5 m) away from you works well. 14

  15. Hold the card next to your eye and look through the hole at your chosen object Make sure you can see ALL of your object. If you cannot see the whole object, then increase the distance between you and the object until you can. Outreach for the NASA PUNCH mission MZ is using the hole in a piece of paper to follow along with this activity. Eye Your object represents the Sun Card with hole Projection surface To learn how sunlight interacts with a pinhole, we view light reflected from your object (Bhanu) as if it were light emitted from the Sun. Your eye receives light as if it were a particular location on a projection surface. 15

  16. Starting with the card close to your eye and seeing the whole object . Move the card a bit farther away from your eye while looking at the object through the hole. Outreach for the NASA PUNCH mission How far do you have to move the card from your eye before you can no longer see the whole object? Notice that the farther away you hold the card, the less of the object you see directly through the hole. 16

  17. How much of the object you can see depends on the distance between your eye and the card with the hole Card with hole is closer to your eye Eye Projection surface Card with hole Card with hole is farther from your eye Eye Projection surface Card with hole 17

  18. What happens if we change the viewpoint of our eye? Card with hole is farther from your eye Eye Projection surface Card with hole Head moved DOWN to look through the hole Card with hole is farther from your eye ?? ?? Eye Card with hole Projection surface 18

  19. To change the viewpoint of your eye through the hole 1. Hold the card steady at a distance where you cannot see the whole object, but only the middle parts. 2. Move your head DOWN just a little bit while still looking at the object through the hole. Outreach for the NASA PUNCH mission Which part of the object can you see? ?? 19

  20. When you move your head DOWN while holding the card steady, you should be able to see the upper parts of the object. Outreach for the NASA PUNCH mission Which part of the object can you see? The top of the object 20

  21. Keeping your card steady, now move your head UP just a bit while still looking at the object through the hole. Outreach for the NASA PUNCH mission Which part of the object can you see? ?? 21

  22. When you move your head UP while holding the card steady, you should be able to see the lower parts of the object. Outreach for the NASA PUNCH mission Which part of the object can you see? The bottom 22

  23. When the card is farther away from your eye and you move your head UP, you can see the lower parts of the object (including Bhanu s feet) through the hole. Card with hole is farther from your eye Eye Card with hole Head moved UP to look through the hole Card with hole is farther from your eye Eye Only light from Bhanu s lower parts can reach the eye Card with hole Projection surface 23

  24. When the card is farther away from your eye and you move your head DOWN, you can see the upper parts of the object (including Bhanu s head) through the hole. Card with hole is farther from your eye Eye Card with hole Head moved DOWN to look through the hole Card with hole is farther from your eye Eye Only light from Bhanu s upper parts can reach the eye Projection surface Card with hole 24

  25. NEVER EVER look at the Sun through the holes! We are using Bhanu (your object) to represent the Sun. Bhanu is helping us to SAFELY learn how sunlight passes through the hole to reach the projection surface. Outreach for the NASA PUNCH mission Your object represents the Sun Smooth flat projection surface JO is holding the 3-Hole PUNCH Pinhole Projector The position of our eye as we look at Bhanu is like a place on this surface. We want to know: Which parts of the projection surface receive light which parts of Bhanu? projection from 25 NEVER EVER look at the Sun through the holes!

  26. Seeing your object (Bhanu) from the different eye positions Every point on your object (Bhanu) reflects light (from sources in the room) in all directions. This is shown at two points: 1) the tan lines from Bhanu s ear and 2) the blue lines from Bhanu s foot. Smooth flat projection surface Card with hole Head raised up Head in middle Head lowered down As you look at Bhanu through the hole from the middle eye viewpoint, your eye receives light only from the middle parts of Bhanu. This part of the projection surface cannot receive any light rays from Bhanu s ear (tan lines) or foot (blue lines) because they are blocked by the card. 26

  27. Seeing your object (Bhanu) from the different eye positions The viewpoint of your eye is like a location on the projection surface. We want to know: Which parts of the projection surface receive light from which parts of Bhanu? Smooth flat projection surface Card with hole Head raised up Head in middle Head lowered down When you looked through the hole at Bhanu from lower and higher viewpoints you could see that: only light from the upper parts of Bhanu would reach the lower parts of the projection surface, and only light from the lower parts of Bhanu would reach the upper parts of the projection surface. 27

  28. Now return to your card with the hole: 1. Hold the card steady at a distance from your eye where you cannot see all of your object (Bhanu), but just the middle parts. 2. Move your head around to change your direction of viewing the object through the hole: up, down, left, right, and so on. Outreach for the NASA PUNCH mission Move head up See Bhanu s feet Move head right Move head left Don t see Bhanu s bow See Bhanu s bow Move head down As you move your head around, notice that you can receive reflected light from all parts of the object, even though you cannot see the whole object from one single perspective. See Bhanu s head 28

  29. Pinhole Projection of the Sun To understand pinhole imaging of the Sun, keep the Bhanu activity in mind. It is important to hold this distinction between seeing the whole object at once from a single perspective (Case 1) and seeing only parts of the object from corresponding opposite perspectives (Case 2). Outreach for the NASA PUNCH mission Case 2 Case 1 29

  30. For safety reasons during the previous activity, your object (our Bhanu) has represented the Sun. To advance our exploration we now turn Bhanu back into the Sun. Outreach for the NASA PUNCH mission In the diagrams on the next three slides, Bhanu becomes the Sun. Sun Bhanu The different viewpoints of your eye while looking at Bhanu through the hole now return to being locations on a smooth flat projection surface that receives the Sun s light through the hole. NEVER look at the Sun through the holes in the card! 30

  31. The distance between the card with the hole and the smooth flat projection surface determines how much of the Sun s disk would be visible to the projection surface from a single viewpoint. Smooth flat projection surface NEVER look at the Sun through the holes in the card! CASE 1 - closer In CASE 1, the projection surface would receive light from all of the Sun s disk from a single viewpoint Case 1 is like holding the card close to your eye and seeing ALL of the object at once Card with hole Smooth flat projection surface CASE 2 - farther In CASE 2, the projection surface would receive light from only part of the Sun s disk from a single viewpoint. Case 2 is like holding the card farther from your eye and seeing PART of the object Card with hole 31

  32. In Case 2, when the card with the hole is farther away from the projection surface, the lower part of the projection surface only receives light from the upper part of the Sun. Smooth flat projection surface NEVER look at the Sun through the holes in the card! Light from the upper part of the Sun would only reach the lower part of the projection surface. Lower part of projection surface Card with hole This is like when you lowered your head to see the top of the object through the hole. Eye Only light from Bhanu s upper parts can reach the eye Head moved DOWN to look through the hole Card with hole 32

  33. In Case 2, when the card with the hole is farther away from the projection surface, the upper part of the projection surface only receives light from the lower part of the Sun. Smooth flat projection surface NEVER look at the Sun through the holes in the card! Upper part of projection surface Light from the lower part of the Sun would only reach the upper part of the projection surface. Card with hole This is like when you raised your head to see the bottom of the object through the hole. Head moved UP to look through the hole Eye Only light from Bhanu s lower parts can reach the eye 33 Card with hole

  34. Pinhole Projection of the Sun PLEASE NOTE The Sun is VERY far away compared to distances between the projection surface and the card-with-the-hole. Thus, it is impossible to make diagrams (such as those on the next slides) with the proper scale. To make the principles of pinhole projection clear we adjust the size of the Sun in the diagrams. This allows us to illustrate how the apparent size of the Sun compares to the size of the hole (as seen from the projection surface). Size of hole Apparent size of Sun relative to the hole When there is a closer distance between the card-with-the-hole and the projection surface, the Sun appears smaller relative to the hole. When there is greater distance between the card-with-the-hole and the projection surface, the apparent size of the Sun is larger relative to the hole. 34

  35. Pinhole Projection of the Sun If the projection surface is close enough to the card-with-the-hole then we get shapes of light and no imaging on the projection surface. [CASE 1] Size of hole Apparent size of Sun relative to the hole This is like seeing the whole Bhanu from a single perspective. If the projection surface is farther from the card-with-the-hole then we begin to get the imaging effect where light from particular parts of the Sun only reaches particular parts of the projection surface. [CASE 2] Size of hole Apparent size of Sun relative to the hole This is like seeing only part of Bhanu from a single perspective. 35

  36. Pinhole Projection of the Sun Now we are ready to address our questions 1. Why don t we see round images of the Sun when the projector is held closer to the projection surface (Case 1), but we do see them when we move it farther away (Case 2)? 2. How can small, non-round holes formed by gaps between leaves, strands of a straw hat, fingers of our hands, and by our pinhole projectors create images of the round Sun? 36

  37. Pinhole Projection of the Sun Why don t we get solar images when the projector is held closer to the surface? CASE 1 Smooth flat projection surface At this closer distance between the card and projection surface, light from every part of the Sun s disk can be received through every part of the hole to the projection surface. Card with hole CASE 1 When the Sun s apparent size is smaller than the square hole, we see a square shape of light on the projection surface Sun Apparent size of Sun relative to the hole Size of hole In CASE 1, light from every part of the Sun can pass through every part of the hole. So, light from any part of the Sun can reach every part of the projection surface that is directly behind the hole. Light from everywhere on the Sun fills the hole, making a shape of light on the projection surface with the same shape as the hole. 37

  38. Pinhole Projection of the Sun How can small, non-round holes create images of the round Sun? CASE 2 At this larger distance between the card and projection surface, only light from part of the Sun s disk can pass directly through the hole to the projection surface. Smooth, flat projection surface Card with hole The Sun s apparent size is larger than the square hole. Sun Size of hole Apparent size of Sun relative to the hole In CASE 2, only light from near the center of the Sun can pass through the hole to the projection surface. Parallel rays coming from the outer parts of the Sun (dashed lines) are blocked by the card. BUT 38

  39. Pinhole Projection of the Sun How can small, non-round holes create images of the round Sun? BUT light rays coming in at an angle from the outer parts of the Sun can pass through the hole to reach the projection surface. Smooth, flat projection surface Card with hole CASE 2 The Sun s apparent size is larger than the square hole. Sun Bhanu was the Sun so we could learn how this works. Light from the upper part of the Sun arrives at the bottom part of the projection surface (red dashed line). And light from the lower part of the Sun arrives at the top part of the projection surface (green dotted line). Recall when we pretended Bhanu was the Sun. You shifted your head up to see the bottom of Bhanu (eye at green arrow tip), and you shifted your head down to see the top of Bhanu (eye at red arrow tip). 39

  40. Pinhole Projection of the Sun How can small, non-round holes create images of the round Sun? CASE 2 Smooth, flat projection surface Only light from the inner part of the Sun s disk can pass directly through the hole to the projection surface. Card with hole CASE 2 We see a circular shape of light on the projection surface Sun IMAGE NOT to SCALE Light from outer parts of the Sun s disk can only reach the projection surface at an angle. The Sun s apparent size is larger than the size of hole Not to Scale Because the Sun s disk is round, sunlight from outer parts of the Sun forms a ring of light that surrounds the central shape of light. In this case, we start to form a fuzzy, inverted image of the round Sun through the square hole (or any other shape of hole with comparable size). 40

  41. Pinhole Projection of the Sun How can small, non-round holes create images of the round Sun? CASE 2 Card with hole We see a circular shape of light on the projection surface Sun IMAGE NOT to SCALE Smooth, flat projection surface We start to see an image of the Sun because there begins to be correspondence between light coming from a particular region of the Sun and light received at a particular (opposite) region of the projection surface (top-to-bottom, left-to-right). This correspondence is key to image formation. The tighter the correspondence, the sharper the inverted image on the projection surface. In Case 1, there is no such correspondence and so no image forms. 41

  42. Pinhole Projection of the Sun How can small, non-round holes create inverted images of the round Sun? CASE 1: No imaging of the Sun. Light from every part of the Sun can pass through every part of each of the holes (square, triangle, and round) to the projection surface. Case 1 See hole-shaped light shapes on projection surface Sun CASE 1 Projector held closer to the smooth, flat projection surface => see hole shapes of light. Smooth flat projection surface Card with hole is closer to surface CASE 2: Start to form images of the Sun. Light from outside the center of the Sun must pass through the holes at an angle. This starts to force a correspondence between places on the Sun and places on the projection surface, which is necessary for images of the Sun to start forming. Case 2 The 3 holes each make a fuzzy round shape of light on the surface Sun CASE 2 Projector held farther from the smooth, flat projection surface => fuzzy, inverted images of the round Sun. Card with hole is farther from surface Smooth flat projection surface 42

  43. Pinhole Projection of the Sun Pinhole Images seen on the projection surface are inverted both top-to-bottom and left-to-right. CASE 2 Card with square hole We see a circular shape of light on the projection surface Sun IMAGE NOT to SCALE Smooth, flat projection surface Q: Why do we see an inverted image when light from an object is projected through a pinhole onto a surface? A: Because light from the Sun passes through the hole and arrives at the opposite side of the projection surface, top-to-bottom AND right-to-left. [Note the little sunspot] 43

  44. Our pinhole projector is based on the same principles as the famous camera obscura effect. The image in the darkened space is inverted both top-to-bottom AND left-to-right. 2. Use the yellow line to find the head of the 1. Use the blue lines to find the top & bottom of the statue in both the real scene and the projected image on the board in the darkened area. Can you also use the yellow line to find the head of the person in both the real scene and the person in both the real scene and the projected image on the board in the darkened area. 3. By noting the position of the seated man in both the real scene and the projected image, can you see that the image is inverted both top-to-bottom AND left-to-right? 44 Also see: https://en.wikipedia.org/wiki/Camera_obscura

  45. How are Pinhole Images of Eclipses Inverted? See Section 5: APPENDIX A Discovering How Pinhole Images of Eclipses are Inverted An indoor demo using the 3-Hole PUNCH Pinhole Projector with an F-shaped light source [Super neat! Don t miss it!] Outreach for the NASA PUNCH mission A 3-slide demo using images from the 2017 solar eclipse A 6-slide interactive inquiry using images from the 2012 Annular Eclipse seen from Pueblo Bonito, Chaco Canyon, NM Pinhole images through gaps at elbows View through solar protection glasses See how these contemporaneous images of the eclipsed Sun are the same but inverted left-to-right and top-to-bottom 45

  46. Why are our Projector Images Fuzzy? Why Aren t They in Focus? Outreach for the NASA PUNCH mission See Section 5: APPENDIX B What Does it Mean to be in Focus? ? 46

  47. THANK YOU! Thank you for your curiosity about pinhole projection! We hope you ve gained some enjoyable insights and will continue to explore! Outreach for the NASA PUNCH mission PLEASE SEE ADDITIONAL INFO On the Next Slides (Section 5) Pinhole Images of the Sun are Everywhere. Keep an eye out every sunny day! 47 Bhanu

  48. ADDITIONAL INFORMATION ADDITIONAL INFORMATION Outreach for the NASA PUNCH mission Link for Feedback Valuable References Credits & Acknowledgements Links to PUNCH & PUNCH Outreach Products 48 CONTACT: Dr. Cherilynn Morrow, Outreach Director for the NASA PUNCH mission [cherilynn.morrow@gmail.com]

  49. [Really] Understanding Pinhole Projection of the Sun Follow along with our playful learning adventure! Outreach for the NASA PUNCH mission And PLEASE give us feedback on these questions at the link below: Insights gained? Remaining questions? Ideas for improvements? https://tinyurl.com/PinholeFeedback MARK 3 Version Final Release for use up to and including the Annular Eclipse on 14 Oct 2023 FRONT BACK 49

  50. Valuable References 1. Lenses and Pinholes: What Does In Focus Mean? A brief and clear explanation about what it means to be in focus : https://www.physicsforums.com/insights/lenses-pinholes-focus-mean/ 2. How a Pinhole Camera Works (Part 1) Excellent diagrams: https://www.scratchapixel.com/lessons/3d-basic-rendering/3d-viewing-pinhole-camera 3. Real image: Collection of focus points made by converging light rays We love the simple but insightful stick-figure: https://www.wikiwand.com/en/Real_image 4. Your Eyes See Upside Down and Reversed Lucid explanation by an eye doctor (MD) relating human eye to a pinhole camera: https://bceye.com/retinal-image-inverted-reversed/ 5. Camera Obscura The history of this wondrous effect, including reference to a possible paleo-camera: https://en.wikipedia.org/wiki/Camera_obscura http://paleo-camera.com/archeo-optics/ 6. Making, Measuring and Testing the Optimal Pinhole A thorough and playful journey through the technical details of pinhole photography: https://www.35mmc.com/26/10/2020/making-measuring-and-testing-the-optimal-pinhole-pinhole- adventures-part-3-by-sroyon/ 50

More Related Content

giItT1WQy@!-/#giItT1WQy@!-/#giItT1WQy@!-/#giItT1WQy@!-/#giItT1WQy@!-/#giItT1WQy@!-/#giItT1WQy@!-/#giItT1WQy@!-/#giItT1WQy@!-/#